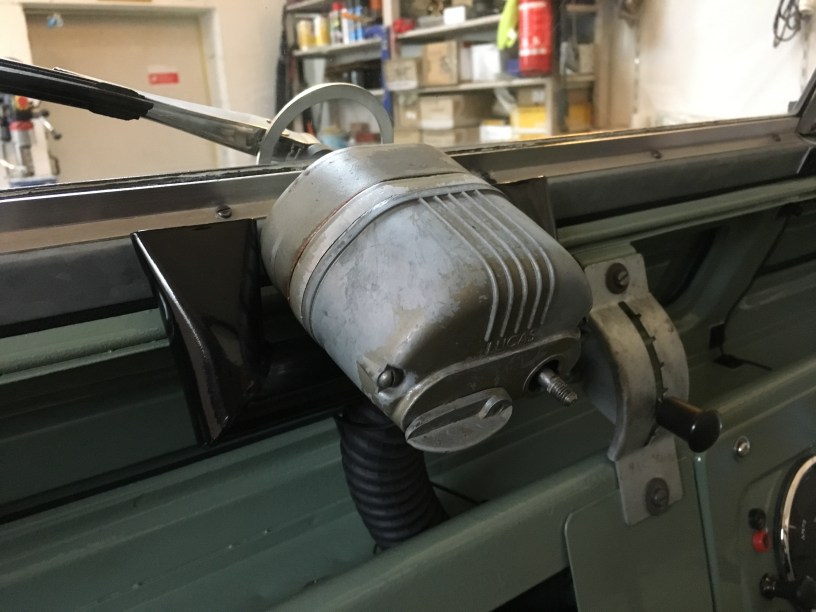
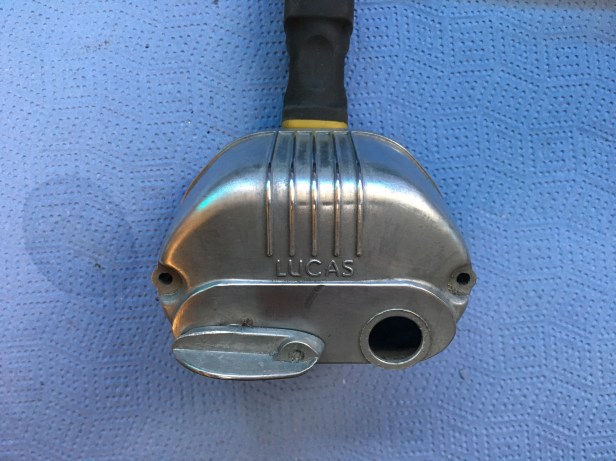
There are 2 independent wiper motors on the Series 1,2 and early 2a Land Rovers, both operated separately. In fact, the passenger side wiper was offered as an optional extra!
When I tested the wiper motors on the bench some time ago, they worked…. at the least the motor made a noise and shaft turned. But once i’d fitted them to the bulkhead, installed the wiper arms and wired everything up…. the wipers wouldn’t “wipe” but the motor still worked. After some faffing, I decided the best plan would be remove them from the vehicle, strip them down and have look what may be wrong inside.
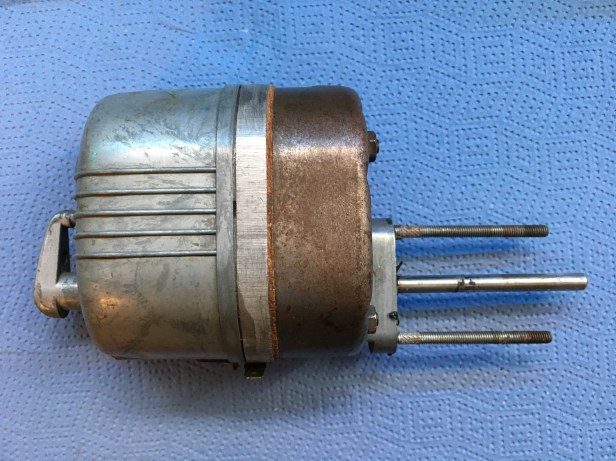
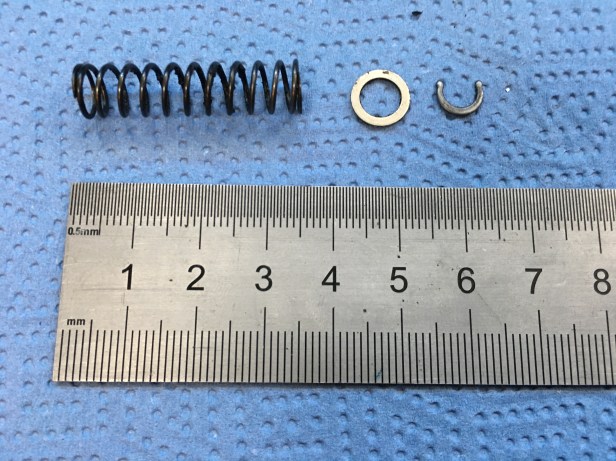
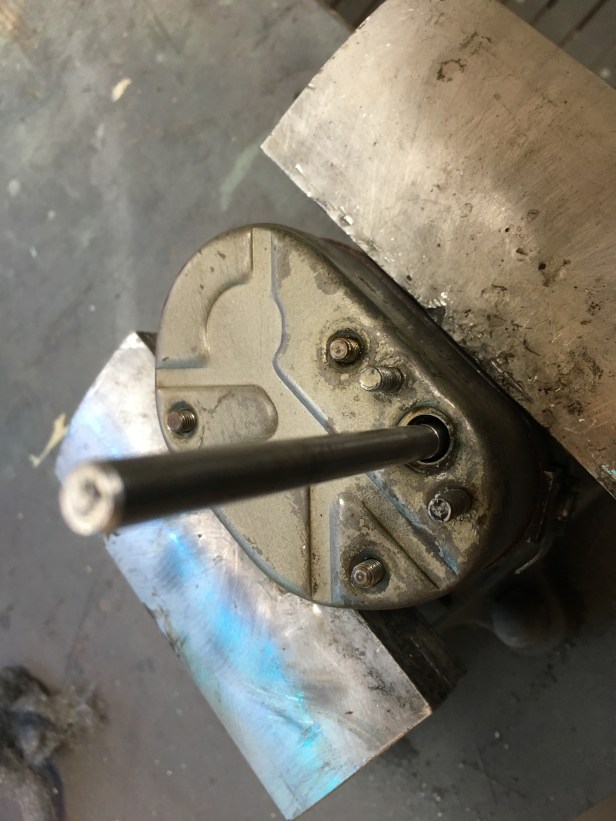
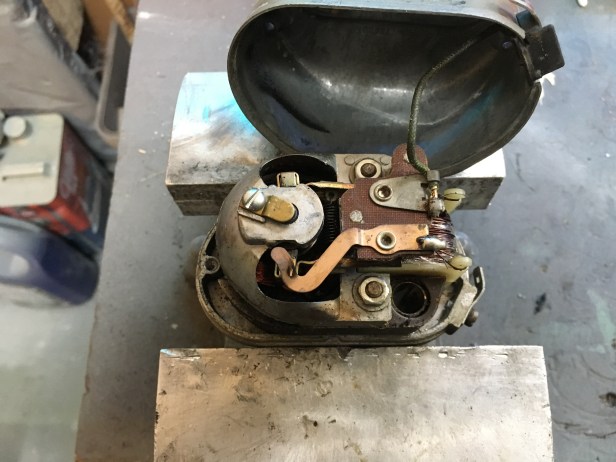
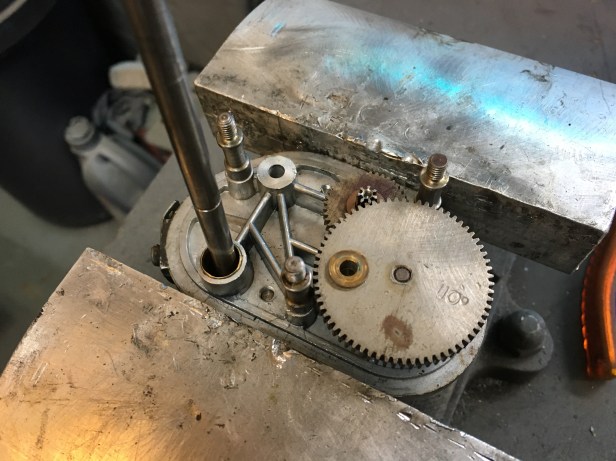
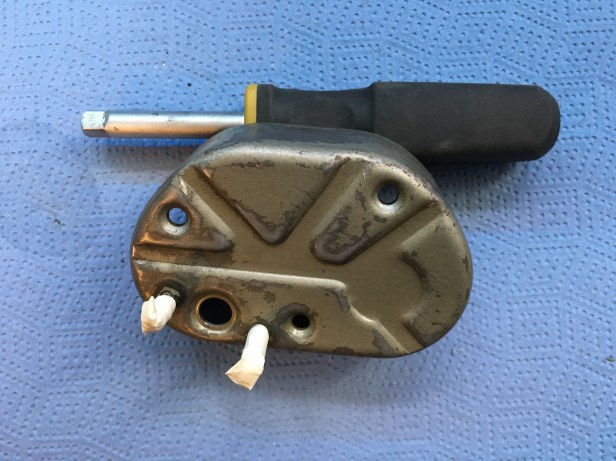
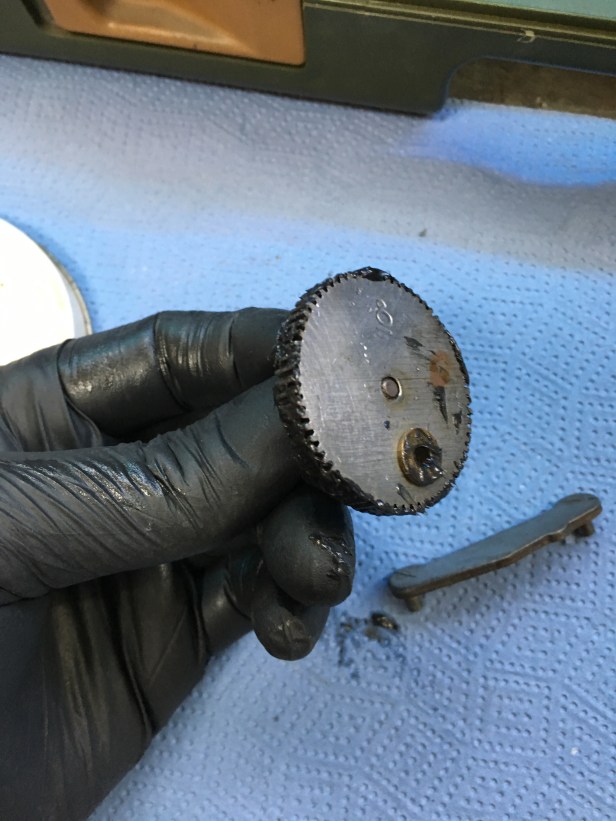
Lucas wiper motor, ready for strip downFirst remove the block holding the mounting posts. The shaft on which the wiper arm fixes is in the middle. This is the part that rotates.Once the block is removed, carefully remove the spring clip, washer and springYou definitely don’t want to drop this tiny spring clipNext, remove the 3 small nuts and lift off the gear housing….… to reveal 50 year old congealed grease. This gloop has the consistency of cold Marmite and is a common cause of issues with these little motors.The gears all lifted out easily and dropped into a tub of degreaser to soak for a whileNext, flip the motor over and remove the motor housing. The carbon brushes were in good order, so without wanting to do more harm than good, I gave the motor a good clean out with the air line and cleaned up the copper contacts.As I had everyone apart, I thought I might as well treat the housings to a deep clean. Some organic paint stripper was applied to the motor housing to strip the original lacquer offWhilst the stripper was at work, I cleaned up all of the gears and dry fitted everything back into the gear housing. All of the gears were in good condition. Rotor gear on the right and intermediate gear.Next is the final gear. The 110 degree marker refers to the arc of the wiper sweep on the windscreen. Interestingly, larger gears are available to give more coverage.
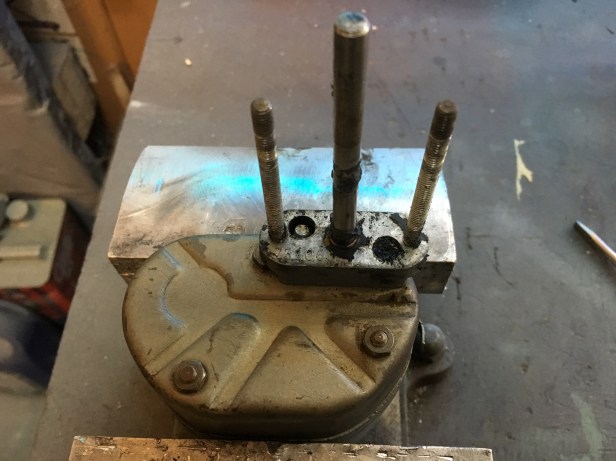
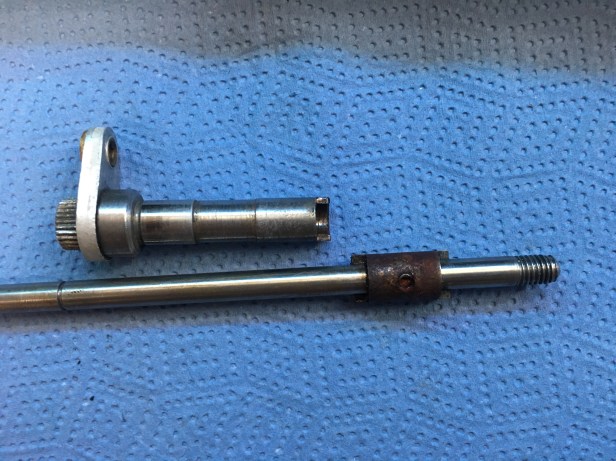
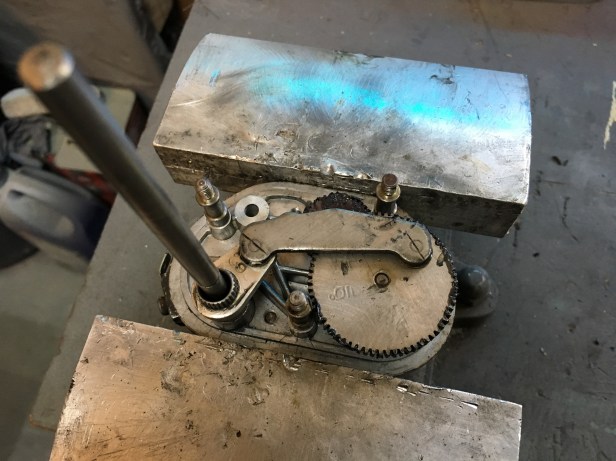
Now to the possible reason why the wiper arms weren’t rotating when the motor was switched on….
The long shaft fits inside the crank and keys with the “rusty” part… (couldn’t think of a better description…. but it’s no longer rusty :-))…thus…. If the “key” doesn’t engage properly, the motor will still make the shaft rotate but with the additional load of the wiper on the windscreen, it won’t move it. It’s important that these moving parts are well greased (and not with Marmite). This was the problem. There’s a small lever on the threaded end of the shaft that can be operated from inside the cab to align the key and as everything was so gummed up it was almost impossible to move. Problem solved.
So, we’ve learnt grease goes off after a while….. time to put everything back together again.
Shaft, crank and connecting rod fitted back into placeIn the meantime, the paint stripper has done its job an after a good polish with some wire wool, the motor housing looks great.The gear housing also got a good rub back and sprayed matt black.Now I’ve established everything fits back together without Marmite, the gears are removed and the shafts, bushes and gear teeth get a modest portion of greaseFinal gear greased upEverything back where it should be with fresh grease
Don’t forget, there’s two motors. The 2nd one was in a similar state and received the same treatment. Once the new paint on the gear housing has gone off I’ll rebuild everything and fit them back to the vehicle.
I’d like to think I’m methodical 🙂
The Land Rover workshop manual doesn’t have any commentary for the wiper motor, so it’s with special thanks to the “Wandering Hippo” for the great instructions on stripping the motors down.
In the USA we have McMaster-Carr; they will have the parts or good substitutes that would fit. I do not know if they ship to France. You likely have a French counterpart. You will need to measure accurately. These are NOT metric.


Thank you , I have just started a series 2a rebuild and this information will prove very helpful.
LikeLike
You’re welcome. I am glad the information is of interest.
LikeLike
Thank you for this auto. It was very useful.
I need a new spring clip and spring.
Where coud I find these parts?
Thank you again.
Francois from Paris
LikeLike
Francois,
In the USA we have McMaster-Carr; they will have the parts or good substitutes that would fit. I do not know if they ship to France. You likely have a French counterpart. You will need to measure accurately. These are NOT metric.
Thanks. Bon Chance.
LikeLike