With LGL at British Classic Cars having the once over before the safety test on 15.05.18, a bank holiday in Switzerland yesterday and nothing much to do as it was pouring with rain, I ventured into the garage…
For the last 2 years or so, there’s been a Land Rover to put together but that’s done and the garage was looks totally abandoned. There must be something fettle with in here…
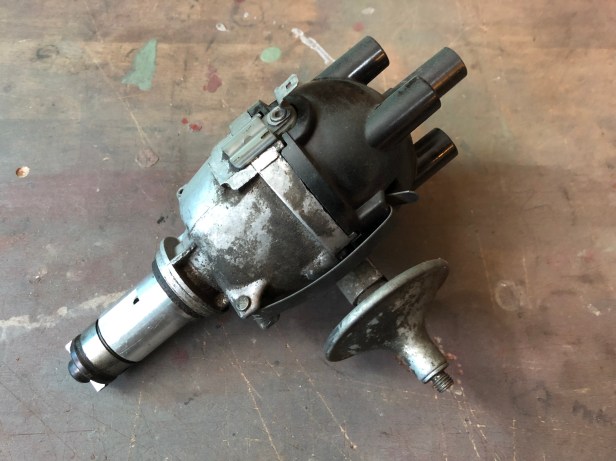
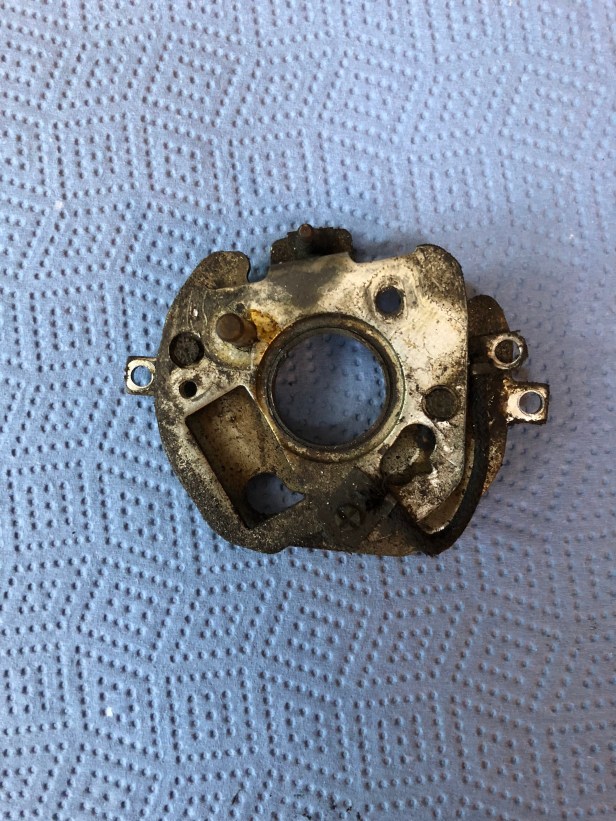
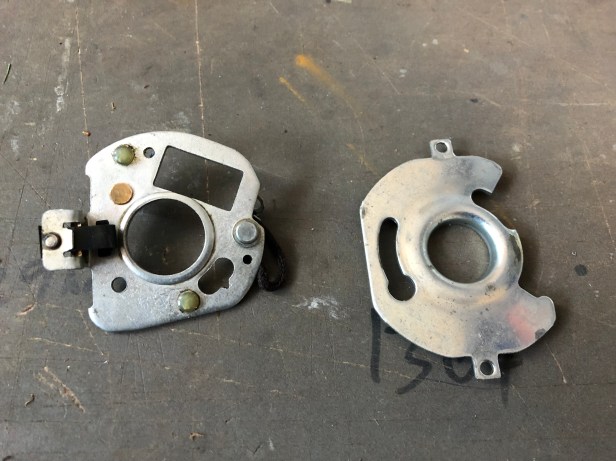
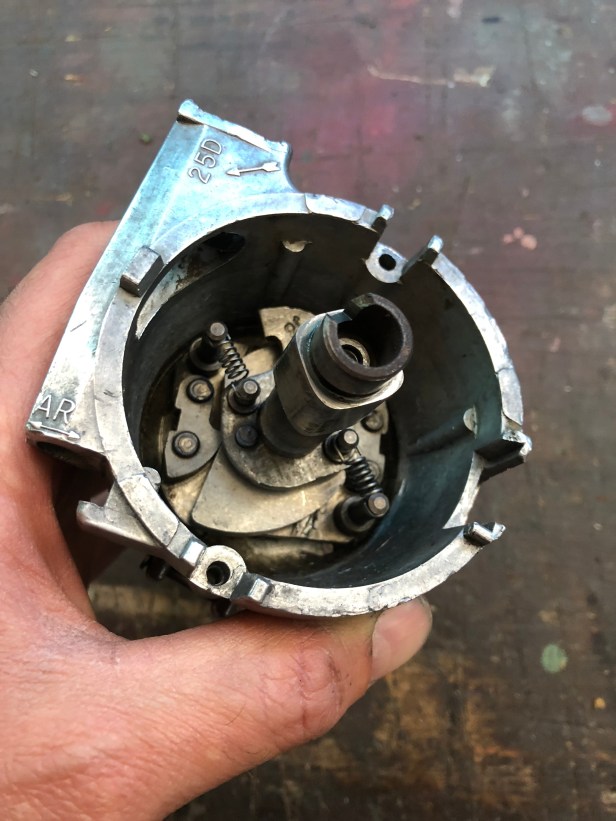
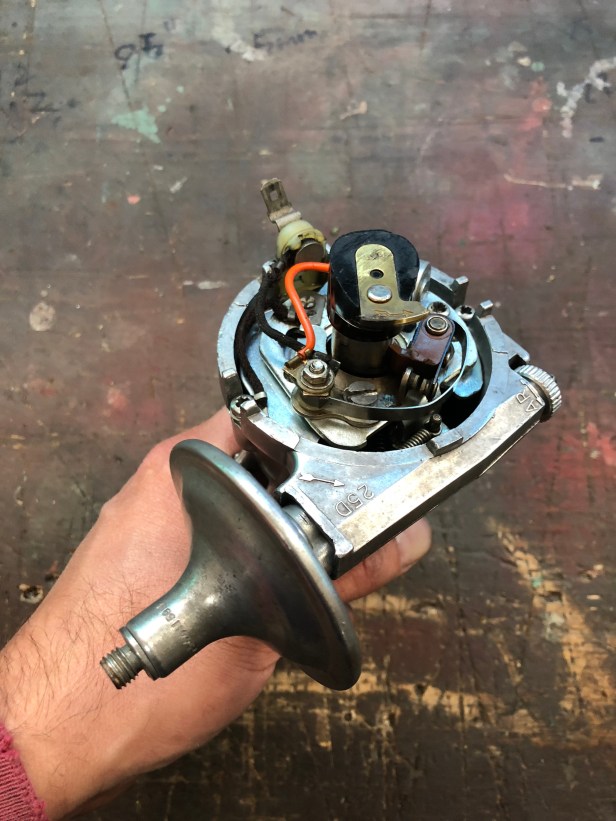
Oh, yes, here’s something… The original Lucas 25D distributor.
I’ve fitted a new distributor from Accuspark but the quality isn’t all that good when compared to the Lucas. So the idea is to tidy up the old Lucas, replace the points with an electric ignition kit and refit it… at some point. But for the time being, a strip down and clean will keep me occupied for a few hours.
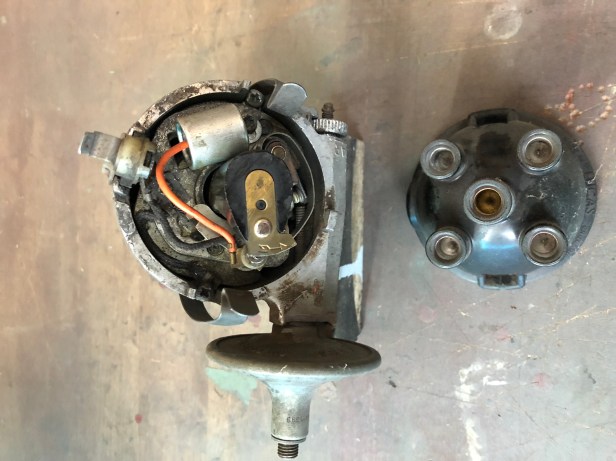
Original carb with 50 years of baked on dirtDistributor cap is removed showing the points and cam
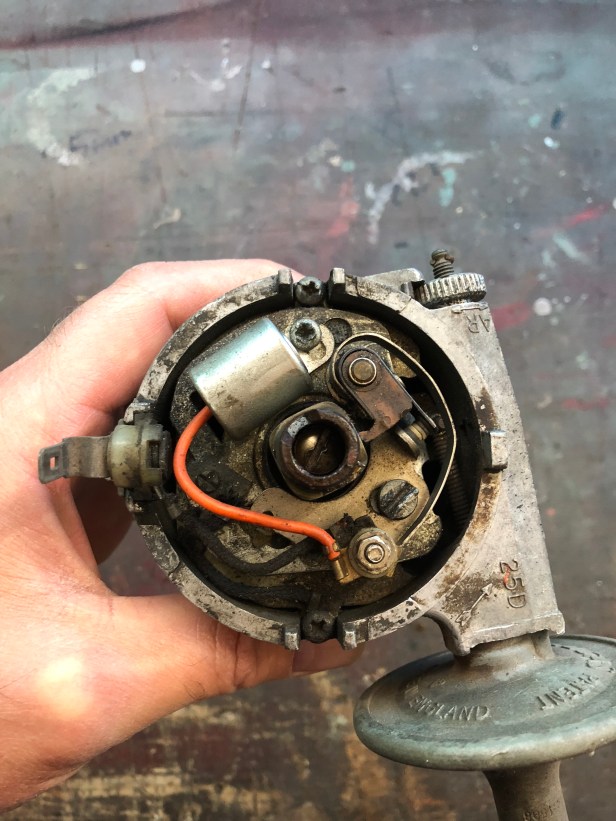
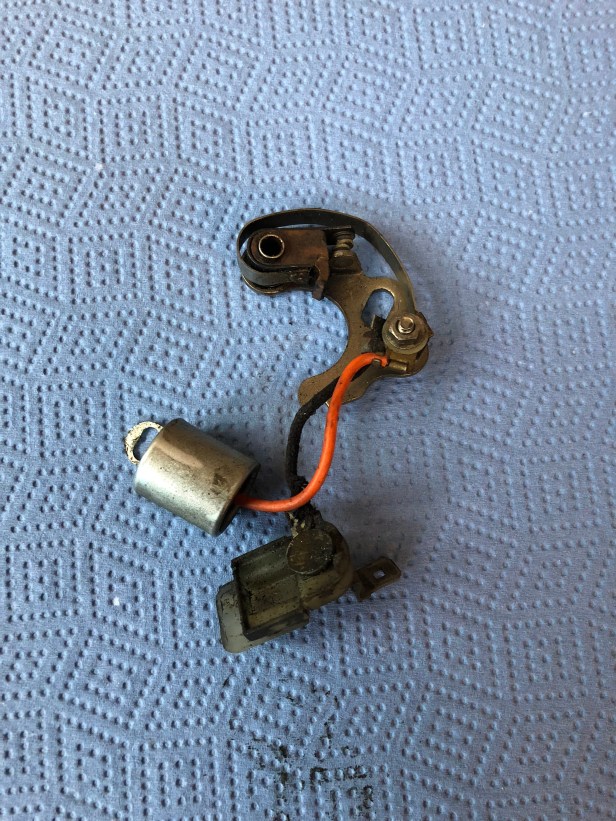
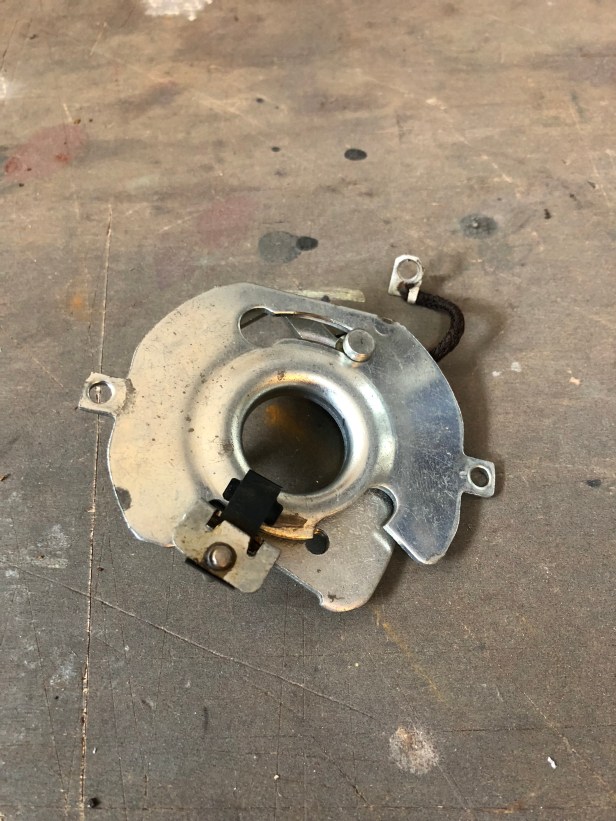
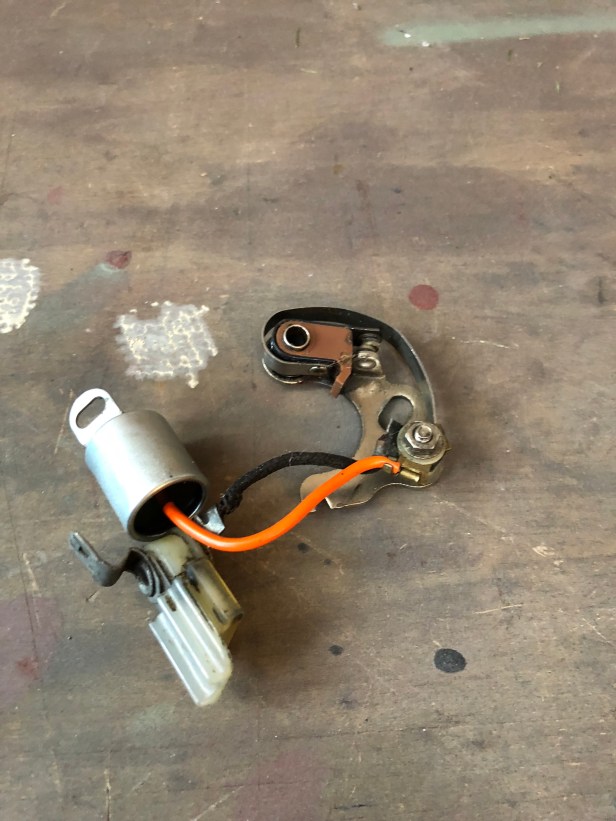
The points and condenser. I’m amazed it worked at all with all that muck in there.
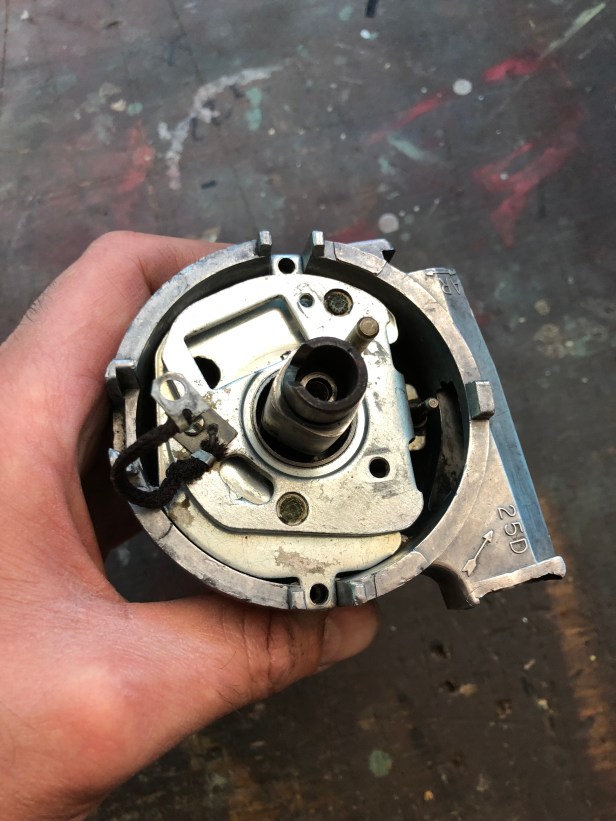
Points, condenser and feed. This assembly will be replaced with a solid state electronic system but the for time being this will be refitted.
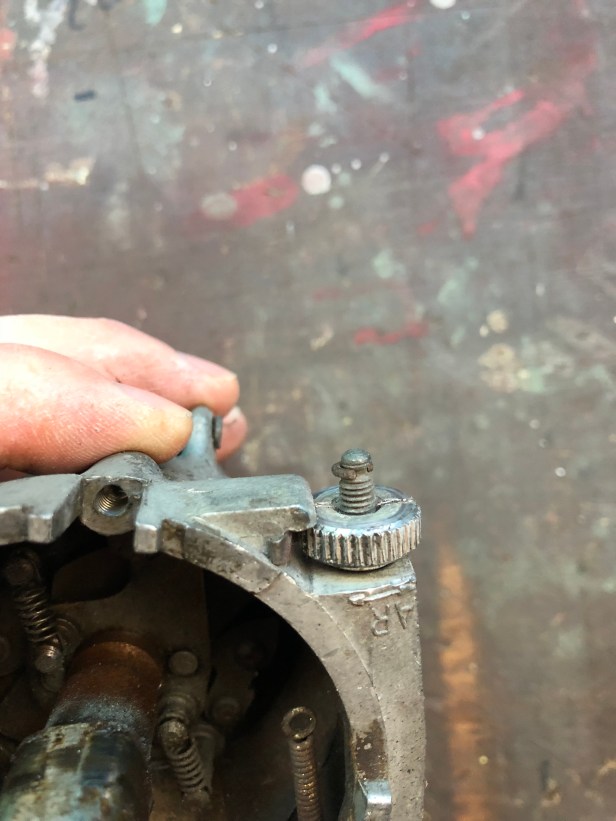
Next off is the breaker plate. The spring on the vacuum advance fits of the brass post
With the breaker plate out of the way, the vacuum advance can be unscrewed and withdrawn from the unit. (Then hunt about the garage floor for the spring that shot out of the end…)
Spring (smaller one) reunited with the vacuum unit
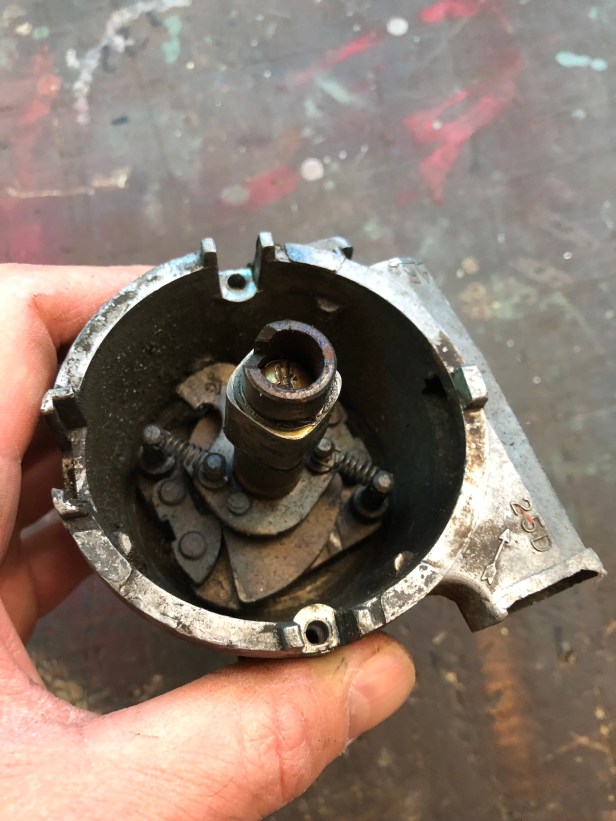
Cam, bob weights and primary and secondary advance springs
Advance springs and cam removed. These are very specific springs. At the point of manufacture, a dynamic tester was used to set the distributor up. It’s important the correct rating of spring is fitted to each of the bob weights seen here.
To remove the base place beneath the bob weights, there’s a pin that needs to be drifted out of the end of the shaft… about where my little finger would be in the picture above. Once the pin is out, the drive gear can be removed and the shaft with the base plate pulled out of the unit. Even with a 12 tonne press at my disposal, I couldn’t press the pin out! The bearings don’t have any play in them, so I’ll leave that for now.
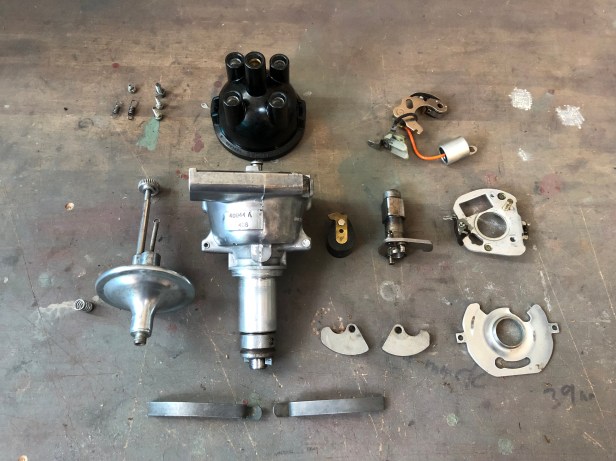
All the parts were soaked in some degreaser (except the main body and vacuum advance) and give a good clean up. The main body and advance unit came up well with some wet and dry and wire wool. Time to put things back together.
Breaker plate slots back together. These two parts rotate against each other depending on the “advance” of the distributor relative to the engine RPM.
… and here it is, slotting back together.
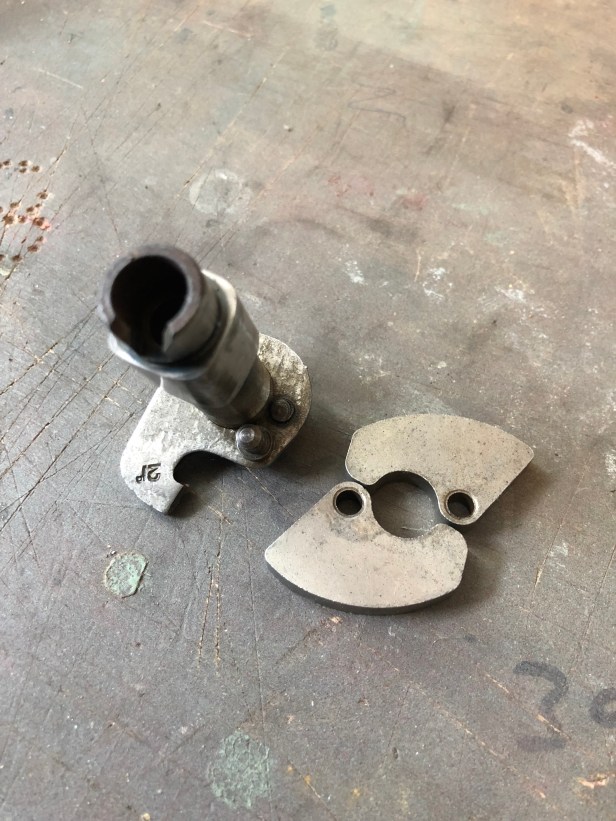
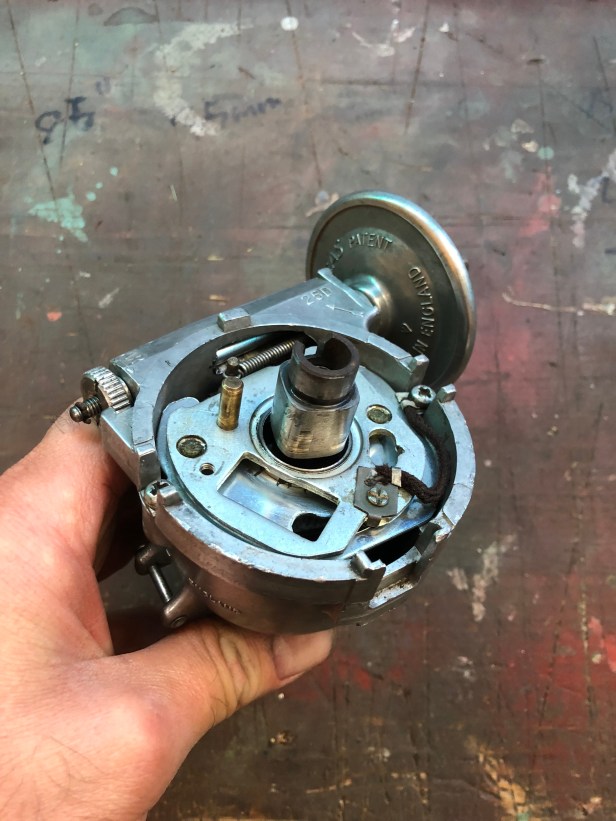
Now for the cam and bob weights. The 21 degrees stamped on the cam, indicated the distributors static advance setting.
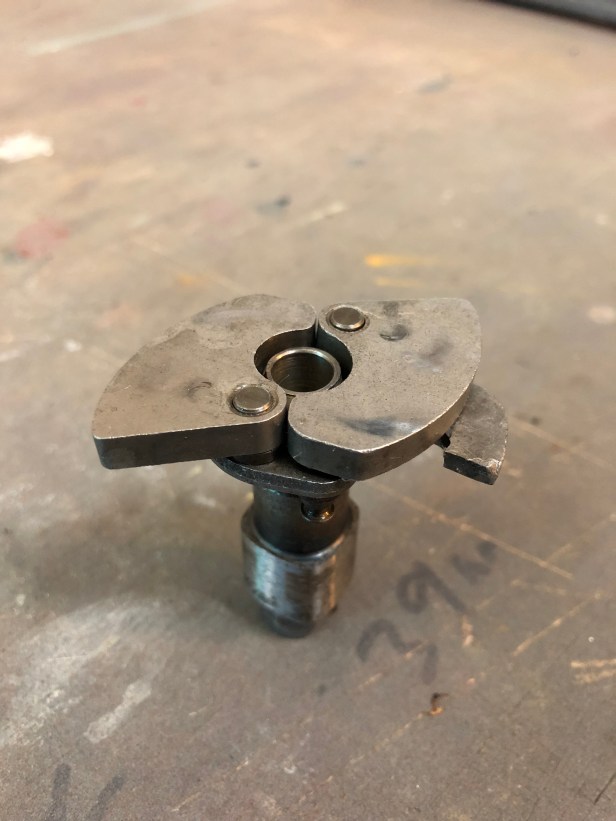
Bob weights on the cam. A dab of grease on the pins, should keep things running smoothly
This would have been easier if I’d been able to remove the shaft but after a little cursing, the bob weights and cam are relocated
Now for these two tiny springs. These clip between the base plate and cam. The one on the left is the primary spring, the right hand one is the secondary spring. Up to about 900 RPM the primary spring is under load, after that the secondary spring comes into play.
Springs back in taking care not to stretch them. They were harder to get than to refit… oddly.
Breaker plate back in
Then on with the vacuum advance unit (with a smear of grease) and screw the breaker plate down.
The points will be replaced but they still got a clean. It just wouldn’t look right… right?
Points and distributor cam refitted. I can’t set the connect breaker gap as the workshop manual is in LGL incase the garage need it
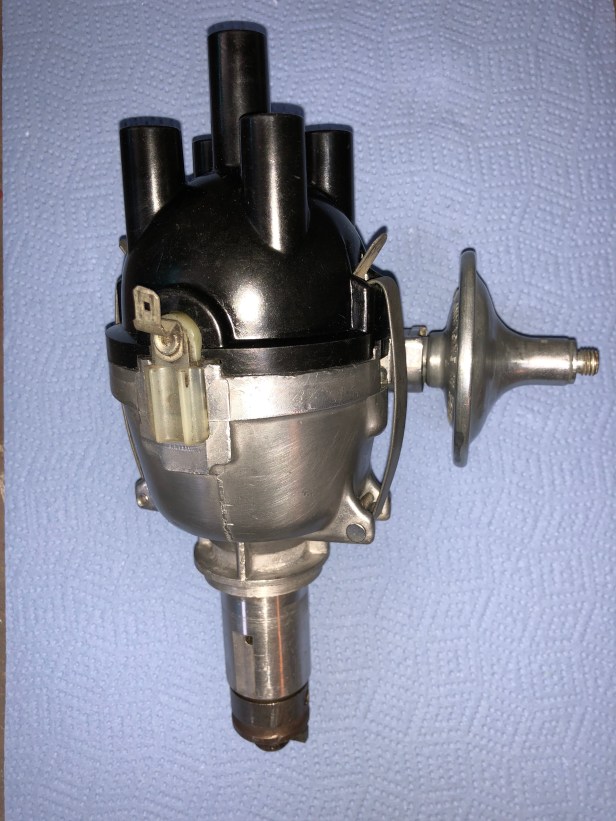
One job left… fit the distributor cap
Job done.
Another thing I learnt doing this little job was the 3 digit number on the raised “square” block relates to the month and year the distributor was built. 466 = April 1966
I also learnt there is a great deal of effort required setting up distributors, to the point of it being something of a dark art.
I was unable to find any Land Rover specific info on Lucas distributors but did refer to an article on the Jaguar Club of North America. If you want to read more on exactly what’s going on inside a distributor, ignition curves, spring rates and such erotica, the article is… HERE.