
Cold Start Cable Conversion
Preamble
I have been working on this post for a long time and it wasn’t getting any shorter, so I started again. This is the thinned down version. If you have any questions on this post, do please leave a comment.
HNJ Engineering recommend using the cold start cable from a classic Range Rover as this has a twist lock function, i.e. the spring loaded cold start cam on the SU carb can’t switch the choke off because the knob is locked in place.
The original Series 2a cold start mechanism on the Solex carb had a little nipple that the cold start cam was pushed over, this locking it in place at the carb end. There was no spring load to worry about.
So the issue is, the spring on the cold start cam on the SU carb will simply pull the system closed again once I let go of the push / pull knob in the cab.
However, there’s enough friction in the original cold start cable mechanism to overcome the return force of the spring on the new cold start cam.
Unfortunately what I have won’t connect to the new carb as it’s way too short. To connect the cold start knob to the cold start cam on the carb, I need to do the following:
- Lengthen the outer cover of the cold start cable
- Remove and fit a new, longer inner cable to the original cold start knob (this will run inside item 1 above)
1: Lengthening the outer cover of the cold start cable
This is entirely home made so no official part numbers:
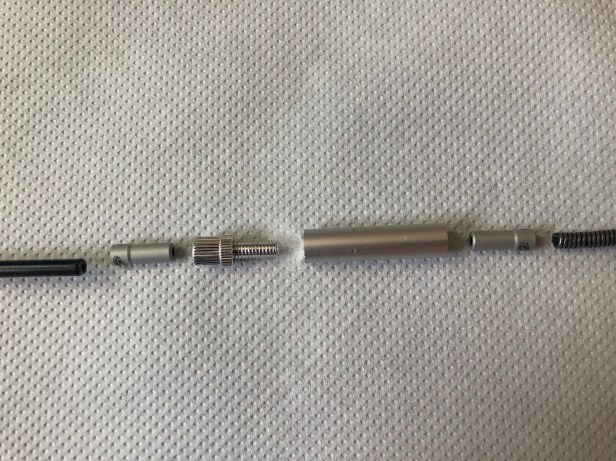
- Bicycle brake inner cable and outer cover: Available from your local bike shop, or in my case, third draw down in cabinet 2.
- 12mm diameter aluminium rod (to make a small barrel adjuster to join the old Solex cover to the new Shimano cover)
- Shimano rear derailleur adjuster.
- M5 x 0.8 tap
- 4.2mm drill bit
- Pillar drill, milling machine or if you’re confident, a hand drill and patience
- 2nr cable ferrules
Installation
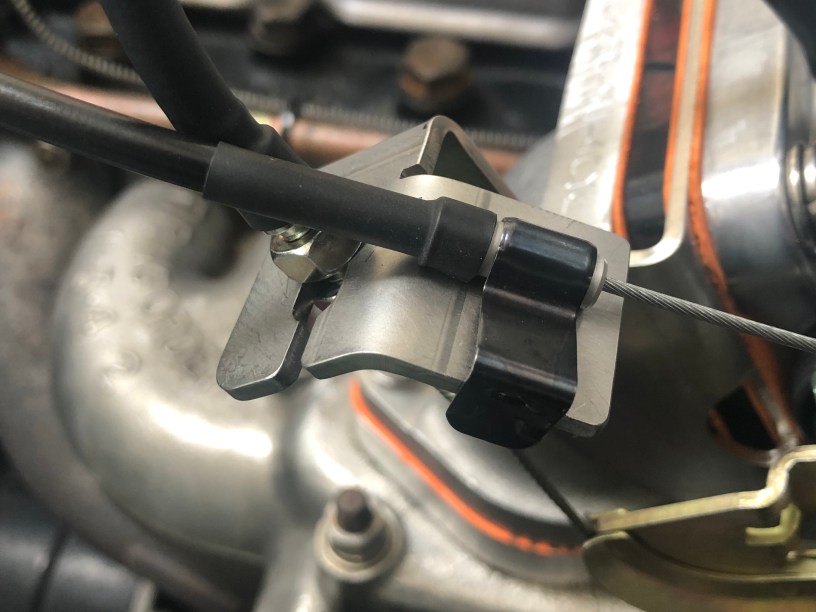
The outer cover of the original Solex cold start is a spiral steel sheath. This is pressed into the frame of the cold start switch mechanism and cannot be removed. As the cold start cam on the SU HIF44 carb is higher up and further away from the switch, this would have be lengthened.
I first cut the oringal outer down to within 100mm of the switch. I then made an adjustable barrel to join the original spiral cover to the bicycle brake outer. The OD and ID of bicycle brake outer is the same as the original Land Rover spiral cover. Handy!


2: Remove and fit a new, longer inner cable
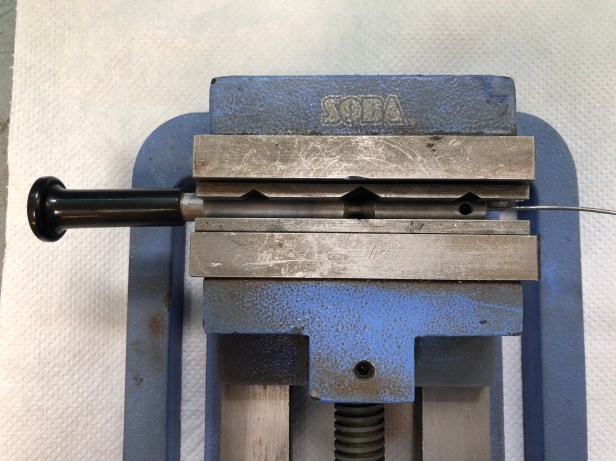
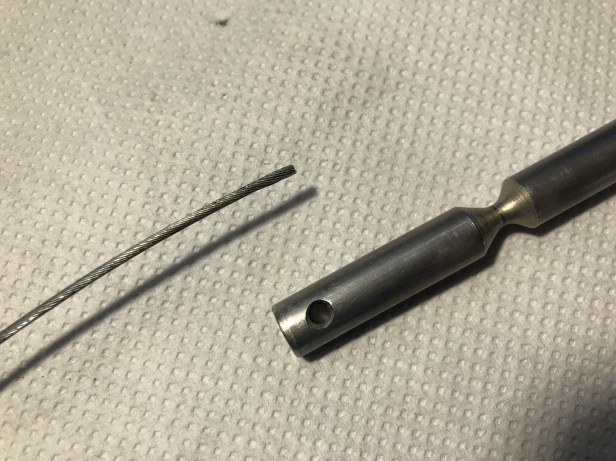
Similarly, the inner wire of the cold start is another one way fitment. The wire is inserted into the end of the knob (the one you pull to engage the cold start) and through a cross hole in the shaft, the wire is stamped to expand it locally so it can’t pull out again.
I found an article on TerryAnn Wakemans site on how to remove and replace the hardened steel wire. I can’t find the exact link but I will describe the process below.
If you’re in any way interested in Land Rovers and travel, then it’s worth having a read of TerryAnns website and see what she’s done with here awesome Series 2 Doormobile.
You’ll need the following for this….
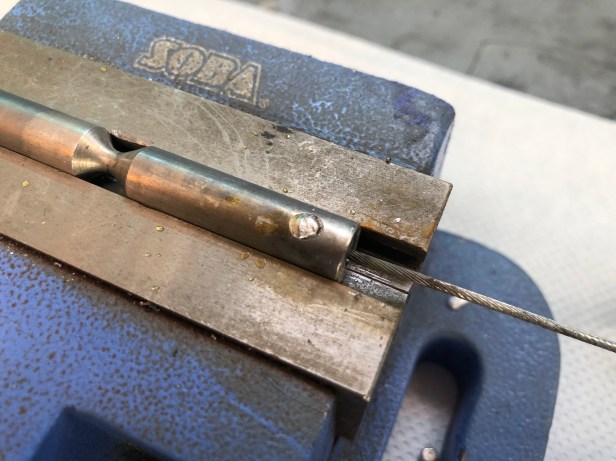
- 3mm parallel punch
- Hammer
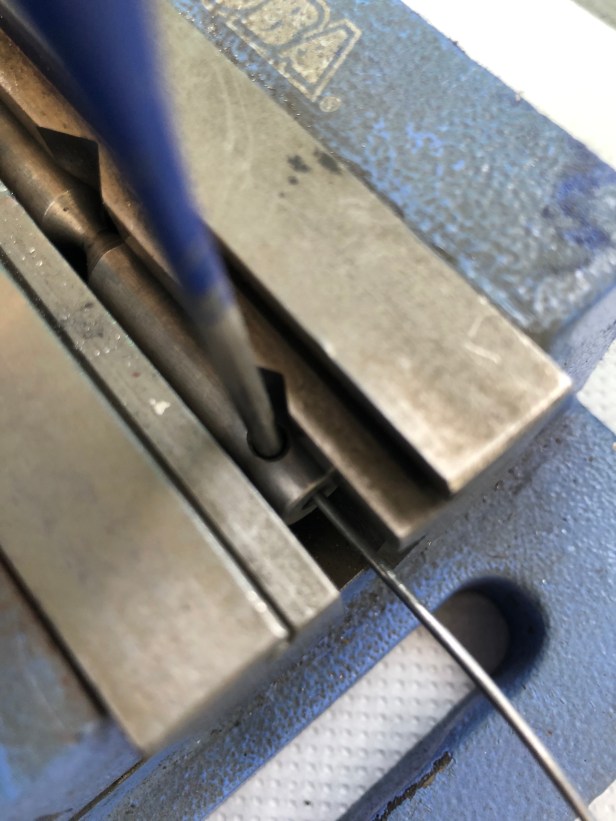
- 2.5mm dia brake cable (both nipples removed)
- Soldering torch
- Solder
- Flat file
Installation
The idea is to shear off the flattened portion of the original wire using a punch. Once the wire is removed, everything can be thoroughly cleaned. Then the new bike cable (wire rope) can be inserted into the end where the hardened steel wire was and soldered applied through the cross hole.


The inner can now be fed into the outer from inside the cab and connected to the carb.


I was apprehensive this would not work at all but I can safely say, this little fix works extremely well. The friction in the system is caused by the tang of the cold start switch pressing against the shaft when the knob is pulled out. This is more than enough to resist the force in the return spring on the carburettor.
Not only does the cold start knob stay firmly in place when it’s pulled but having an adjuster means the cable can be tuned. This is particularly handy as the SU Tuning Manual says there needs to be 1.5mm free play in the cable.

Love your blog. So well done. Where did you purchase the choke cable ferrule shown with the securing clip? I have the clip but need a ferrule like that one. Thank you!
LikeLike