
Preamble
It’s been a while… Time to finish cleaning the component parts, make a small repair and reassemble the MAP hubs.
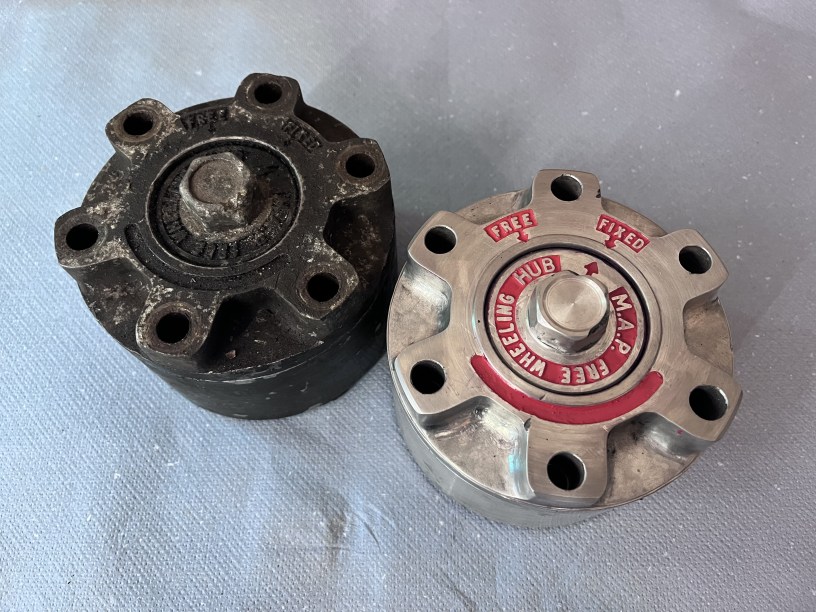
Cleaning, facing and detailing
There was a lot of salt corrosion and paint on the hubs which needed to be removed. I carefully chucked the parts in the lathe and machined off just enough material to remove the corrosion and paint.


The same approach was taken with the main shell and oil filler screw. A word of caution when machining the face of the hub shell, you only want to remove enough material to create a smooth face. To remove too much will effect the stack height, and therefore the operation of the hub.


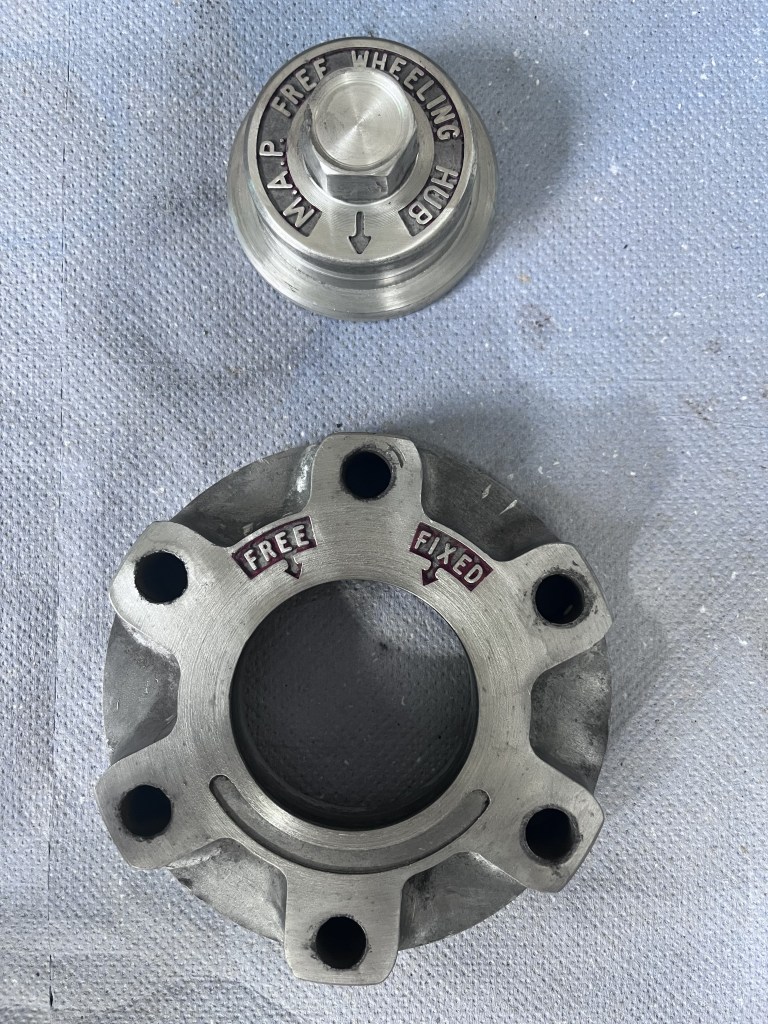
The same process was carried out on the selector cap. With the parts cleaned up, I painted the text with some RAL 3020. The easiest way to do this is paint over everything, let it cure and remove the paint on the face of the lettering with a sharp Stanley blade. This leaves the letters in relief of the surrounding material.

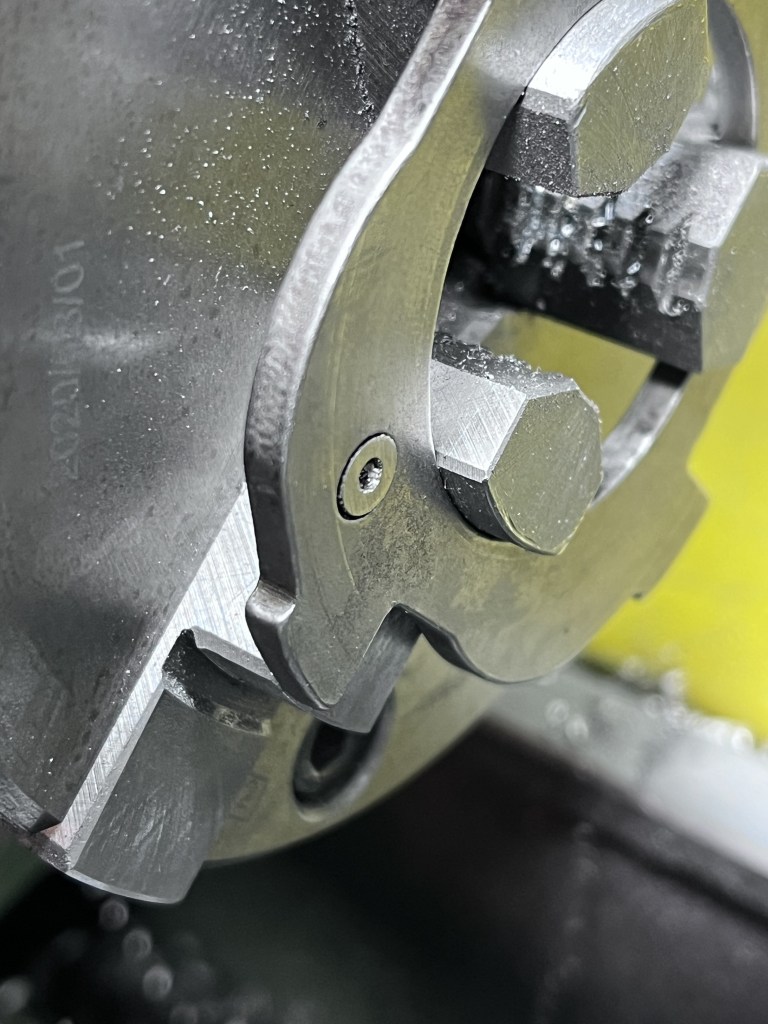
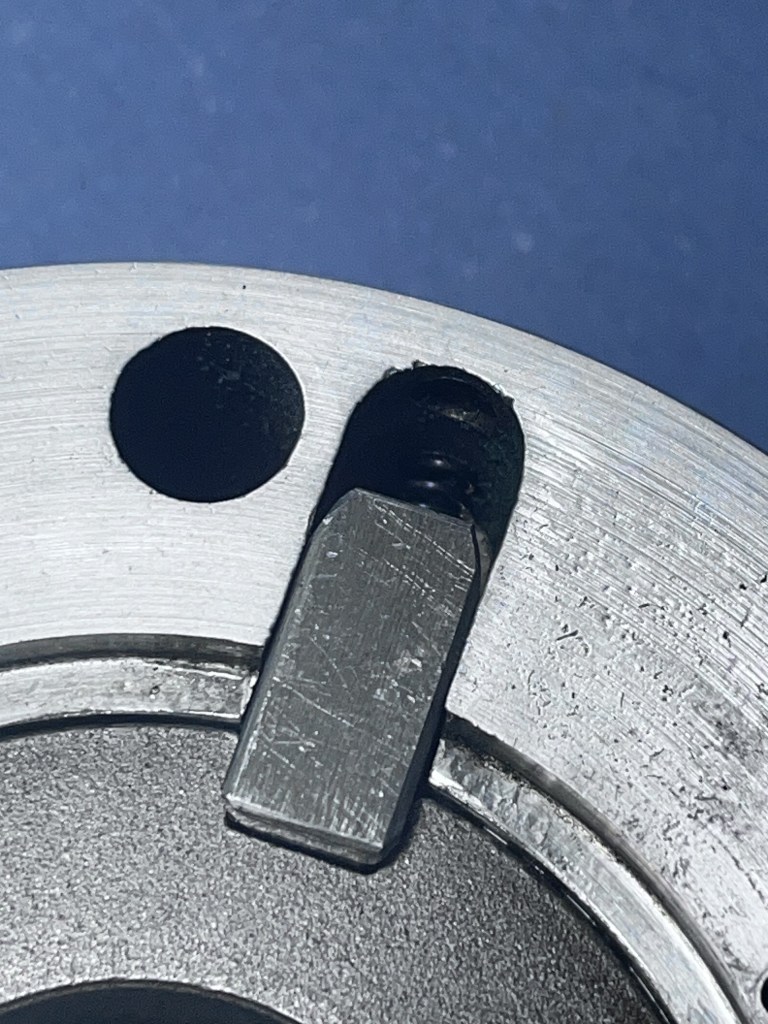
Repairing the selector ring
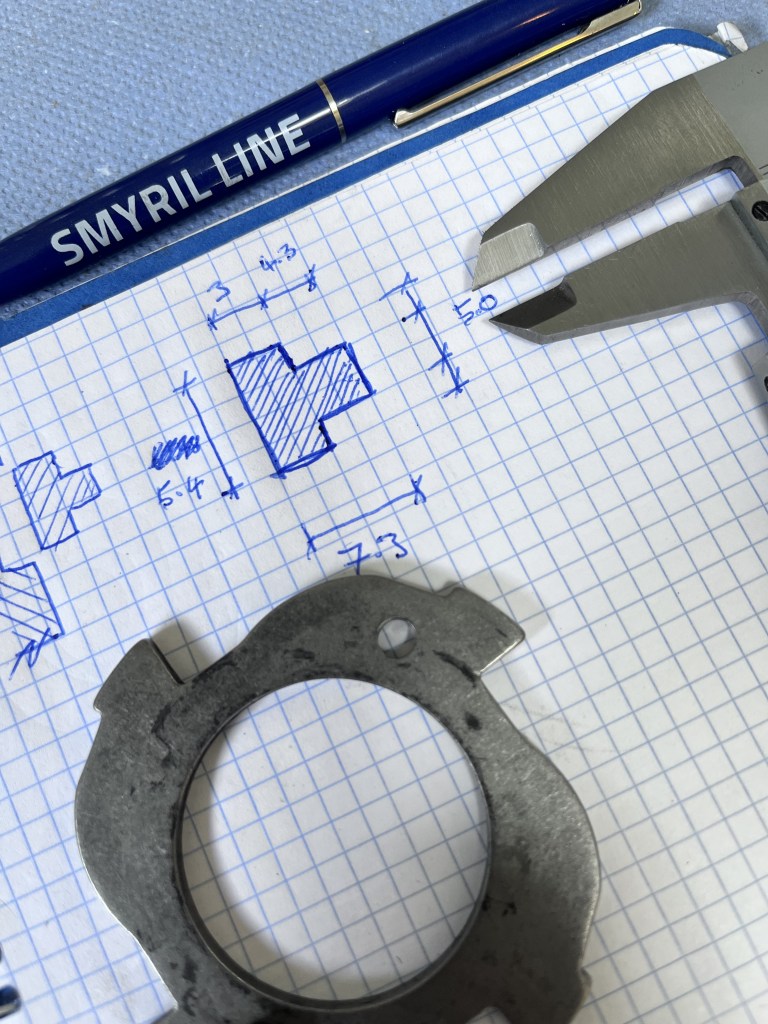
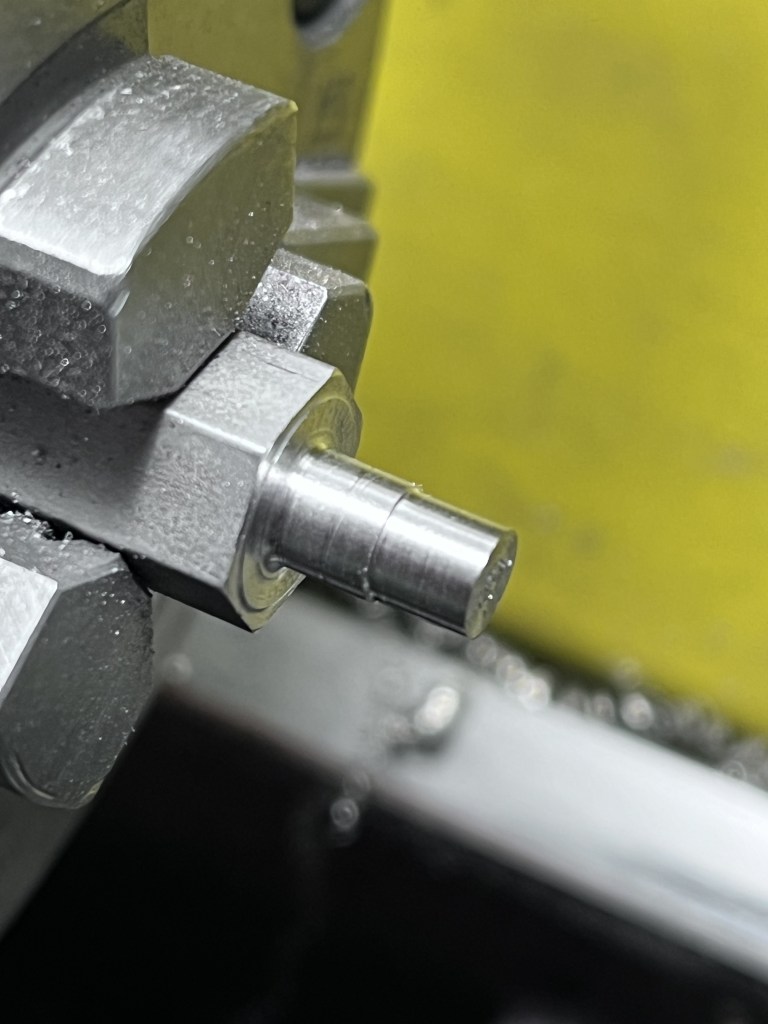
I noticed that one of the pins in the selector ring was missing but was able to make a new one on the lathe. This would originally have been a hardened steel pin, pressed into the selector ring (also hardened) and peened from the rear. The two pins are not the same diameter so the other selector ring was used as a reference point.


Reassembly
With all of the small parts cleaned and repaired, it was time to reassembly both hubs. It’s pretty straight forwards requiring nothing more technical that a pair of circlip pliers, some oil and the service kit with the new gaskets and seals. The service kit is available from Land Rover Optional Equipment in the UK.
It’s worthing stating that the bronze bush in the hub shell was in very good condition. There was still a good precise fit with the hub body. This is not pat of the service kit.
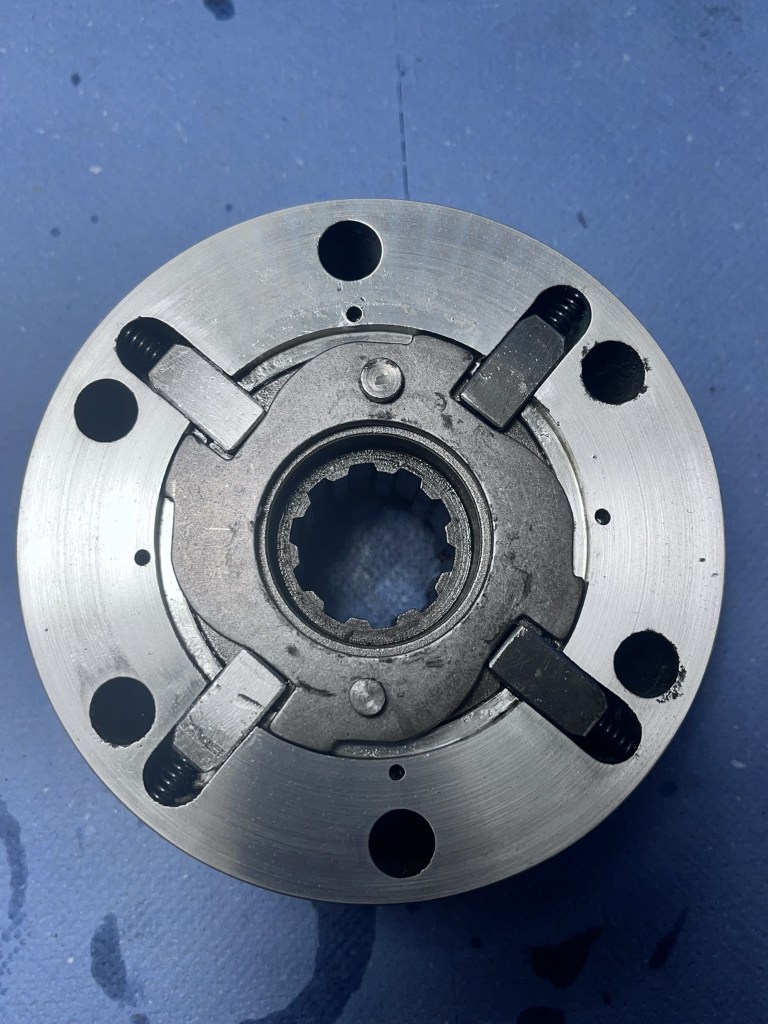
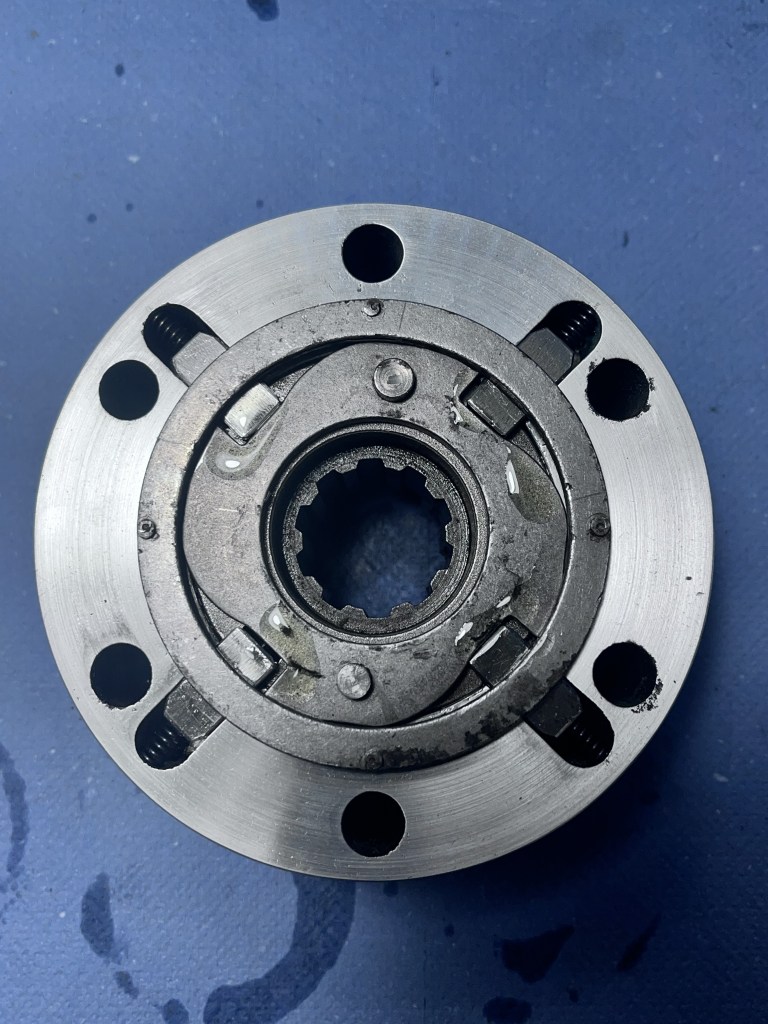
#1: Insert hub body into hub shell


#2: Fitting pawls, springs and lock ring. (springs are part of the service kit).


#3 Face plate and centre boss
Unfortunately, I did not take any photos of this step. It simply requires a seal to be installed in the groove on the selector boss and another in the groove on the inside of the face plate.
The hubs I bought still had the original leather seal in the face plate and was rock hard. I machine it out on the lathe but using a sharp pointy implement and some patience would achieve the same results.

Hubs are now ready to fit.

Excellent tutorial, I wish the whole Land Rover workshop manual was like this!
LikeLike
Hi Olivier, thanks for the comment and the kind words. I’m glad you found it useful. Next up will be the figment.
LikeLike