LGL needs somewhere to carry the other spare wheel…. It’s going on the back door. Amongst the box of goodies that arrived last week was a new bracket on which the wheel will reside.
Swing away wheel carriers seem a popular alternative to hanging the wheel on the door but personally think they look ugly and never seen one in real life that isn’t covered in rust.
The door is specially designed to accommodate the weight of the wheel and uses the internal frame design as a Defender door.
The internals of the original door were slightly different. On some models the wheel was mounted much lower down… not sure if this didn’t actually foul the two a hook as the wheel would be well below the bottom of the door.
A lot less bracing in the original door as you’ll see below
There’s also a third hinge designed into the frame of this door (the skin is yet to be drilled through), also to assist with the extra load… again, this is typical to the Defender.
Rear door with the 5 holes predrilled during manufacture and the new carrier
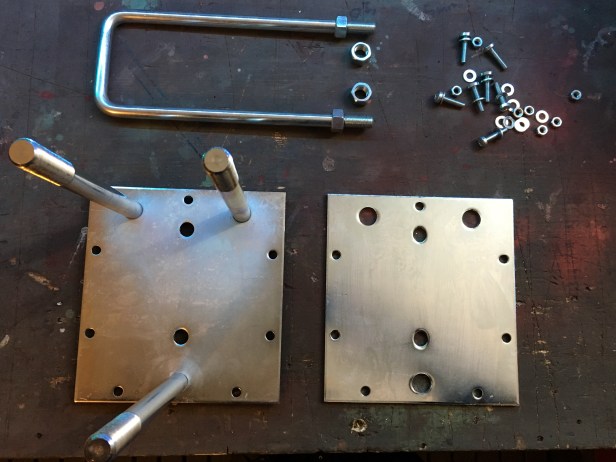
Frame stripped down to component parts. I didn’t like the look of the cheap passivated fixings supped with the kit, so I will replace these with stainless steel items
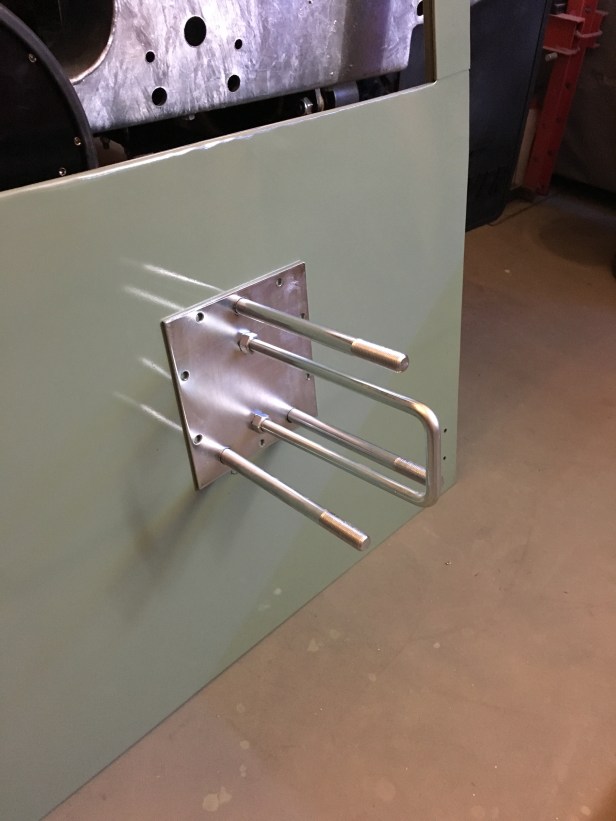
The plate with the 3 pins is inserted through the matching openings in the door
The three pins from the other side
Cover plate offered up
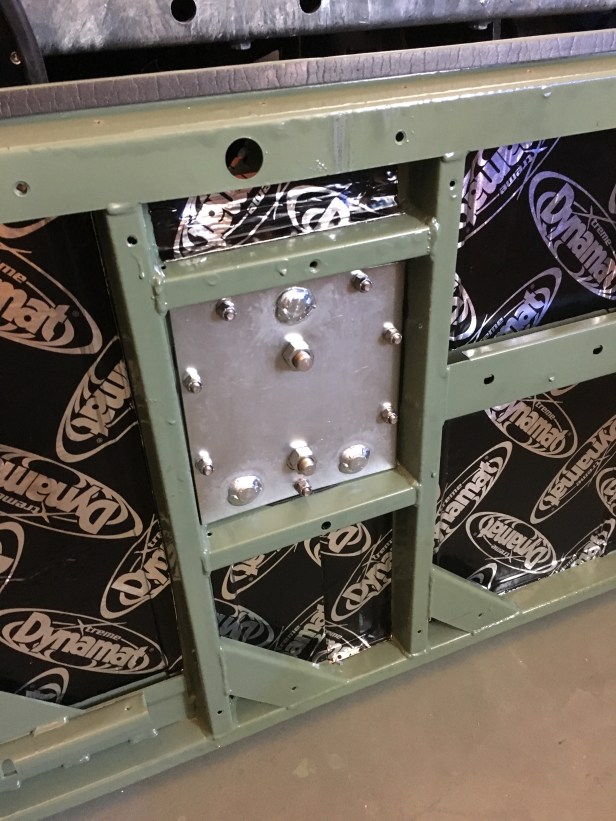
The remaining two large holes were filled up with the staple
Holes are drilled between the back plate and cover plate. The fixings for the whole carrier pass through the steel web of the framing… the strongest part of the door. If it were just through the aluminium it would soon be falling off
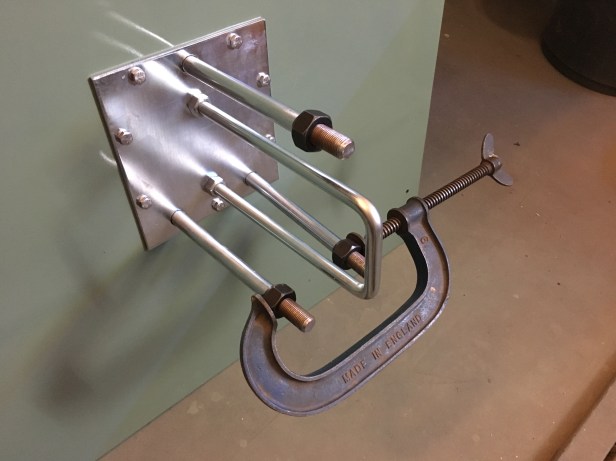
6 nut are supplied. 2 per pin of the carrier. The first set pass on with the chamfer innermost giving a flat face to match the inside face of the wheel rim and the second set, the other way round to match the chamfer on each of the holes in the rim (as per any other wheel nut)
“Innies” are screwed on and tightened onto the pins. Some how all of the pins now point in a different direction and the rim won’t fit. So, with a Record G Clamp between the flats of the nuts, things were realigned… gently
Same trick with the top pin
The end product will look a bit more exciting than this. All the other rims were shot blasted and powered coated before tyres were fitted. The finish is great and very hard but in the interest of budget, I’ll spray this one. It comes primed so it just needs a good rub down first.