For whatever reason, the original door check mechanism for LGL was missing when I bought the vehicle so the door was never held open correctly.
The weight of the spare wheel on the door did help it open to a certain extent but on anything other than level ground it tended to swing shut.
Now the spare wheel on the rear door has been removed, the door opens to about an angle of 110 degrees. Firstly, this look odd and secondly it chips the pain on the upper door hinge as its only supposed to open 90 degrees.
The rear door I have came from Ashtree in the UK and it’s effectively the same construction as a Defender door to cope with the weight of a spare wheel. To this end, it also has the bracketry for the Defender door closure mechanism.
With some hunting around the inter-web I came up with a list of the part numbers I needed. All readily available in either Genuine Land Rover, OEM or… and I can’t believe I’m saying it… Britpart.
I’m not going to dwell on the latter but the are 4 things on LGL from Britpart (3 in this post) and they have all needed some modification to fit and or needed to be finished off. Weld spatter removed, painted properly straightened etc…
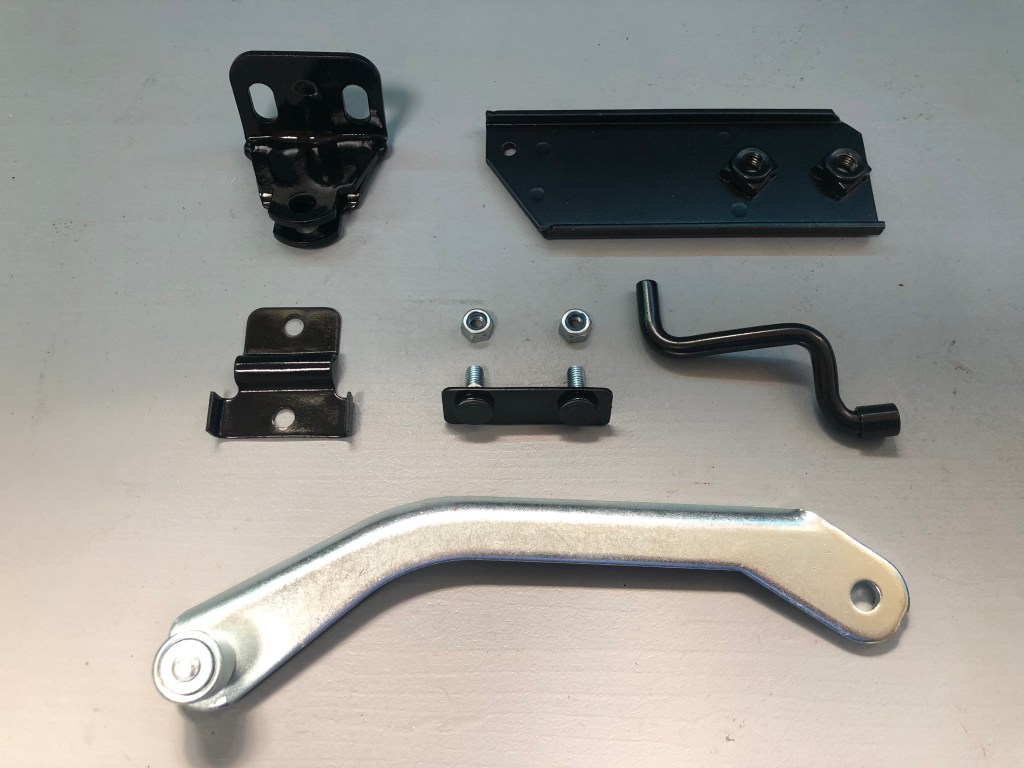
Parts Required: (excluding fixings)
(top row, left) Check strap bracket: MXC2047
(top row, middle) Bracket rear door: LR016768
(middle row, left) Pivot bracket MWC6450
(middle row, middle) Stud plate BFU710200
(middle row, right) Torsion bar MXC1790
(bottom row) Check rod LR016708
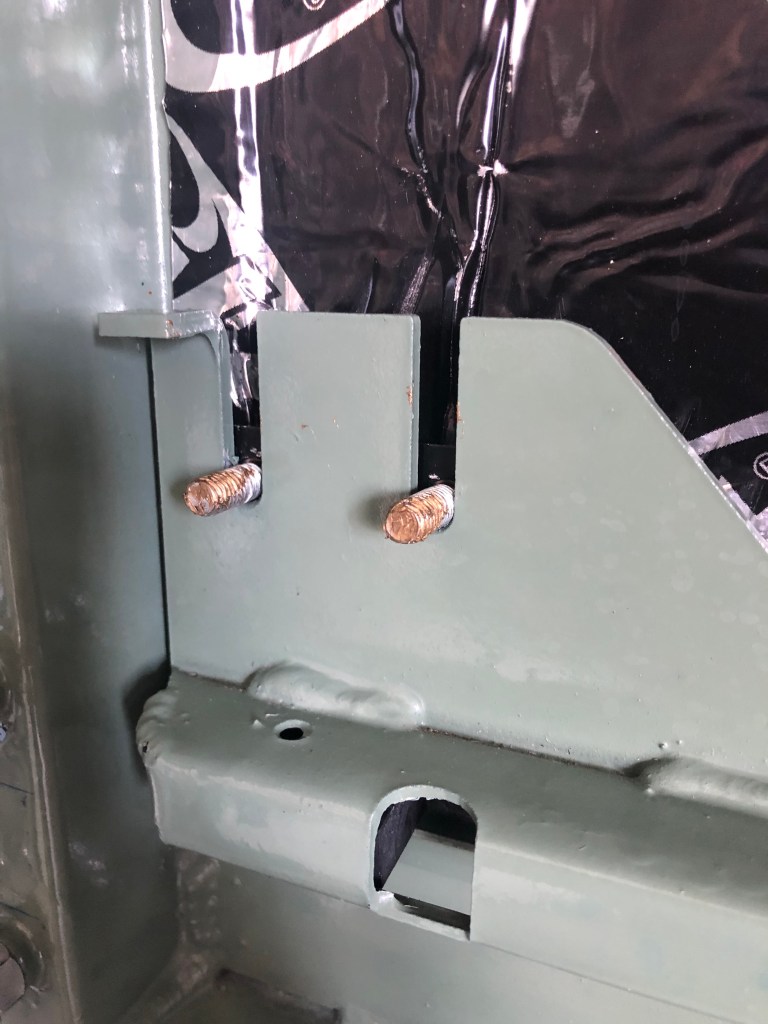
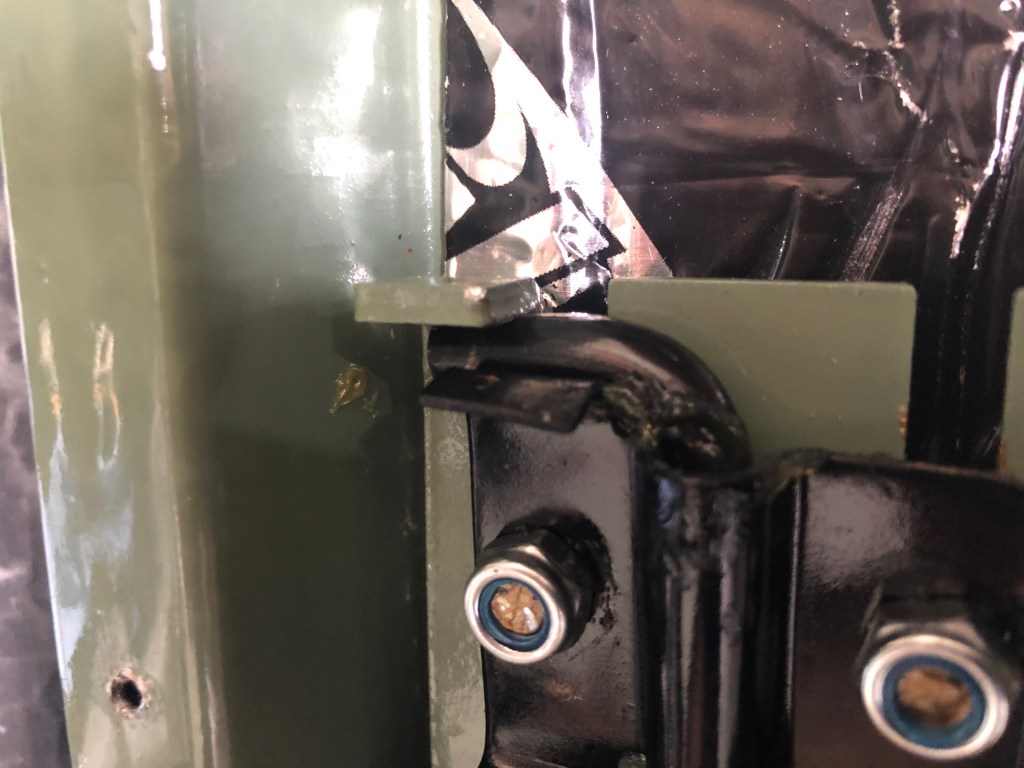
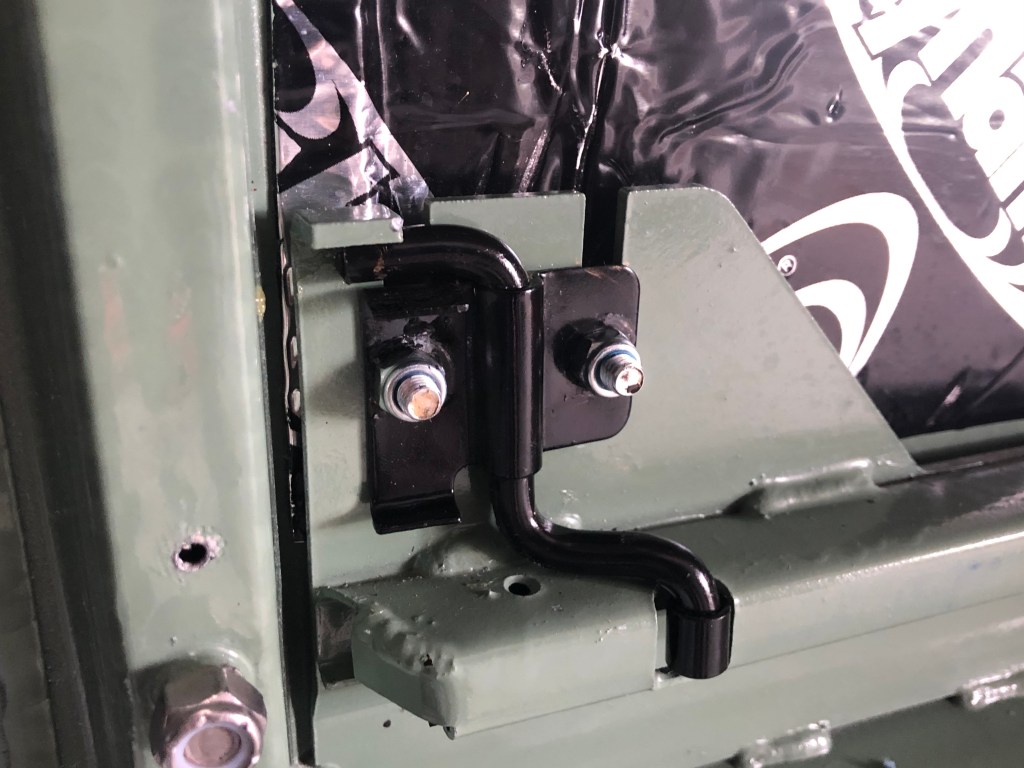
First of all the door components are fitted:
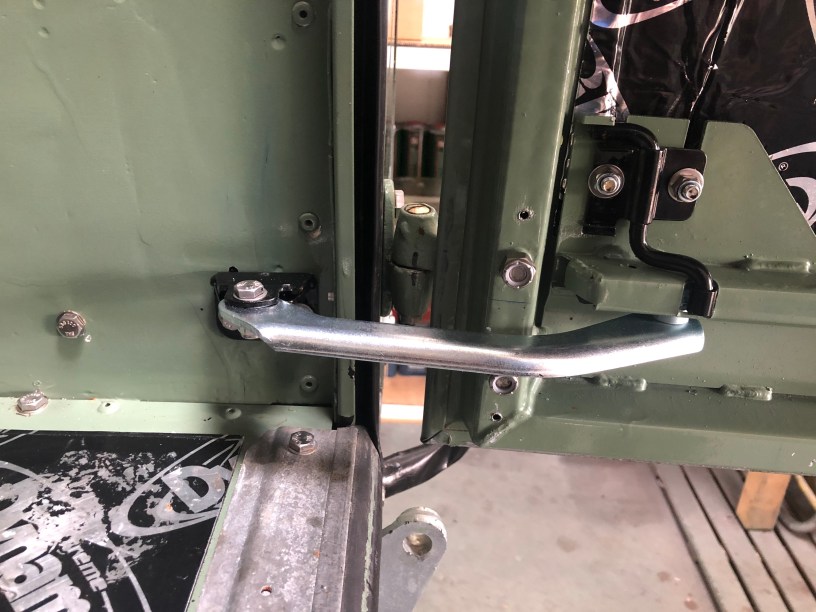
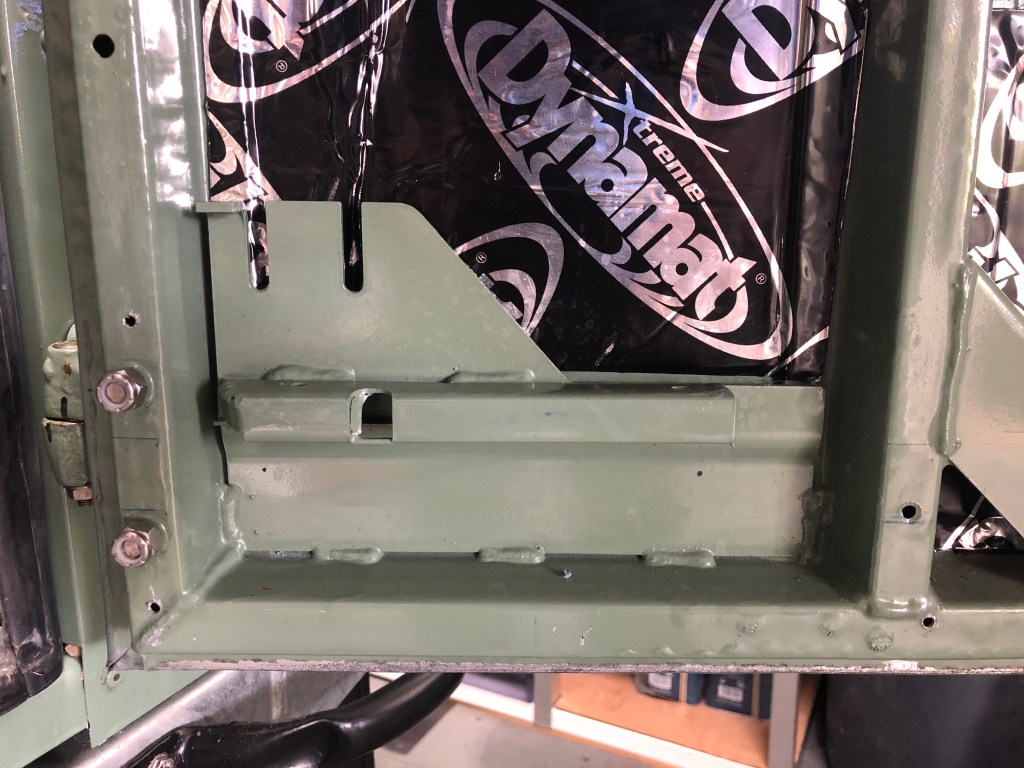
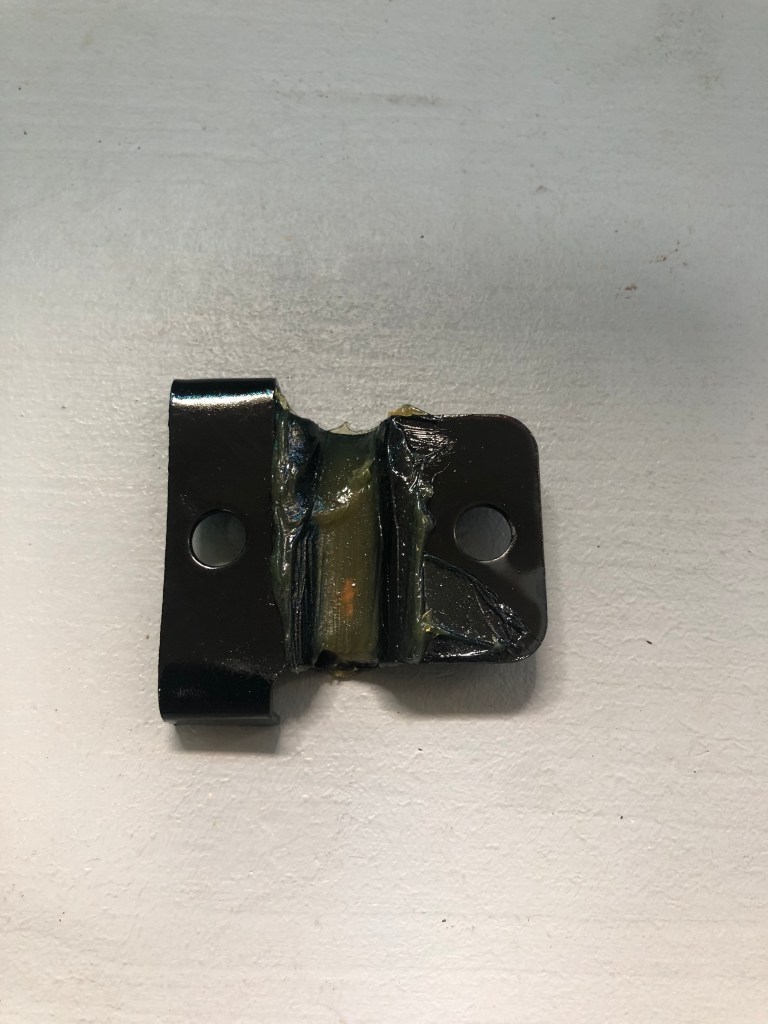
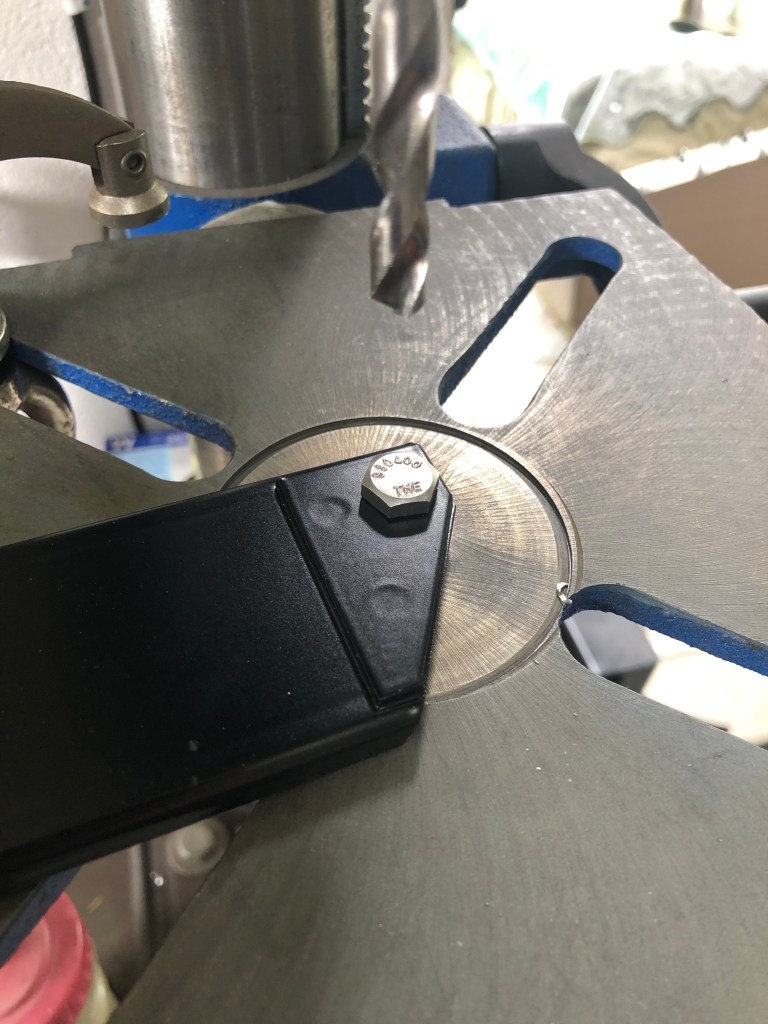
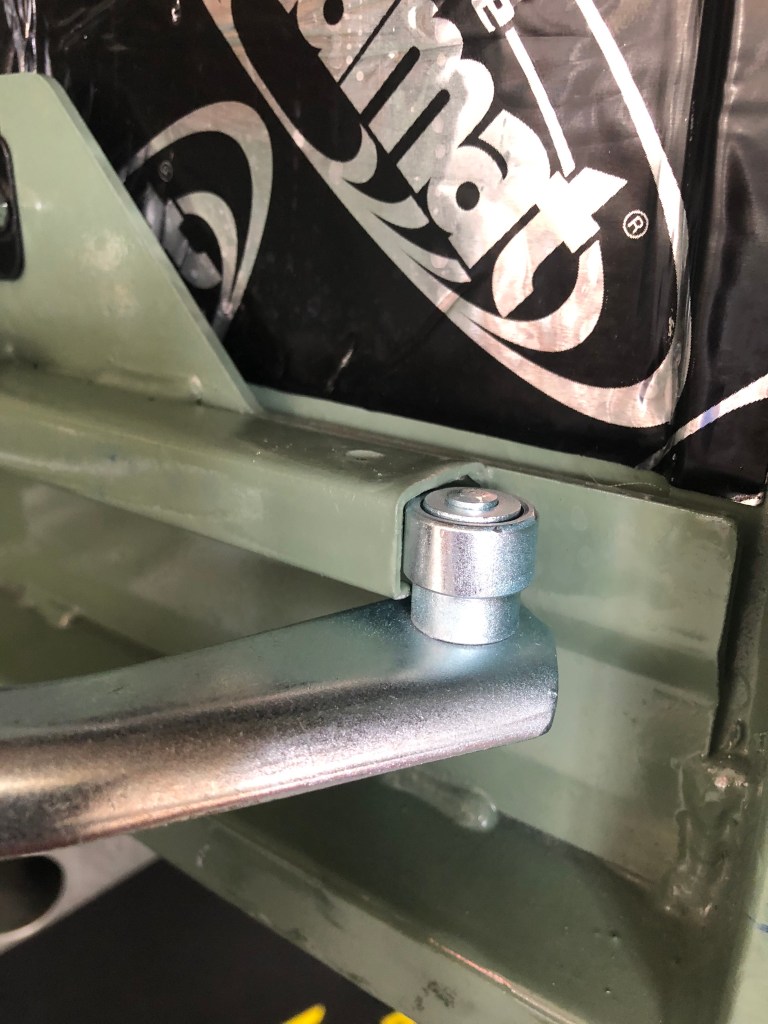
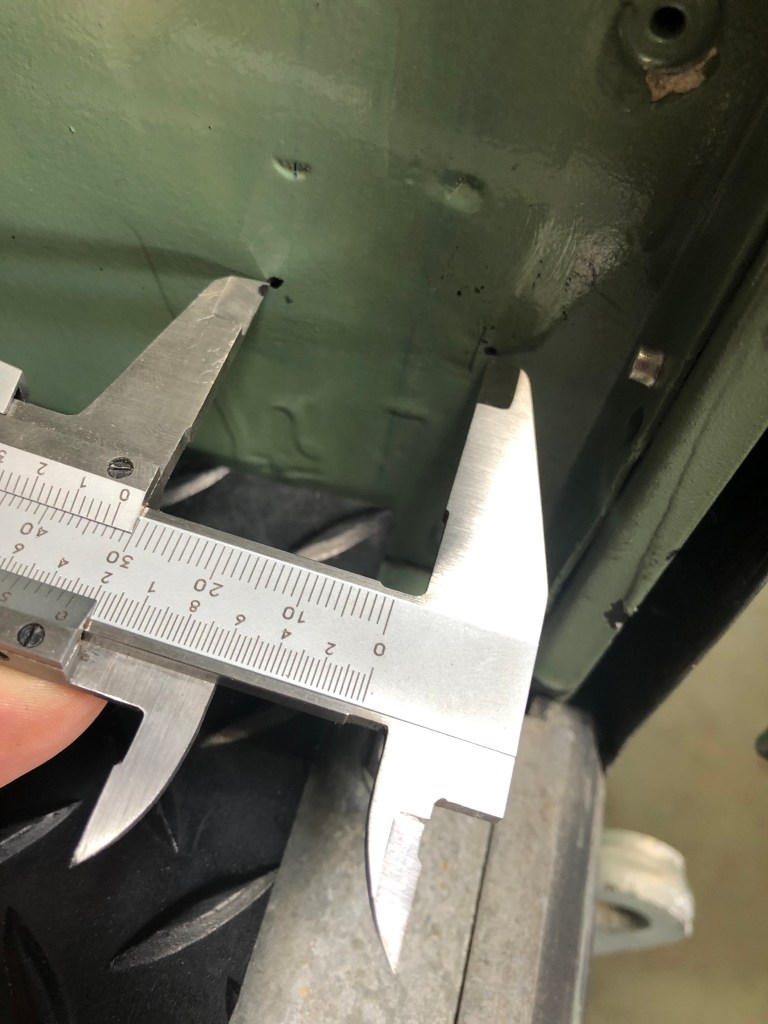
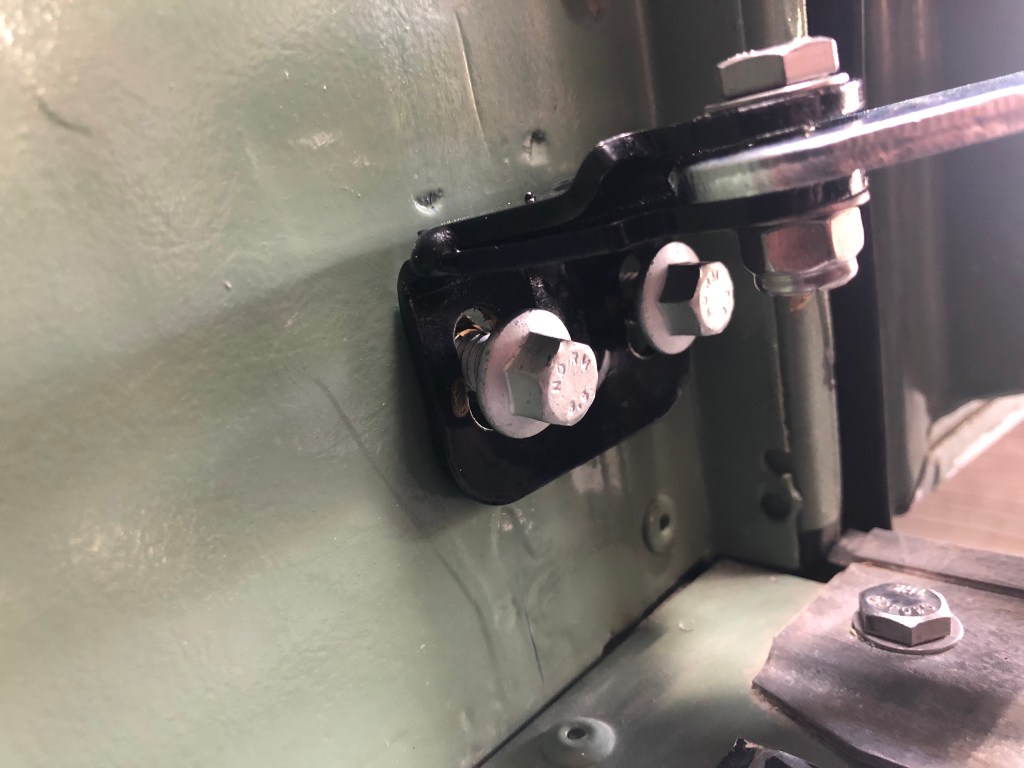
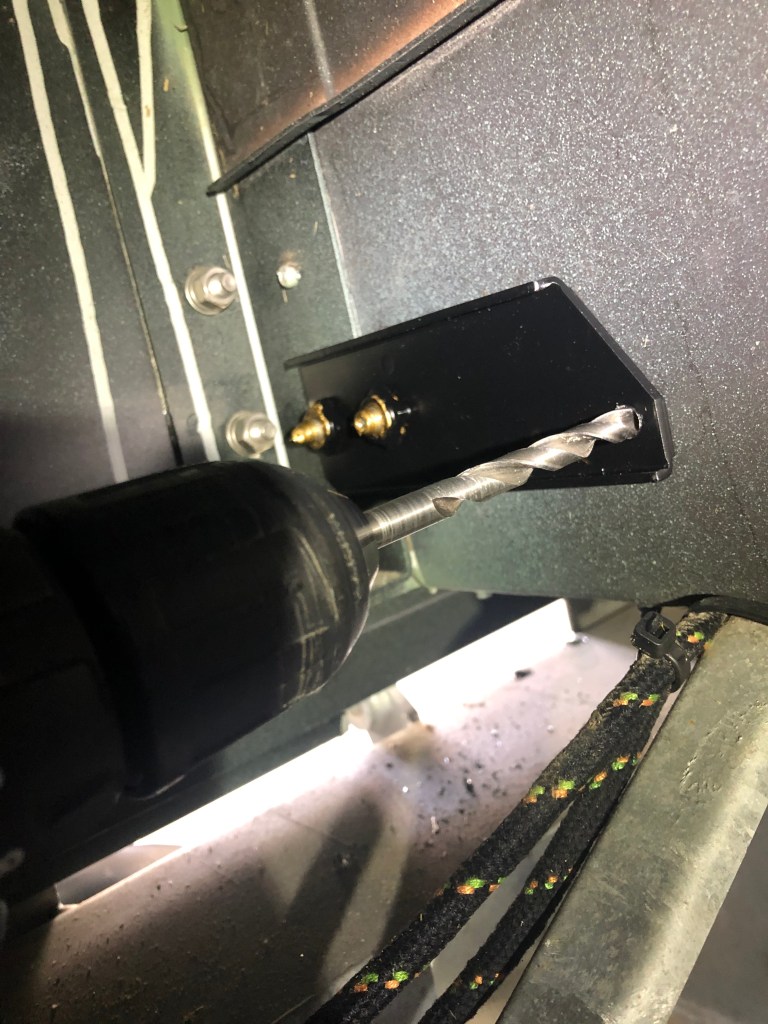
Standard Defender door check bracket assemblyThe torsion bar (top) is cunningly bent to be forced against the door bracket when the check strap passes of the nub on the end. This is held in place by the pivot bracket and the stud plateFirst the groove in the pivot bracket is filled with grease Stud plate is slid down the two grooves in the door bracket. Threads have some copper slip applied. The rubber buffer LR010901 (not pictured above) was fitted in the slot below the stud bracket earlierNext the Britpart pivot bracket is offered up but doesn’t fit! The top lip won’t fit beneath the torsion barThe top lip was straightened in the vice and re-bent. It now fits.Next the check strap components are installed. But first the rear door bracket (the larger one) needs a modification. The small hole on the left is for a pop rivet to pull the bracket tight to the rear tub. I prefer to make this a more substantial fixing.Hole is drilled out to accept a 7/16 boltThe check strap is then slid down the slot in the doorOh…. the guide on the check strap needs to pass the nub on the torsion bar… believe me it’s not something you can do by hand… and I don’t want to hit it with a hammer. The pivot bracket and torsion bar are slackened off and the check strap guide can move beyond the nub. Next the check strap can be fixed to the Britpart check strap bracket. What a surprise the holes don’t line up. Theres’s not enough space in the back of the bracket. Sometime spent with a rats tail file and the hole is slotted enough for things to align.For the next stage, the rear door needs to be propped open at 90 degrees. Then the position of the check strap bracket can be established.Two holes need to be drilled in the rear tub. These need to be at 32mm centres2 x 9mm holes.The M8 bolts can be pushed through the bracket and rear tub…… and screwed into the large bracket positioned in the wheel arch. Then an 8mm hole is drilled for the final anti flex boltHey presto. All done. The door opened works as desired, holding the door open at 90 degrees. The check strap is temporarily removed to fit the door trimJob done.
There are a number of gas strut alternatives for Defender rear doors available from quality aftermarket manufactures. I had thought of going that route myself but after calculating the length of the gas strut (which are readily available online) it was apparent that I would have to start hacking about with the rear door trim.
Please don’t say such things: The rear door I have came from Ashtree in the UK (sadly no longer trading at time of writing)
I am waiting for my 5 doors ordered and paid for my Series IIa.
Thank you for this superb guide. I am in a similar position and wasn’t sure exactly what bits I needed to source and how to put it all together. This has been fantastic. Cheers.


I’ll believe it when I see it!
LikeLike
Please don’t say such things: The rear door I have came from Ashtree in the UK (sadly no longer trading at time of writing)
I am waiting for my 5 doors ordered and paid for my Series IIa.
LikeLike
Hi Walter. Thanks for the information. I’ve just checked the URL again and it’s back up. I’ll revise my post accordingly.
LikeLike
Thank you very much, I was already afraid that I would have to drive around without doors (like a jeep) (smile)
Many greetings
Walter
LikeLike
Love this website.
LikeLike
Thank you for this superb guide. I am in a similar position and wasn’t sure exactly what bits I needed to source and how to put it all together. This has been fantastic. Cheers.
LikeLike
Awesome, I’m happy it helped and thanks for posting a comment! Cheers.
LikeLike
Great tutorial, Very clear and it will definitely help getting mine on as well
LikeLike