
Part Number: 267828 (Sealing ring for intermediate pin)
On the 5th Jan the Strassenverkehrsamt had the pleasure of our company for the routine safety inspection. No big issues but there was a small weap of oil from the engine sump. Had I arrived with more than 3 minutes to spare for the appointment I’d have wiped it off. But such is life.
Not being particularly keen on removing the sump and the length of time it takes to order a new gasket, I decided to entrust the job to the professionals. They also tuned the engine whilst they had it.
However, when I went back for the follow up appointment (to verify the oil leak on the sump was resolved), I arrived to discover there was oil haemorrhaging from around the intermediate gear pin. Even with enough time to give the gearbox a good wipe down there was no way they’d miss that… and they didn’t. Had they not picked it up, I’d have needed to address it urgently as it was pretty bad.
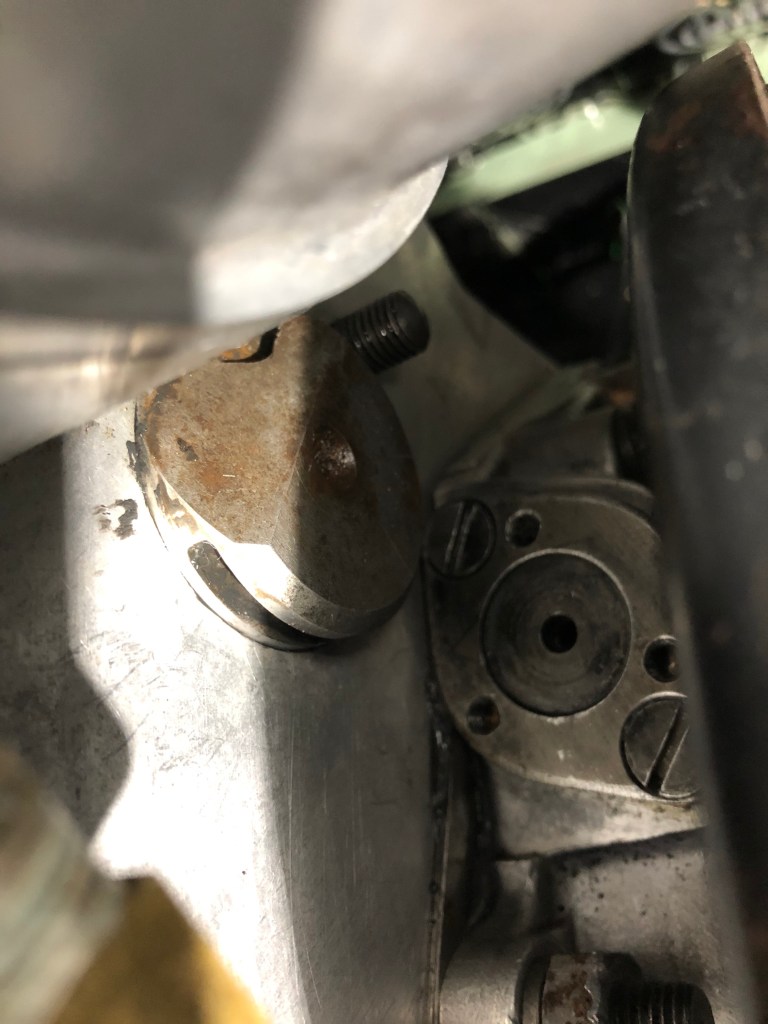
The intermediate gear pin (the face of which can be seen on the back of the transfer case) is so named as it holds the intermediate gear in the transfer case. The pin is above the level of the oil so any oil finding its way up to and past the seal is thrown there by the the rotation of the gears.

Although the workshop manual provides no guidance for replacement of this O-ring, it can easily be done but with this note of caution:
To access the O-ring, the pin needs to be partially withdrawn from the casing (you probably won’t need the special workshop tool for this (Part Number: 605862)). Take care not to extract the pin more than the thickness of the casing as you risk the thrust washer (and if fitted, the shim) dropping off the inner end of the shaft into the transfer box. The casing is shaped in such a way to retain both the shim and the thrust washer but nevertheless, a simple operation could become a more involved job if something dropped off the end of the pin!
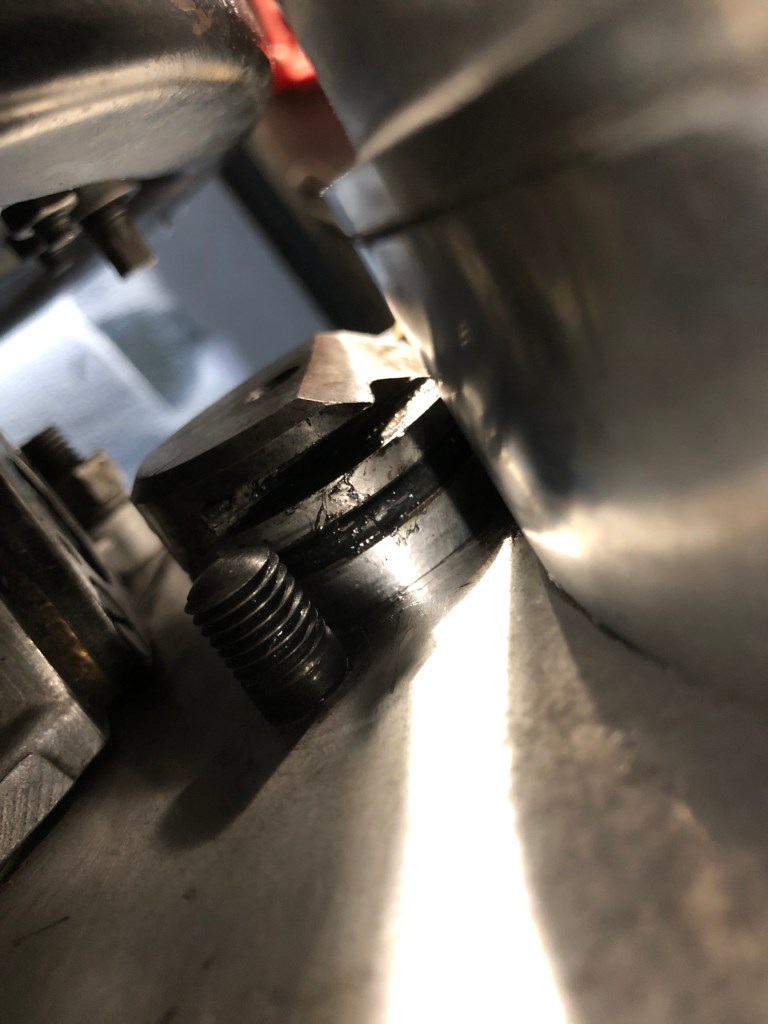
After seeking some advice from the good folks on the Series 2 Forum, the consensus was not to withdraw the pin more than 1 inch. This would be more than sufficient to access the O-ring. As it turned out, the chamfered edge of the pin fouled the casing of the overdrive so I was well inside the 1 inch rule anyway.
You’ll have to excuse the lighting in the following photos, it’s not the easiest place to take a decent shot.
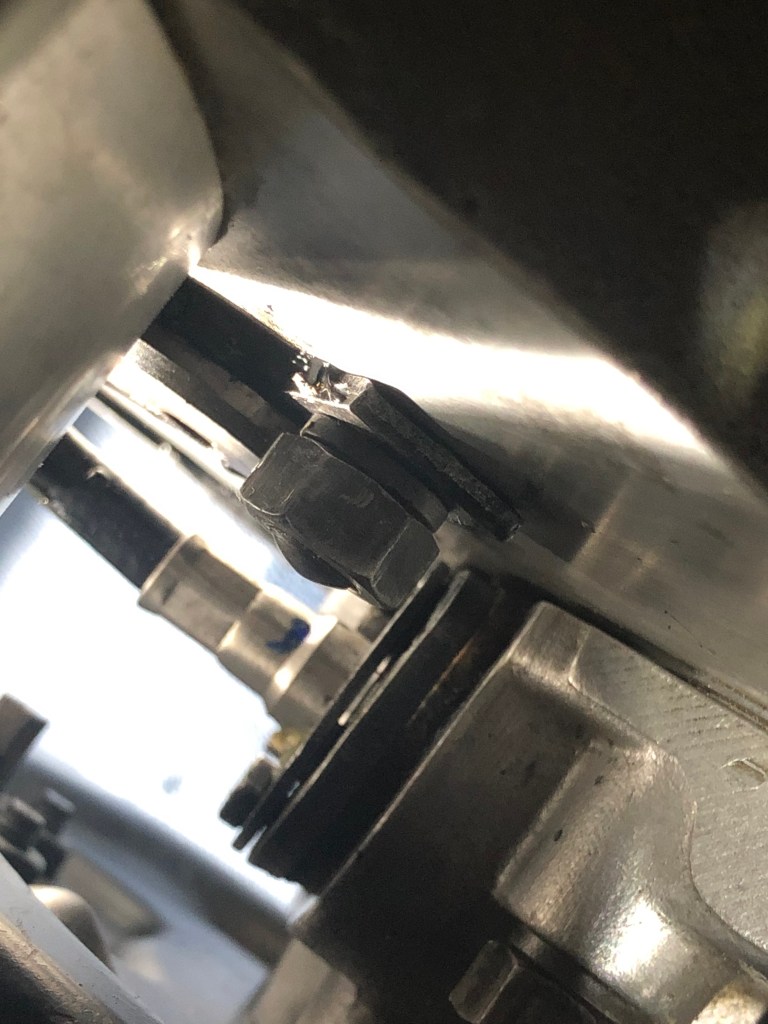
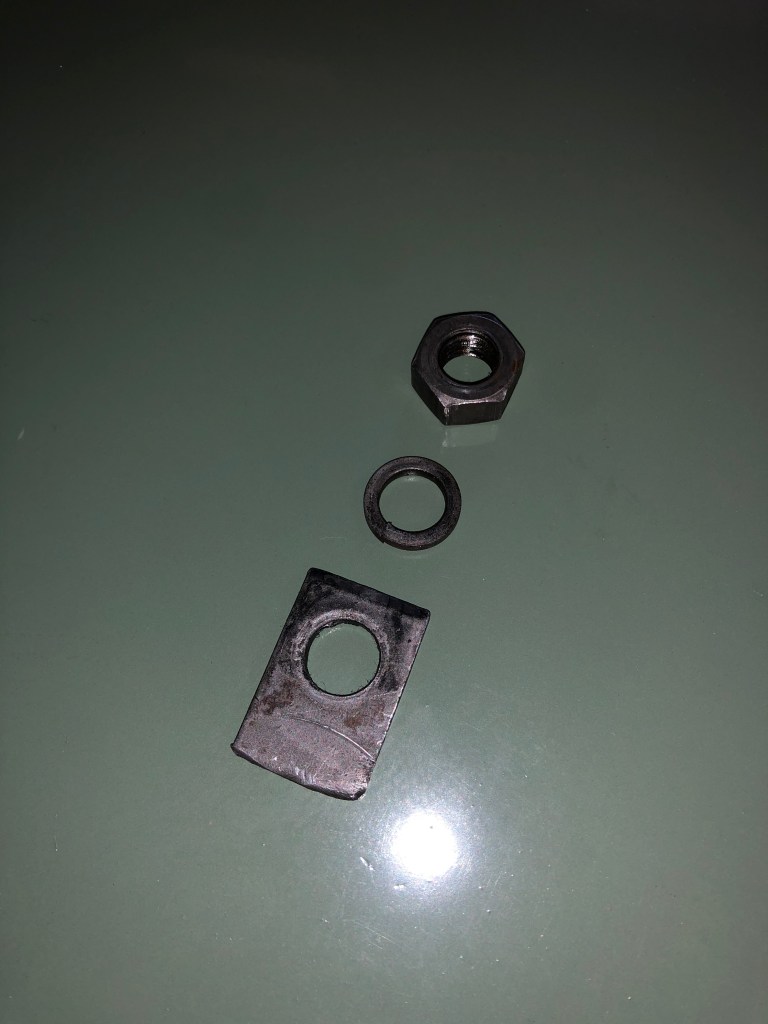
First thing to do is remove the retaining nut and tab. The tab sits in one of the two slots in the pin to stop it working its way out.

As it’s quite a busy part of the gearbox, the upper part of the dip stick and speedo cable were removed.
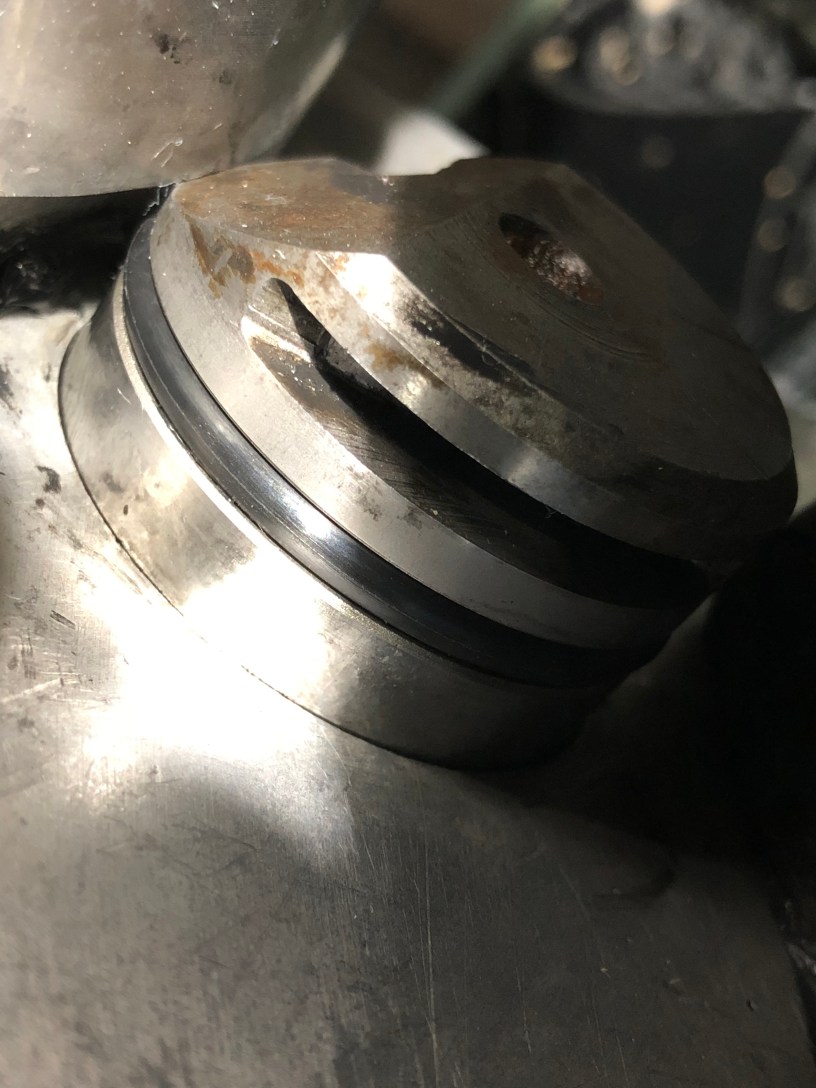
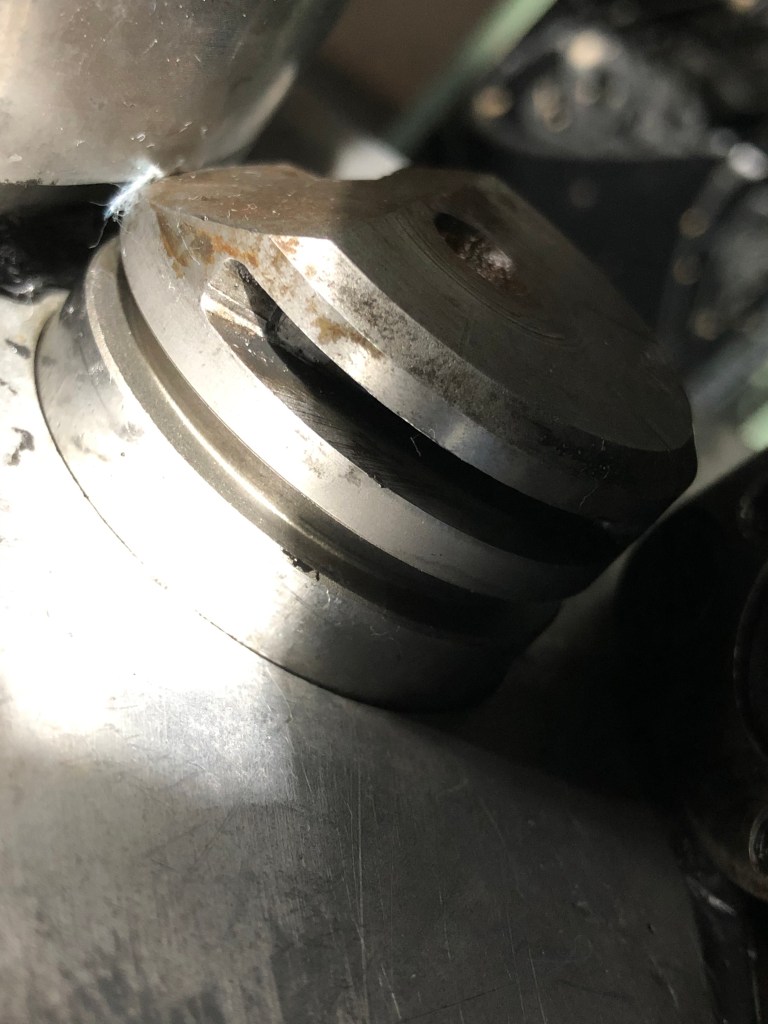
There we have it… the end of the intermediate pin
With a suitable lever in one of the machined slots (the outer ones), the pin is withdrawn enough to see the O-ring.

With a suitably pointy implement, the old seal is carefully removed from the groove…

… and using a piece of cleaning wipe, the groove is thoroughly cleaned.
With the old O-ring removed, the cleaned groove is ready for the replacement

New O-ring in place

The pin is pushed home and the O-ring is once again providing a seal

Retaining tab and speedo cable refitted
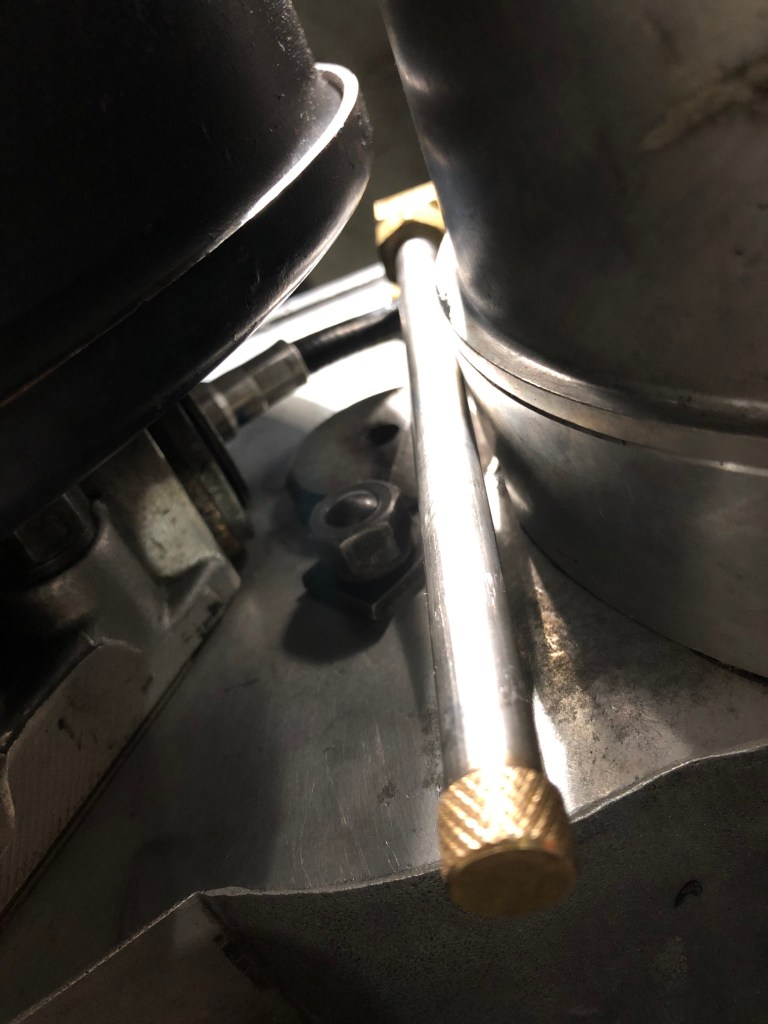
Last but not least, the upper part of the dipstick is refitted
This was a quick operation for which I had a spare O-ring to hand and it has worked perfectly. The revisit to the Strassenverkehrsamt went fine and they ticked the gear oil leak off the list. LGL is good to go until the next appointment in… well, who knows how long.
However… typically for a Land Rover, LGL has developed a fault when idling. Sounds like the pilot jet in the carb may be blocked. That’ll be the next operation.

Great stuff with very clear photos. You must spend a lot of time on your back looking up…
I am not doing the procedure you set out but from the photos I am unsure if the speedo cable is fitted forward or aft of the roverdrive dipstick. One seems to be somewhat in the way of the other and it seems to me that whichever route it takes, one will be possibly rubbing against the other.
LikeLike
Hi Andy,
Over the past days I’ve been procrastinating^W reading your site in my off time and it really is great. I love your meticulous work on your Landy. It’s inspiring for working on my 109! Incredible the MOT man wouldn’t allow parabolic springs, but he was spot on about the LED heresy of course. 🙂 Your short, humorous writing is a joy to read.
Cheers, well done & keep it up!
Ferenc
LikeLike