Time to check out the refurbished bulkhead…. The original had rotted out in the normal places…. foot wells and the feet of the door pillars. To be honest, the original condition was not all that bad, given it was 50 years old. If I think of the a previously owned Series 3, (a newer vehicle by some 20 years) the bulkhead on LGL was in pretty good fettle.
New footwells and door pillars have been let in and the whole thing hot dipped galvanised. Some small amount of distortion has occurred in the thinner sheet panels but I’m not worried about that…. so long as the whole thing is square.
Passenger side footwell.Drivers side footwellThese bulkheads were built to accommodate left or right hand drive so I will have to refit the panels over the brake, clutch and steering column openings on the passenger side.
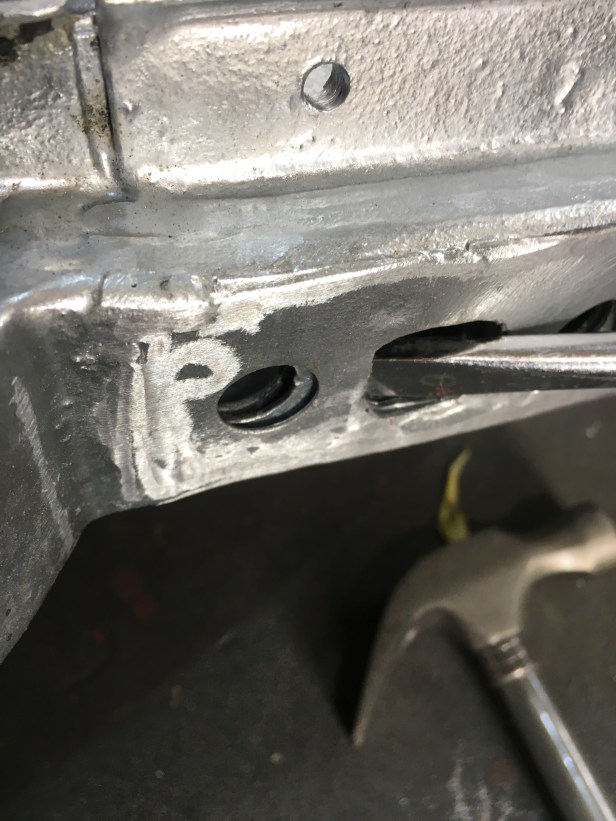
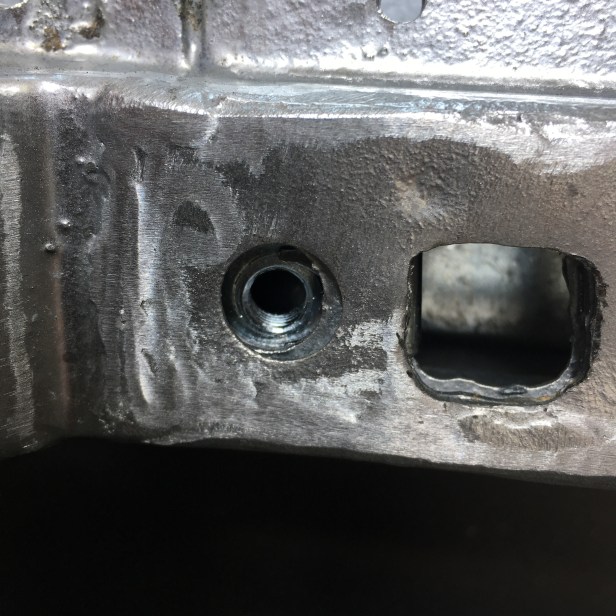
Theres a few things to do before preparation for painting, one of which is to drill out the holes that have been filled with zinc and to fit the captive nuts that will hold the doors on. I don’t want to do this after everything is painted to avoid damage to anything whilst fitting these into the door pillars.
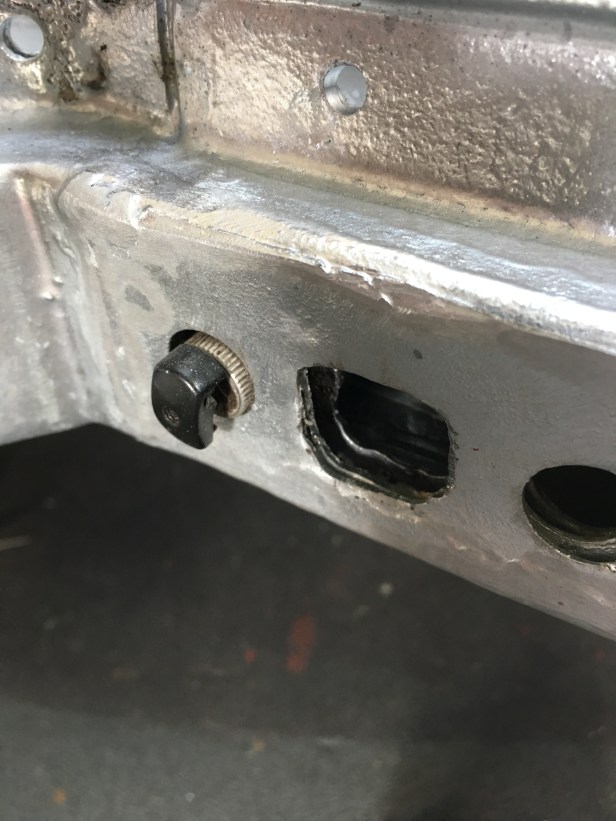
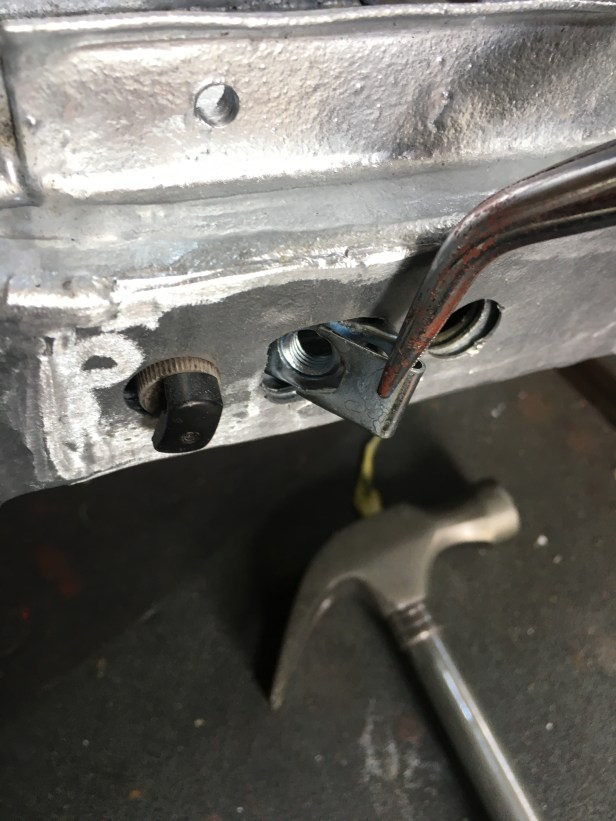
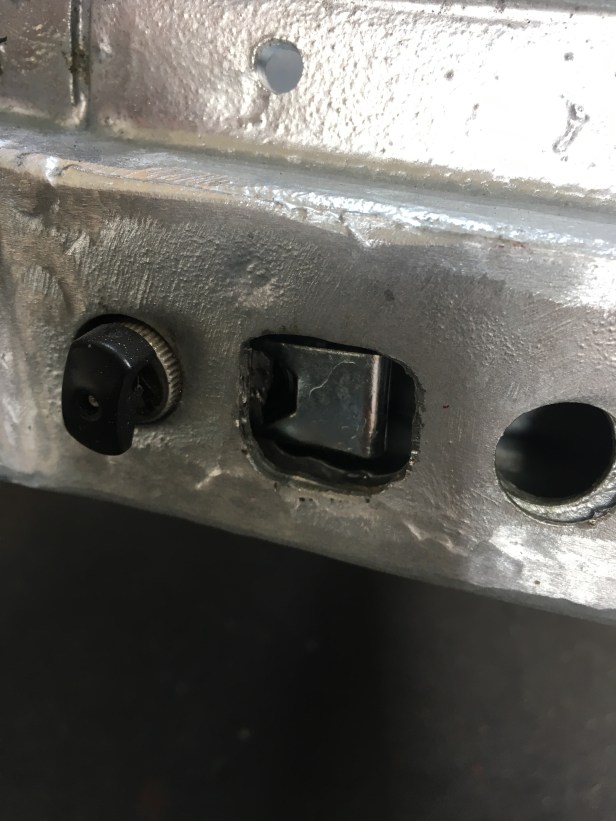
UNF captive nut… hooks inside the door pillarFirst thing to do is to spread open the plates fitted on the inside of the new door pillars…. The plates are full of zinc but opening them up by driving a thick screw driver into the gap breaks the zinc out and allows easier fitment of the captive nutTo prevent loosing the captive nut in the door pillar, I popped a strong magnet into the opening where the nut will reside.With the help of some pin nose pliers, the captive bolt goes inHeld in place by the magnet …… and pushed homeTo keep the new captive nuts in place, some new stainless bolts are used to pull everything in tight. The ugly great hole in the middle is covered by the hinge 🙂
Before even thinking about painting prep, its important to make sure the bulkhead fits. I had to file out a lot of zinc from the bottom of the door pillars where the main retaining bolts fit but its easily done. I also drilled out some of the the small holes that had filled with zinc. Better to do this now than when its painted.
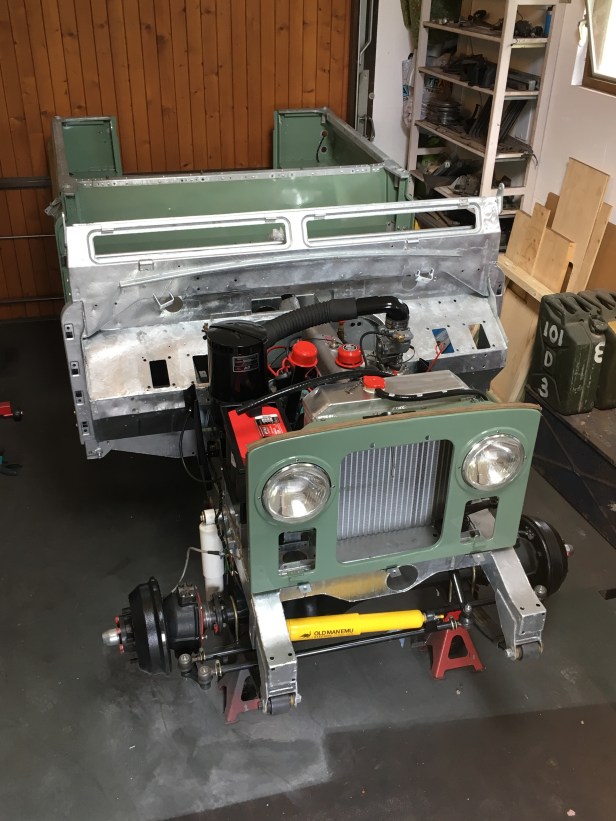
Ready for a shiny new bulkheadThrough bolt installed in the outrigger… on both sides.This is quite a heavy piece of the bodywork and as I was on my own I first slid the drivers side door pillar base over the new bolt… using this as a fulcrum I rotated the whole thing into place.Pleased to say, the fixing points line up perfectly.