After separating the frame from the skin and painting then, they had to be riveted back together. Once that was done, other small tasks were to fit the hinges, new rubber wheel buffers, spare wheel mount (more riveting) and put the thing back onto the Land Rover.
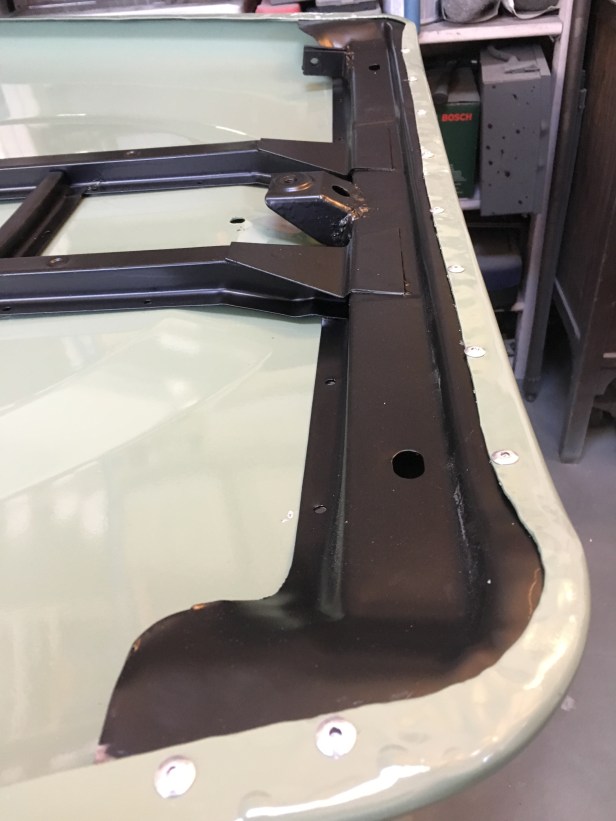
Skin and frame. The matt black has come up well. Now to fit them back together again
Whilst taking every care not to damage the paint, I managed to get the frame back “inside” the skin of the bonnet without too much damage…. Unfortunately, I will need to repaint the front nose of the bonnet though.
The front lip has blind pop rivets and with the aid of the air powered riveter, it was easy enough.
It’s hammer time… The remaining 48 rivets holding the bonnet skin to the frame are dome head rivets and best flattened with an air hammer. A snap punch (not pictured) holds the domed end whilst the shaft is hammered flat. This gives a very good mechanical fitting.
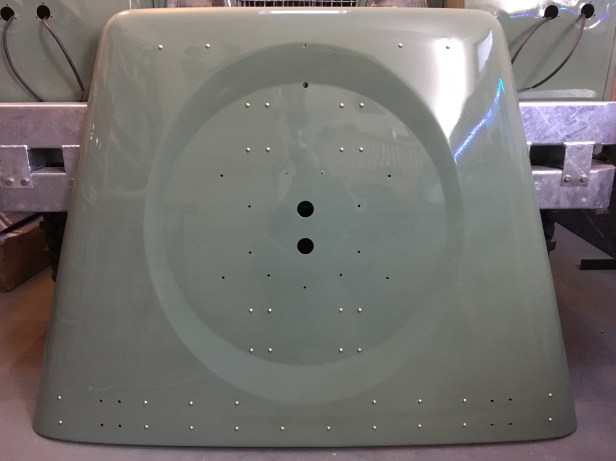
39 rivets fitted, 9 more to go to fit the wheel mount.
Then on with the hinges. Just incase anyone takes them off again they know I was here 🙂
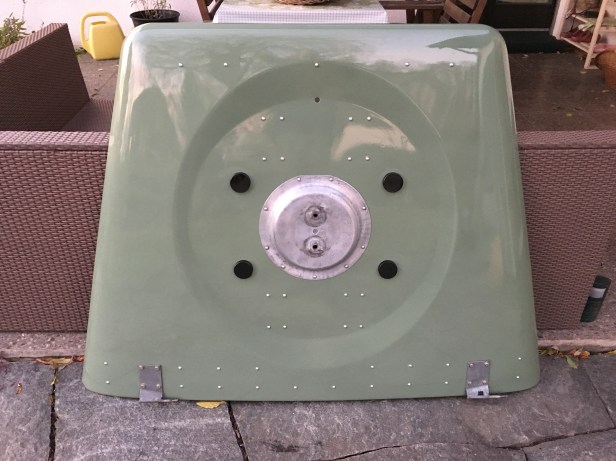
Original hinge bracket fitted with new stainless hardware
A good buff up with a scotchpad and the galvanised wheel mount comes up… err… better. Its hid under a spare wheel much of the time
I really like the contrast of the green and the rivet heads. The vacant hole at the top of the wheel well is for drainage
The underside looks great too
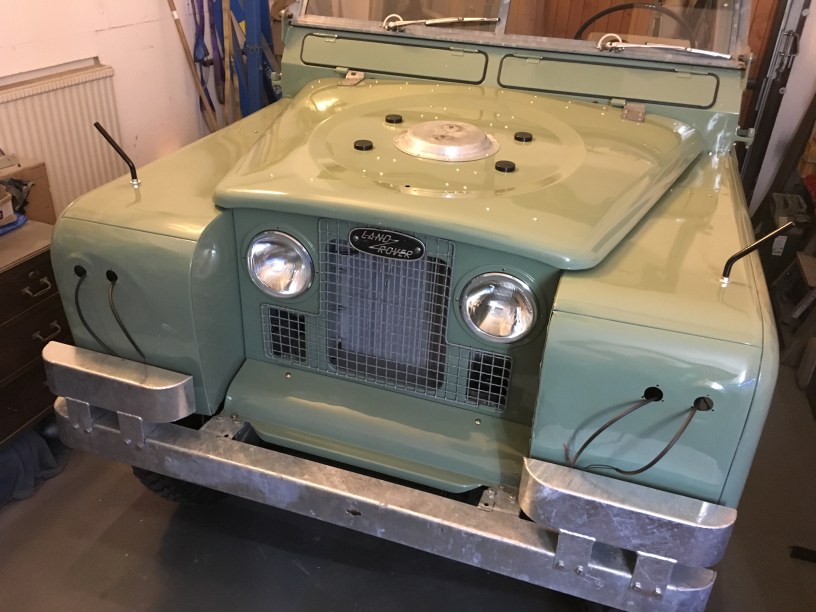
Bonnet fitted 🙂
The bonnet stay, (to hold it up when open) and the closure pin (to hold it shut when closed) will need to be fitted and I think, I’ll pop the spare wheel on there to see how it looks. With the exception of the lights, that’s the front end finished.
Like your new bonnet steel frame, is it made to order or can you buy this item, mine is badly corroded and holed, out skin is fine..
Would appreciate some feedback.
Nick Murphy restoring a series 3.
Hi Nick,
Thanks for the message.
The steel frame is actually integral to the bonnet and not available as a replacement part on its own.
I drilled out all the rivets, removed it from the skin (which needs a bit of careful bending at the rear corners), stripped it, repainted it and refitted with the correct rivets.
If yours is heavily corroded it might be worth sourcing a complete new bonnet unless you can or know someone who is a competent welder.
If you are in the UK, you’re sure to find one for sale on a forum.
There are 2 part numbers for S3 bonnets: Delux (with the recess in the middle) = MRC2440. Standard = MRC2479.
Not sure if these come with or without the spare wheel mounts…. but easy enough to exchange between one and the other.
PA Blanchards actually have a Genuine Delux model for sale.
Good luck with the project.
Regards.
Andi.
I have just bought a series IIa and will redo the frame under the bonnet as you did. So my questions to you:
1) Did you remove the old rivets by drilling 5 mm?
2) Is it diffucult to master the replacement with solid rivets?
3) Was it original aluminium rivets? and who was the supplier?
4) Did you use solid rivets on other parts of yor Landy?
Hi Peter, thanks for leaving a comment.
1) I think I used a 4mm drill to drill out the old rivets, a 5mm might risk enlarging the original hole of it wanders. Good idea to centre punch the heads of all the rivets first so the bit stays on track.
2) no, it’s not hard to get used to the air hammer. I was surprised how easy it was actually. You’ll be fine. I did a few practice ones on a piece of scrap.
3) I got the correct sized replacement rivets from “Bits for Landys” in the UK. They sell every shape and size rivet for just about everything. Decent overseas shipping price too, although this might have changed. They also sell the snap punch which your need to secure the end of the river you’re not hammering on… an essential tool.
4) Yes, I reinstalled solid rivets in the locations where they were used. Aside from the bonnet, they’re mostly on the rear tub capping.
Hope this helps and good luck with the project.
Kind regards
Andi
this looks great. Is there a difference between the series 3 and the series 2 recessed hoods? I am getting a series 2, but it doesn’t come with the hood mount, and this is something I like. But I don’t want to switch it out and destroy the value thank you
Hi Levi, thanks for leaving a message. To the best of my knowledge, the bonnets (hoods) are all interchangeable between S3 and S2 with or without the wheel well for the spare BUT…. the hinges are specific to each model as the mounting parts on the bulkhead are different. There was also some cross over between the Series 2 and 2a… the latter sometimes had the Series 3 bulkhead style mount. Bonnet Hinges Part Numbers:
S2: LH 336476 / RH 336474
S3: LH 346854 / RH 346853
The bonnet I have is referred to as the “deluxe” model. The more basic model, with no recess but still with a spare mount is called a “razor edge” as it has no curved edges.
If you do a lot of off roading, a spare wheel in the bonnet can be a hinderance to seeing what’s going on in particularly tight spaces… but they do look cool 🙂
Hope this helps.


Like your new bonnet steel frame, is it made to order or can you buy this item, mine is badly corroded and holed, out skin is fine..
Would appreciate some feedback.
Nick Murphy restoring a series 3.
LikeLike
Hi Nick,
Thanks for the message.
The steel frame is actually integral to the bonnet and not available as a replacement part on its own.
I drilled out all the rivets, removed it from the skin (which needs a bit of careful bending at the rear corners), stripped it, repainted it and refitted with the correct rivets.
If yours is heavily corroded it might be worth sourcing a complete new bonnet unless you can or know someone who is a competent welder.
If you are in the UK, you’re sure to find one for sale on a forum.
There are 2 part numbers for S3 bonnets: Delux (with the recess in the middle) = MRC2440. Standard = MRC2479.
Not sure if these come with or without the spare wheel mounts…. but easy enough to exchange between one and the other.
PA Blanchards actually have a Genuine Delux model for sale.
Good luck with the project.
Regards.
Andi.
LikeLike
Hello,
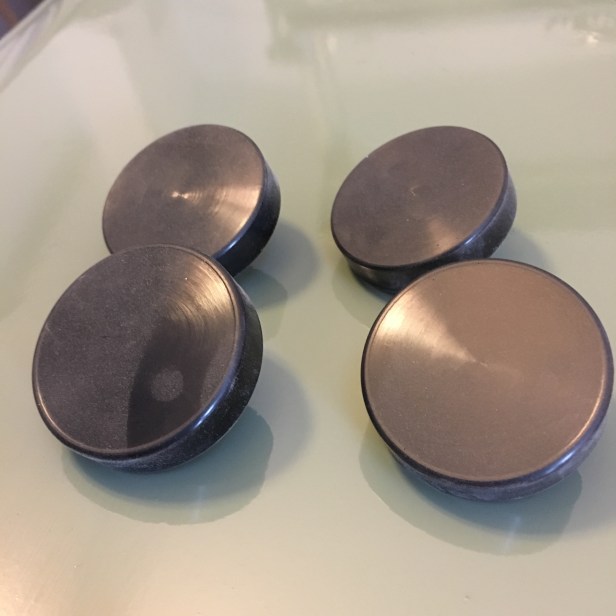
Nice write up. The Spare Wheel Buffers, does the rubber of tyre or the metal of the rim rest on these?
Cheers
LikeLike
Hi Fisk, thanks for leaving a message. The tyre should sit on the rubber buffer not the wheel rim.
Hope this helps.
All the best.
LikeLike
Hi Andi,
I have just bought a series IIa and will redo the frame under the bonnet as you did. So my questions to you:
1) Did you remove the old rivets by drilling 5 mm?
2) Is it diffucult to master the replacement with solid rivets?
3) Was it original aluminium rivets? and who was the supplier?
4) Did you use solid rivets on other parts of yor Landy?
Best regards from Denmark,
Peter
LikeLike
Hi Peter, thanks for leaving a comment.
1) I think I used a 4mm drill to drill out the old rivets, a 5mm might risk enlarging the original hole of it wanders. Good idea to centre punch the heads of all the rivets first so the bit stays on track.
2) no, it’s not hard to get used to the air hammer. I was surprised how easy it was actually. You’ll be fine. I did a few practice ones on a piece of scrap.
3) I got the correct sized replacement rivets from “Bits for Landys” in the UK. They sell every shape and size rivet for just about everything. Decent overseas shipping price too, although this might have changed. They also sell the snap punch which your need to secure the end of the river you’re not hammering on… an essential tool.
4) Yes, I reinstalled solid rivets in the locations where they were used. Aside from the bonnet, they’re mostly on the rear tub capping.
Hope this helps and good luck with the project.
Kind regards
Andi
LikeLike
this looks great.
Is there a difference between the series 3 and the series 2 recessed hoods?
I am getting a series 2, but it doesn’t come with the hood mount, and this is something I like. But I don’t want to switch it out and destroy the value
thank you
LikeLike
Hi Levi, thanks for leaving a message. To the best of my knowledge, the bonnets (hoods) are all interchangeable between S3 and S2 with or without the wheel well for the spare BUT…. the hinges are specific to each model as the mounting parts on the bulkhead are different. There was also some cross over between the Series 2 and 2a… the latter sometimes had the Series 3 bulkhead style mount.
Bonnet Hinges Part Numbers:
S2: LH 336476 / RH 336474
S3: LH 346854 / RH 346853
The bonnet I have is referred to as the “deluxe” model. The more basic model, with no recess but still with a spare mount is called a “razor edge” as it has no curved edges.
If you do a lot of off roading, a spare wheel in the bonnet can be a hinderance to seeing what’s going on in particularly tight spaces… but they do look cool 🙂
Hope this helps.
LikeLike