Having failed to satisfy the whim of the test centre regarding the fitment of parabolic springs, a brand new bespoke set of multi leaf springs were ordered from Jones Springs in Wednesbury, Birmingham England. (my father was born in Wednesbury).
Having had cheaper replacement springs on Gracie, I knew I didn’t want to go back down the Britpart route. They’re utter garbage, one of the leafs actually snapped just driving around on smooth, pothole free Swiss roads!
It took a little while longer than anticipated for Jones to make and ship them but you get what you pay for. They have an excellent reputation in the Land Rover community and came highly recommended by the Series 2 club. Made from British steel too. Not many folks can boast that.
Having cribbed up on how one replaces a spring on a fully rebuilt vehicle, it seemed straight forward enough…. but then, it always does…
The new springs will give a harder ride but will lower the ride height considerably maybe allowing me to get the vehicle in the garage. Oh… and they may help me pass the MFK, which is the reason I’m doing it.
Front End
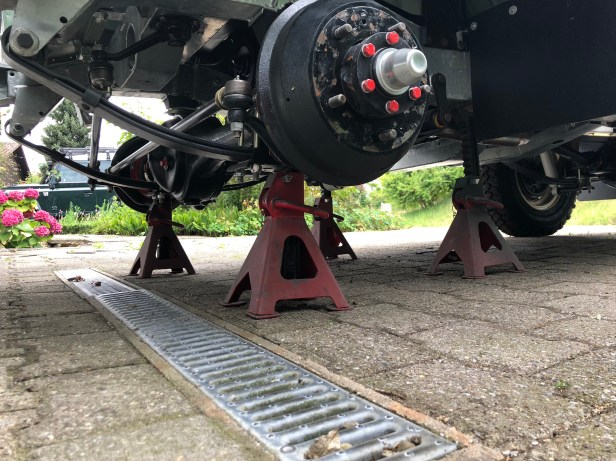
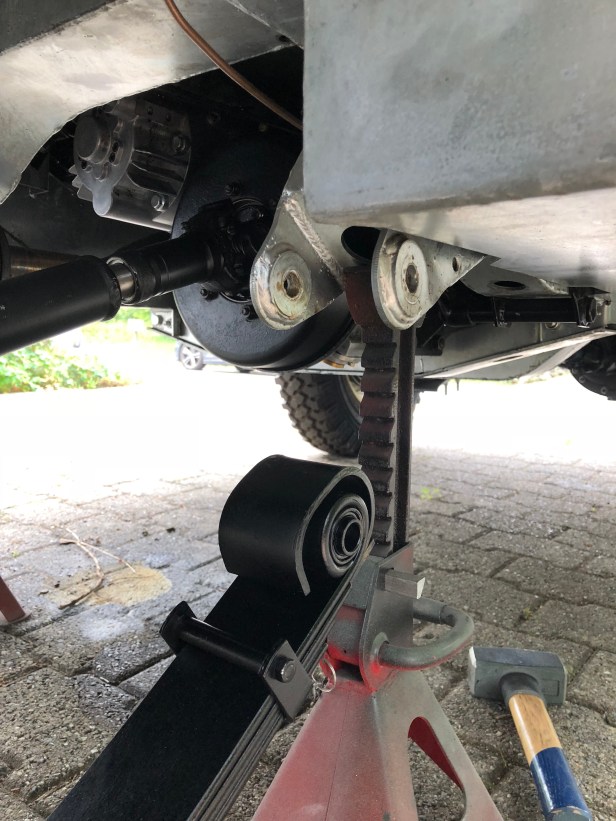
First thing to do is jack the vehicle up, remove the wheels and support the chassis on some axle stands. Then support the axle just above its lowest point of travel. With a little bit of tension in the spring this will help “push” the spring off the axle.
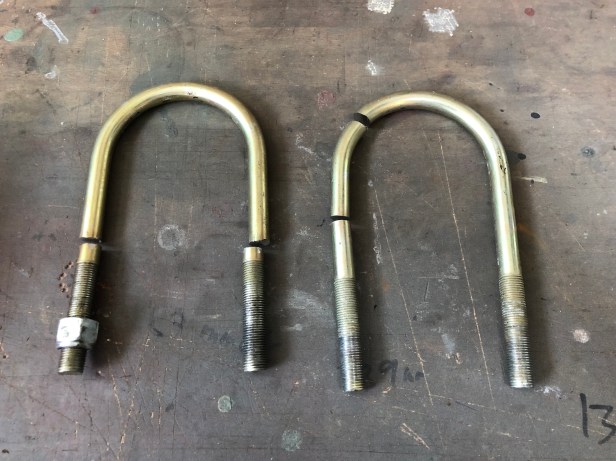
When compared, the front springs look different because the drivers side spring (taller one) has more camber (188mm Vs 171mm). This allows for the weight of the driver. Lets face it most vehicles have but one occupant. It also explains why older Land Rovers seem to list to starboard.
Everything jacked up and secured on 4 number 3 ton axle stands. Never work under a vehicle supported by just a jack.
Out with the, err…. new
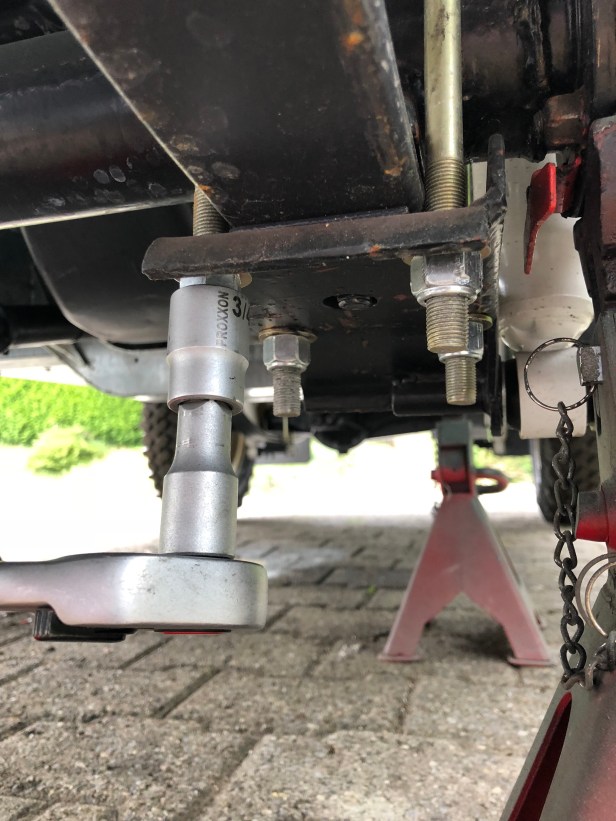
Firstly remove the nyloc nuts on the u-bolts. The manufacture of these specified a torque rating so I was not able to put any copper grease on the threads. This led to some problems even after a few months.
I mentioned cold welding (or galling) in threads previously. This occurred on the first u-bolt nuts I tried to remove. The angle grinder made short work of things though. The other 3 nuts came off OK but as the threaded shanks are a very tight fit in the bottom plate, I cut the second one off too.
A lot easier than hammering away all evening
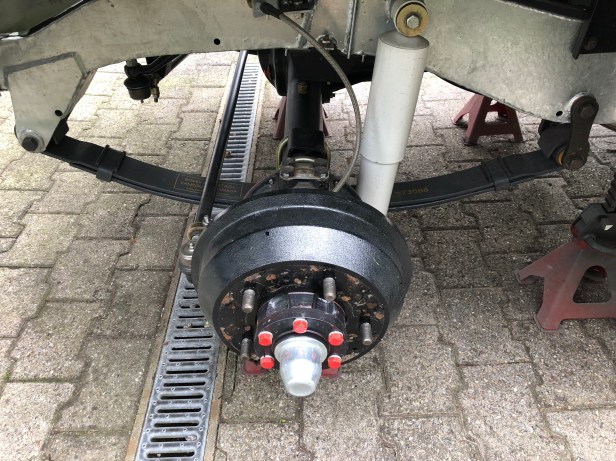
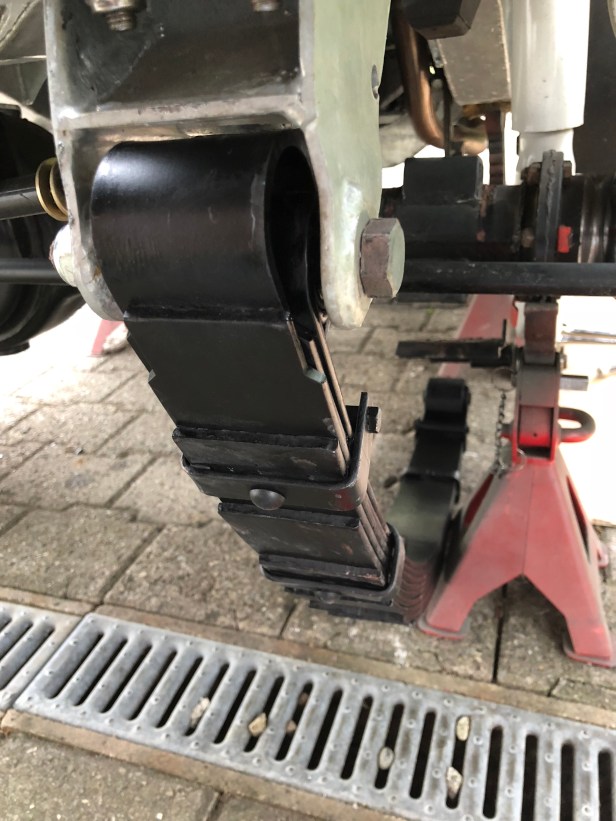
With the u-bolts off and the bottom plate out of the way (still attached to the shock absorber) the spring pops off the bottom of the axle.
Next, remove the pin from the rearward shackle. Top pin is also loosened.
Remove the lower pin and the spring drops away
Only one pin on the front.
Drivers side spring removed
Parabolic vs multi leaf. A parabolic spring has a lot less inter-leaf friction, allows more articulation and a softer ride. A brand new multi leaf spring will also give a good ride but…
…with hindsight the need for better articulation isn’t really a concern in a country with little or no off road driving. (Canadian 109” fitted with Heytsee Parabolic Springs)
New spring slotting into place. Front eye fitted first.
Rear eye is fixed to the shackle and then its’onto the bottom plate. This is jacked into position and pushes the stud in the middle of the spring home into the underside of the axle
Next, the new u-bolts are dropped in place. These are slightly narrower in diameter than the Rocky Mountain ones.
Ready for nuts and washers
Job done. Drivers side spring installed. The pins on the front and rear shackles are not fully tightened yet. The vehicle needs to be sat on the ground to settle the bushes. It I tighten them now with the axle at (almost) full articulation, the rubber in the bushes would be under continuous stress once the vehicle was back on the deck.
Onto the passenger side. Due to the proximity of the differential on that side of the axle, one of the u-bolts, is longed and a special shape
Replacing the passengers side spring is the same process as the drivers side… except you lie on the other side of your body. No angle grinder required this time 🙂
As the multi leaf springs have no torque setting for the u-bolts, all threads had a generous helping of copper grease
Front end done
Rear End
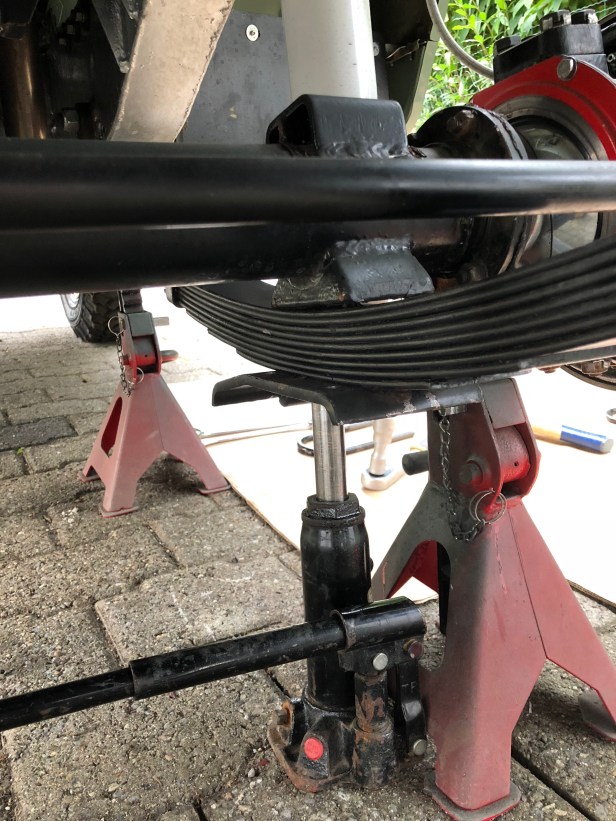
Much the same procedure as the front only with much heavier springs!
Wheels off, chassis and axle supported on axle stands
Hope theses come off a little easier…
YES 🙂
For comparison… 2 leaves vs 11 leaves.
New spring offered up to the forward chassis mount
Plenty of copper grease on the securing bolt
Ae mentioned above, things aren’t tightened down fully yet
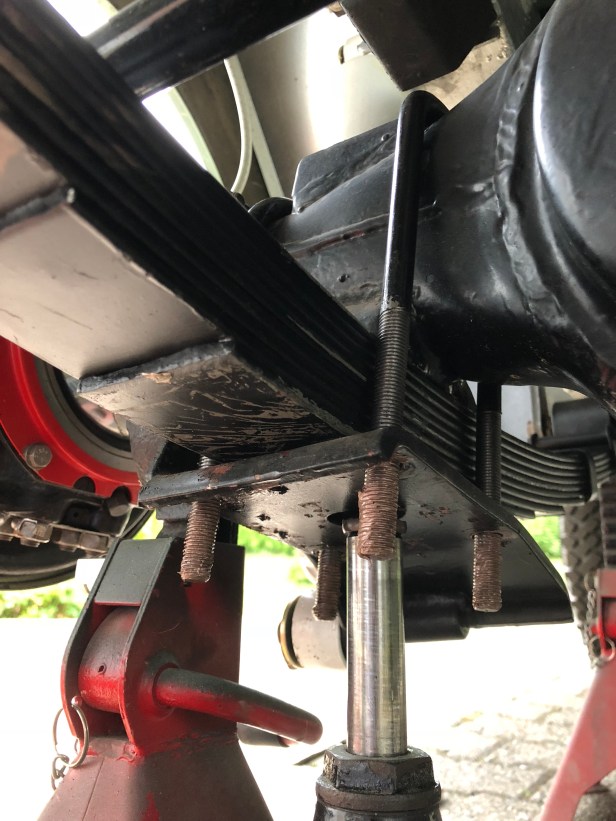
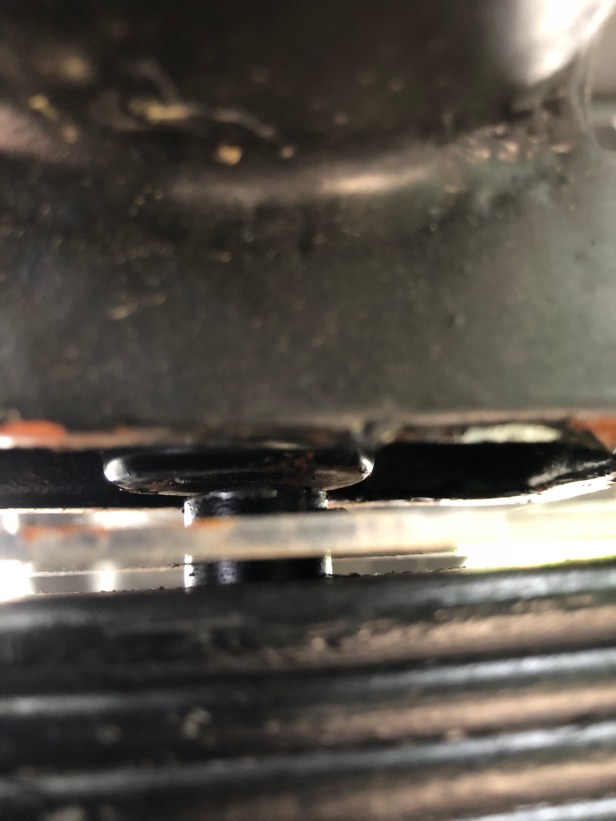
But there’s a problem with this one…
The stud on the spring should pass through the brake pip retainer bracket and engage with the opening on the underside of the axle… It sort of does but leaves a large gap!
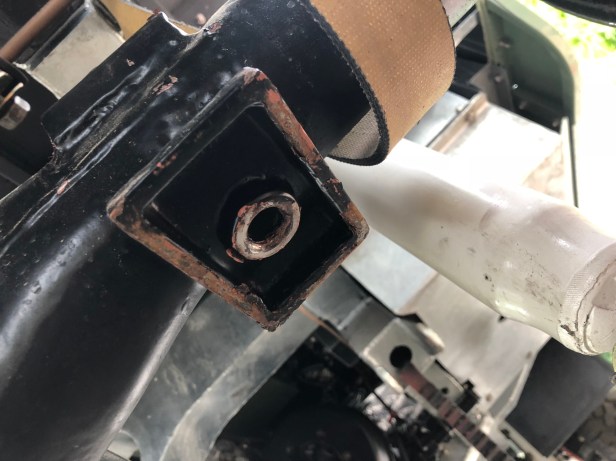
After a lot of trying the shift the axle fore and aft to get it to fit, I bit the bullet and uninstalled the spring in order to take some measurements. The stud starts to engage but doesn’t go “home”.
The should stud fit in the round opening on the underside of the axle
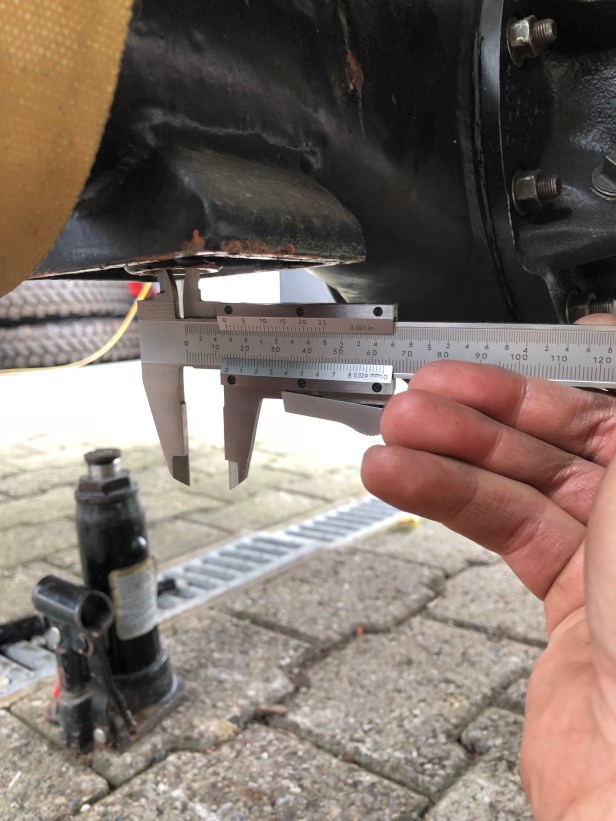
Using the vernier gauge, the internal diameter go the opening = 14mm (give or take)…
…but the outside diameter of the stud = 16mm… angle grinder time again
2 minutes later… that should do it.
Perfect fit. The same operation was repeated on the other side.
I should say, that design changes over the years on Land Rover parts does, on occasion, lead to problems like this. Easily fixed though.
There we go. First rear spring installed
Now onto the second rear spring…
Once the wheels were back on, and the Landy was sat on the ground again, I gave the whole vehicle a good rocking then went round and tightened all of the fixings fully.
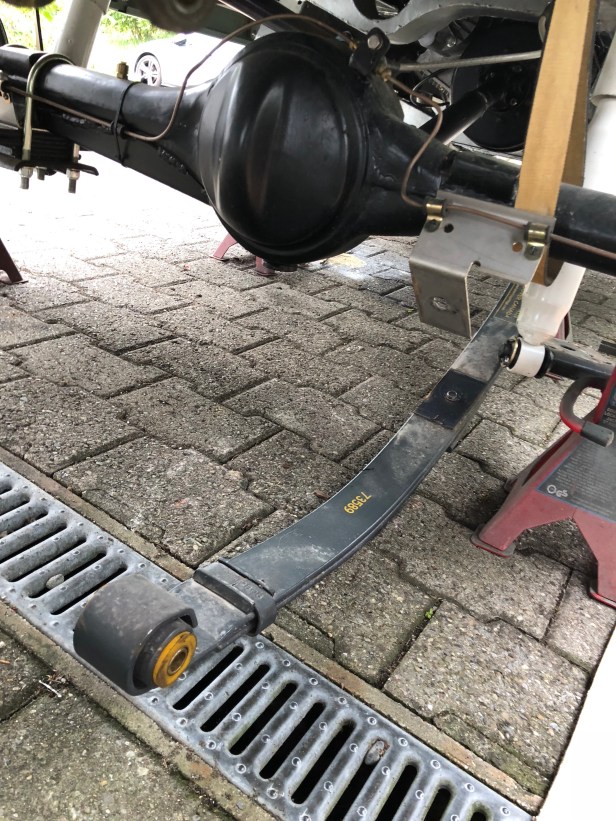
But will it fit?
As you see in the picture above the ride height is greatly reduced… by a massive 100mm at the rear..
Maybe it’ll fit in the garage? On first attempt the handle of the door hit the middle of the roof just behind the front seats. I modified the handle (some cutting, drilling and tapping in a new spring pin) so it sat closer to the door. This bought me another 20mm
I checked the tyre pressure… not sure why they were all at 40 psi! but with the correct pressure (25 psi) I gained another 10mm at the rear.
Try again…
Bum…. this time the bar across the bottom of the door fouls one of the rear air vent domes. I can’t cut the bar out as it’s integral to the door opening squarely.
I cant change the door so how do I gain the required 5mm to clear the bar on the garage door.
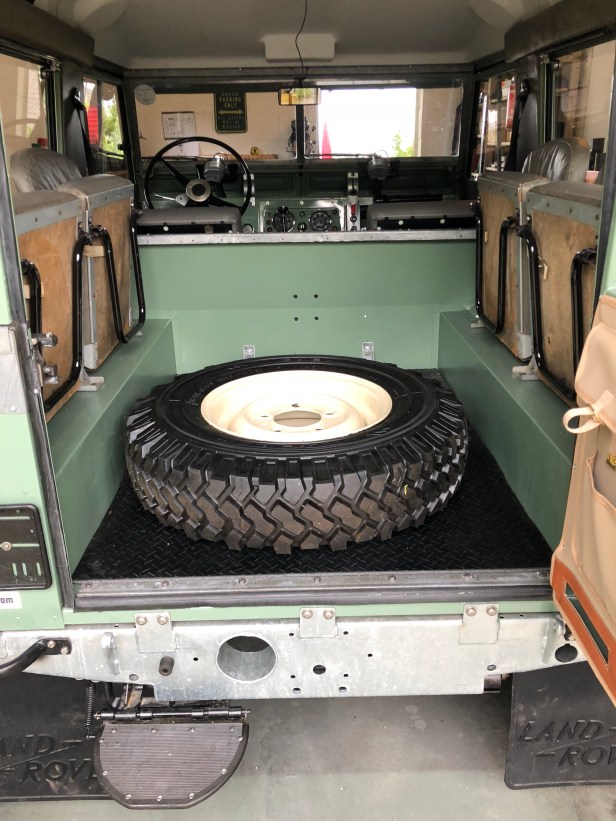
I need something heavy to put in the back. Not something filthy dirty and easy to shift in and out of the vehicle…
The second spare wheel weights about 40kg, maybe this additional load over the rear axle will allow me to drive LGL into the garage?
YES IT DOES. A good days work 🙂
The springs will sag in due course and the additional weight won’t be required in the rear. The second spare wheel will be homed on the bonnet sooner or later but I’m please my 52 year old Landy is in the dry again.
Nice Job. What torque settings did you tighten them all to? Also did you have to put any weight on the vehicle to bring the gap down between the axle and chassis before tighting up?
Thanks for the kind words. There’s no torque settings listed in the workshop manual. Advice from the Series 2 club was to tighten the u-bolt nuts to 50 lb/ft. New u-bolts will stretch after a few months and you may feel the vehicle drifts to one side or the other when you come off the gas…this is symptomatic of loose u-bolts. Re-torque as required.
For the preload on the springs, drop the vehicle back to the ground with all the shackle bolts loose and give it a good shake to align the bushes… then tighten all the shackle bolts.. again, there’s not torque setting in the workshop manual.
Hope this helps.


Wow, what an incredible job! Glad it fits inside 😀
LikeLike
Yep, cold galling _ galls me
LikeLike
Love to visit the web pages for its lucrative look and well organized information.
LikeLike
That’s very kind of you to say so. Regards, Andi.
LikeLike
Oliver
LikeLike
Lovely work. Such a joy to see a clean Land Rover amidst the current vogue for patina etc.
LikeLike
Nice Job. What torque settings did you tighten them all to? Also did you have to put any weight on the vehicle to bring the gap down between the axle and chassis before tighting up?
LikeLike
Thanks for the kind words. There’s no torque settings listed in the workshop manual. Advice from the Series 2 club was to tighten the u-bolt nuts to 50 lb/ft. New u-bolts will stretch after a few months and you may feel the vehicle drifts to one side or the other when you come off the gas…this is symptomatic of loose u-bolts. Re-torque as required.
For the preload on the springs, drop the vehicle back to the ground with all the shackle bolts loose and give it a good shake to align the bushes… then tighten all the shackle bolts.. again, there’s not torque setting in the workshop manual.
Hope this helps.
LikeLike