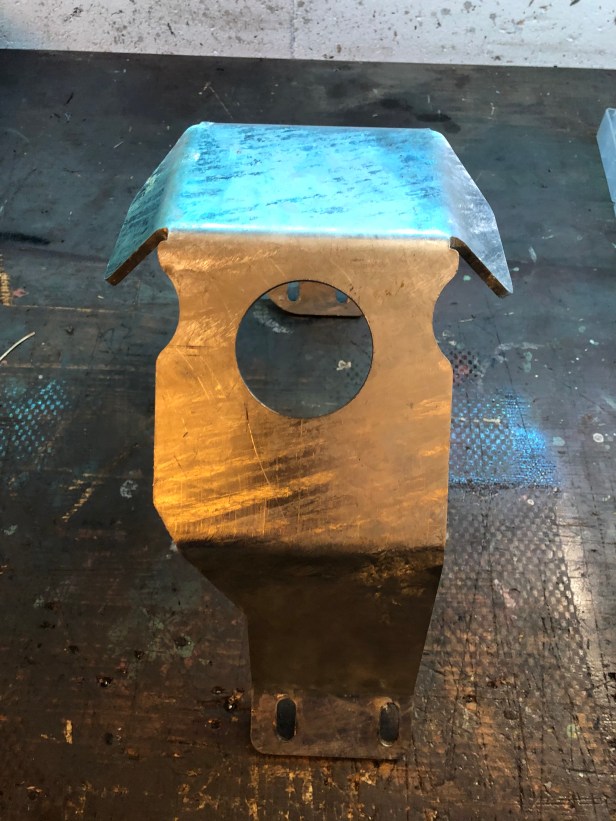
When I rebuilt the axles (front & rear) I purchased a pair of wrap around galvanised differential guards. Contrary to the image on the vendors website, they arrived with the hole for the differential drain plug missing. In order to fit, this meant they would have to be bent around the drain plug boss on the bottom of the differential. It also meant that every time I want to change the oil in the axle, I’d have to remove the differential guard.

The vendor said lots of customers didn’t want them with the hole and were happy refund my money if I send them back. Given the cost of shipping a big heavy box of metal from Switzerland, I decided to keep them.

For the best part of 3 years, they’ve sat in a box in the garage and as I really need the space, I had to make a decision. Throw them in the metal recycling bin or cut the hole and fit them? Seems a waste to throw them out, even if they get recycled… So I’ll drill the missing hole and fit them…

ouVr4l1GTum1FgSACZGcfw
The offending articles


T4hxGEhaSTSXBX%vwnfePg
A 60mm hole needs to be cut roughly in the location of the role of insulation tape


dTfcXaVqS66e%uXlE2CBvQ
With the front of the vehicle on the ramps, the front axle is easily accessed. The drain boss can be seen on the bottom of the differential housing. 


Both differentials are identical but the guards are a slight different shape. One is totally flat on the underside, the other, has an additional angle. I assume the flat one is for the front axle but by some queer quirk of fate, I ended up starting to fit the rear guard to the front axle. No matter, they’re interchangeable with or without the holes.

N20Ym1lJTRq1jlbcivkSPg
Correctly labelled from diff guard and sundry fixings. The rather primitive chunk of stainless steel is the solution to having no hole and takes up the 10mm gap caused as the guard pushes against the drain plug boss.  (There is an additional plate already fitted to the top of the axle)
+beufyHPTYWpGVGMMnz1rg
Guard and slab of stainless steel loosely in place.


0IWFBeY8TGWCHM++qqQ
I roughly eyeballed the centre of the drain boss… (err, twice…)
hXULQxdtQ4uJa5rrO8M83w
… and using the depth gauge on the callipers, was able to measure the distance from the edge of the guard to the edge of the drain plug boss.


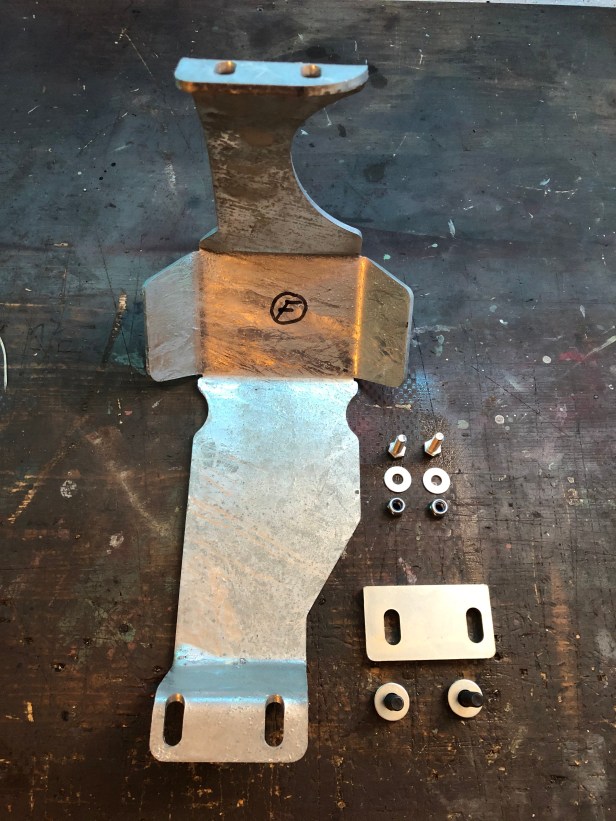
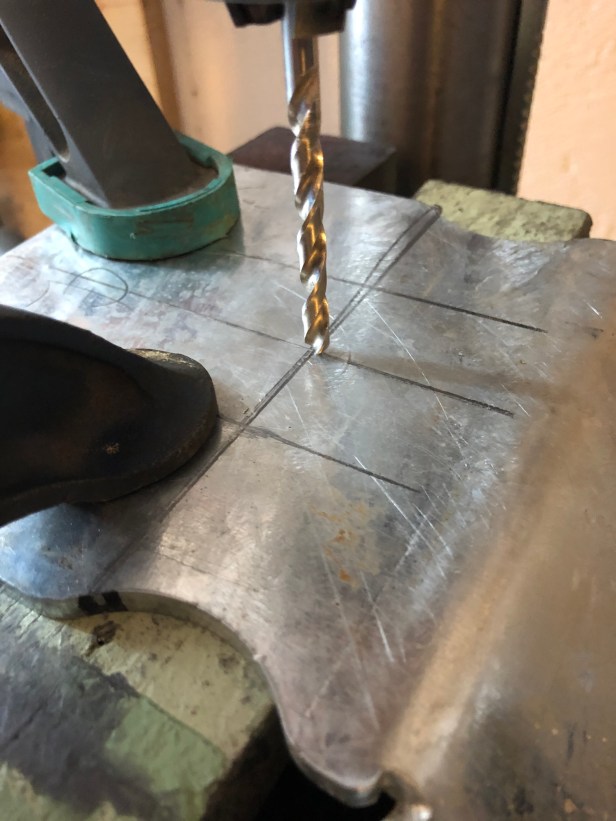
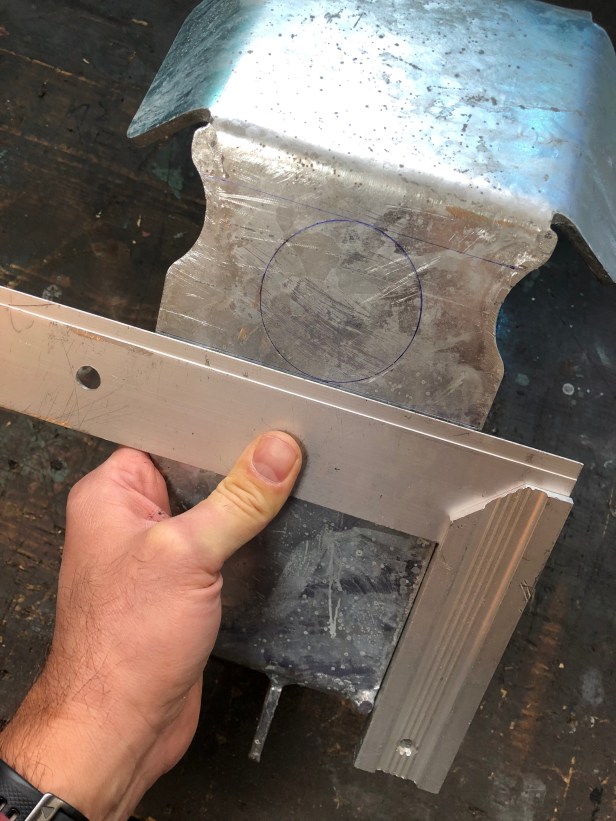
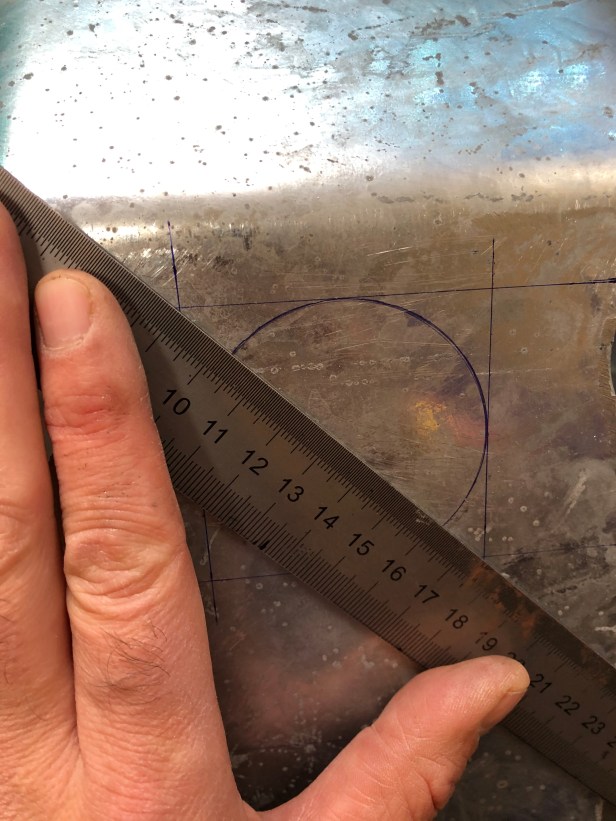
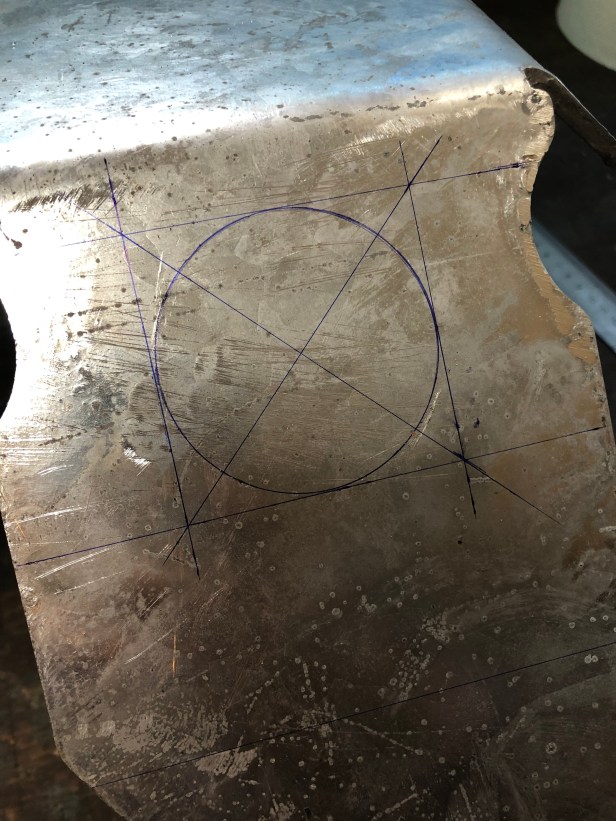
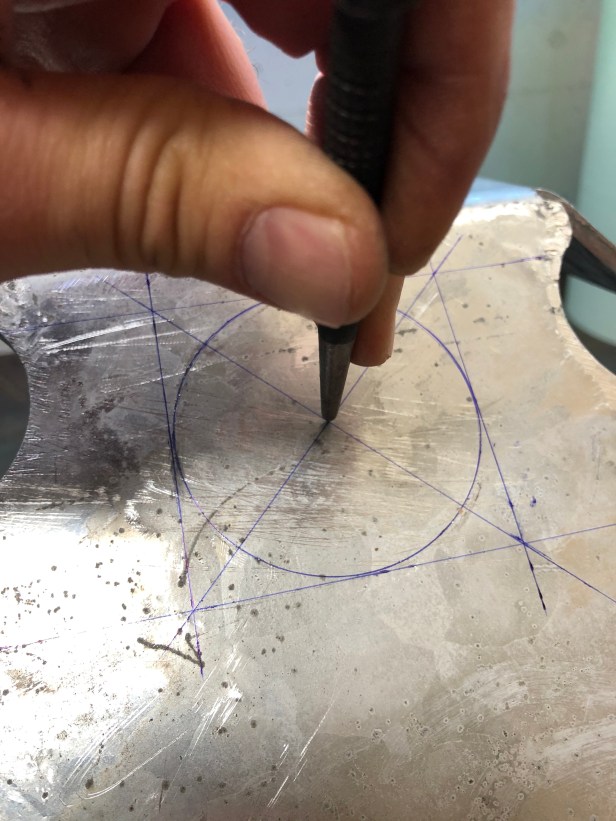
Knowing where the edge of the plate is in relation to the boss, I can set out where the centre of the hole needs be drilled. (The larger hole will need to be drilled from the other side.)

qlHM6EsbQgiRNdnyl+HeMQ
With some cribbing under the guard to support the rather odd shape, I drill a 5mm pilot hole


XaqFW9O6ReCQ1DyTSuVSGQ
I now know the centre of the larger 60mm hole


qgVkvyRvTg6zCD9axn7jCA
New 60mm HSS (High Speed Steel) hole cutter


bMR1bCDDRaGSDIAFTbfWSA
Flipping it over and clamping it to the bed of the pillar drill, drilling can commence. 


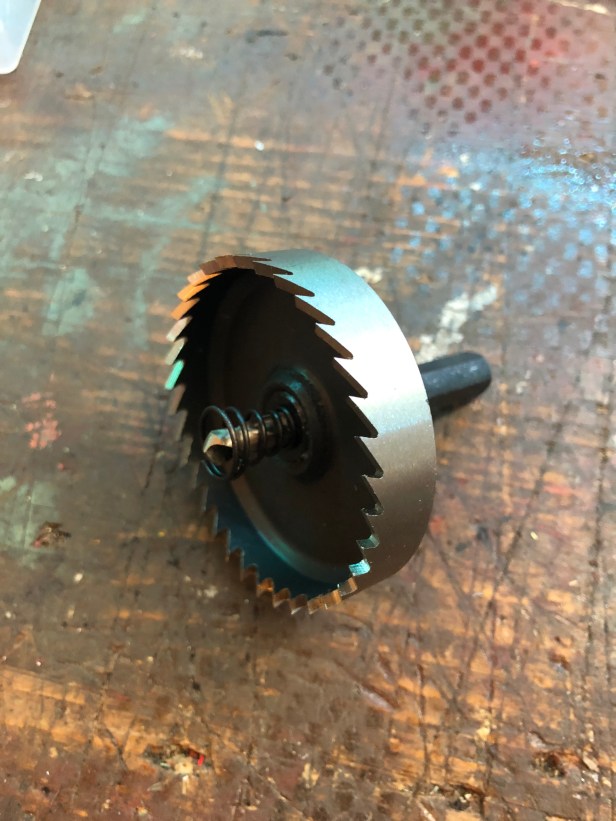
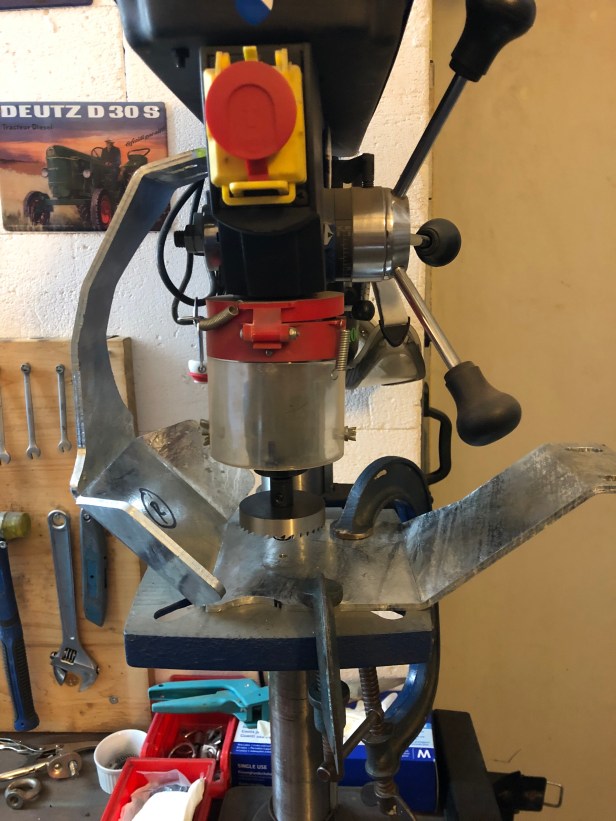
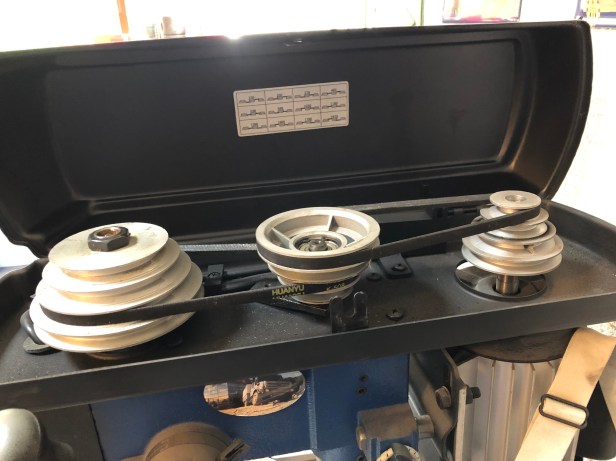
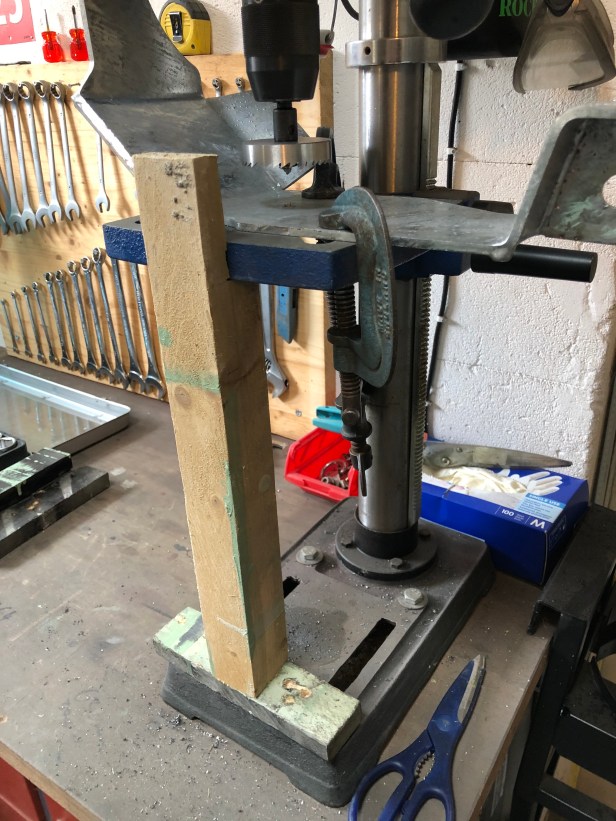
As with many drilling applications, bits come with a recommended rotation speed. This 60mm hole cutter comes with a recommended RPM of 300. So first I have to check to see if I’m in the right gear.

tDfG3uycRym70d5duzOxKQ
On the top of the pillar drill, is the gearbox. The combination I normally use gives an RPM of 250 (rightly or wrongly). Some adjustment is required.


Q2zMVDg4Tr+NcMoihYjM7g
The closest configuration of belts I have is 320 RPM. Close enough. 


6+sHTkkRTSqukVuNQ78Npw
…sometime later and with some cutting lube, (to stop the squealing) the new hole is drilled


01NE83H9Q2qpN8AqcGAhEg
Ta da 🙂


Next step is to transfer the hole on this guard to the other guard…

Fe1RSK1tS3WjUxqWIVI5UQ
First of all, the guards are clamped back to back and the circle scribed out


GTU6M4yYT52h9LCNRlKr6g
Using a set square I can start describing the edges of the circle…


Ek%y+9SJRwGixXqXAviYjg
…and with some confidence, find the centre.


LLbLThbjSnmWu5nsGIpiHg
Isn’t geometry brilliant 🙂


65N+ZdWLSYOmqXDITFA4Jw
The centre is marked with a punch so the drill bit doesn’t wander off target.


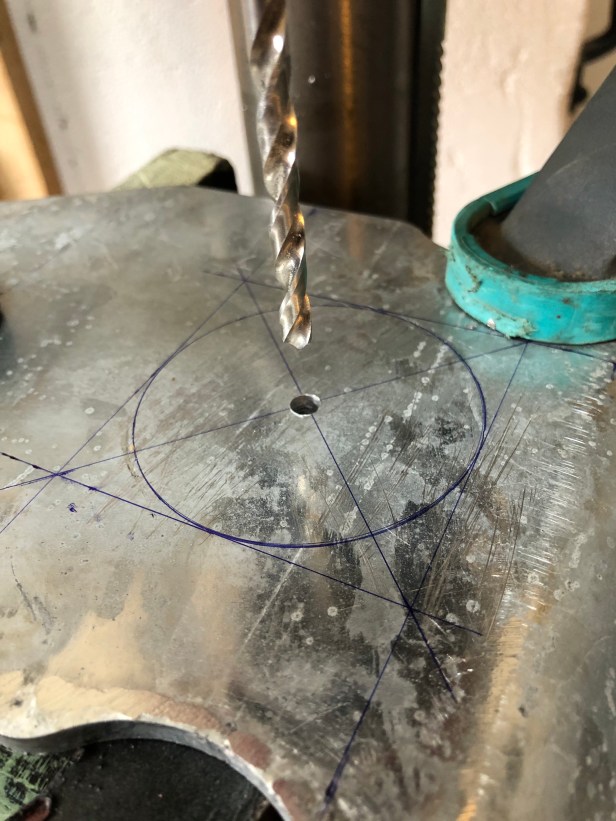
To drill the larger hole, the same process is followed again…
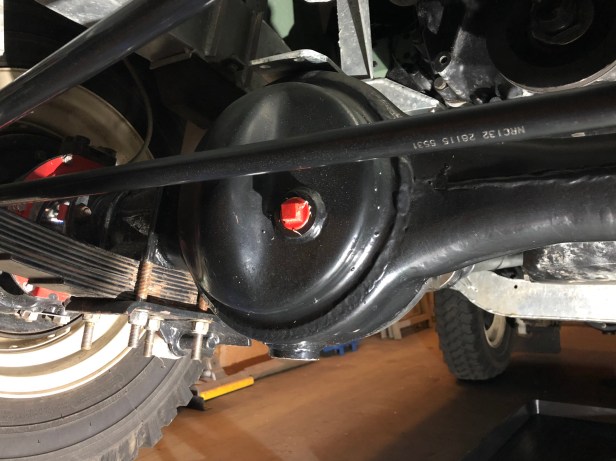
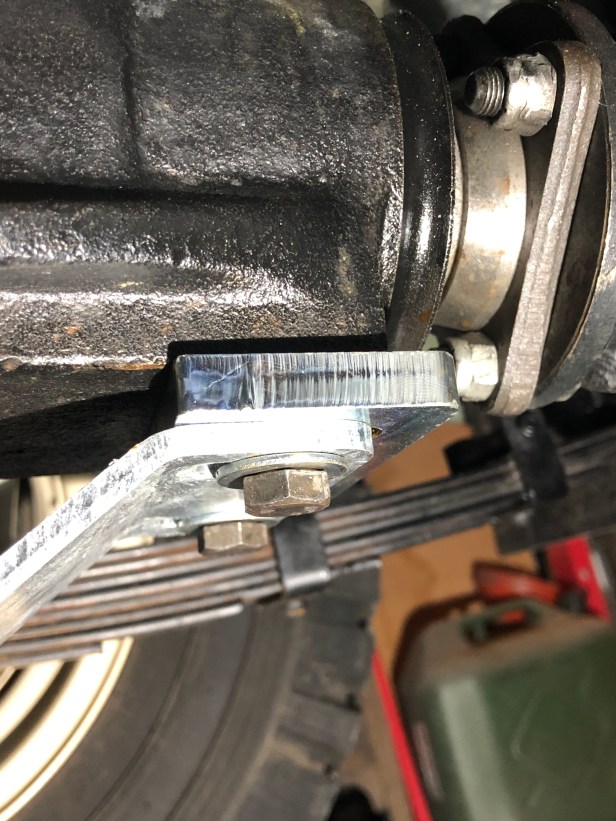
66DcxRNdQZiSJu5kVv5HaQ
Pilot hole drilled


QPzOIs0kQcu2La5A+5VYYw
This time, I braced the front of the platform. It’s not the best pillar drill in the world and the platform tends to bend a little if you apply a lot of force.


WjqQksm9TqaeF16SsmKkgg
Et voila ! Both diff guards with new holes.


Time to fit one…

BimQ1QTi7Jw8MfgrEUQ
Easily fitted with 4 bolts. I exchanged the cheap mild steel fixings for the top section with some stainless steel UNF items. 


S6z8rLjZQ6eaBYNVbFZLsA
Differential drain boss sits (almost) in the centre of the new hole.


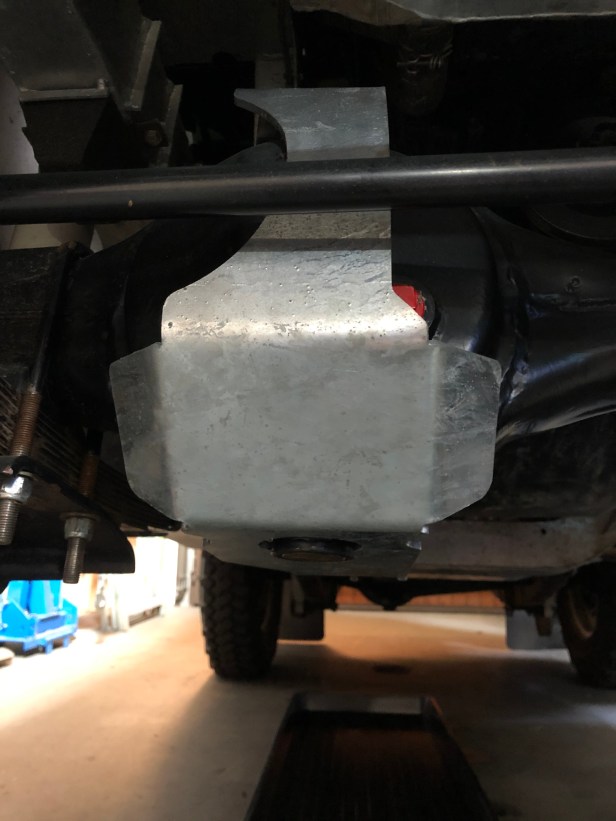
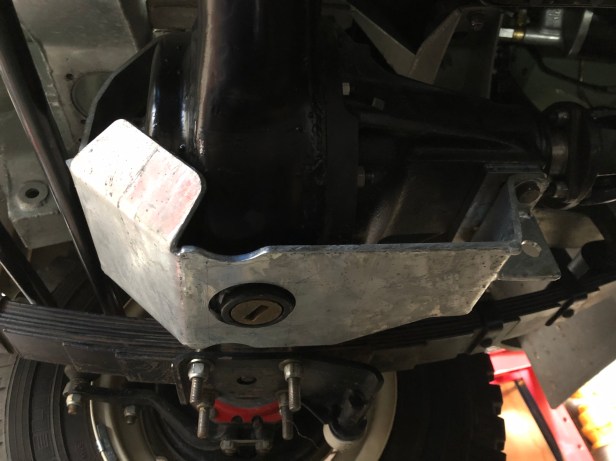
So far, I’ve only fitted the guard to the front axle. The rear axle has the brake line running over the top of the differential (in the normal fashion).

This means the top bracket of the guard would press on the top of the brake line. Even with some rubber brake line grommets on the pipe, I wasn’t comfortable.

It’s absolutely essential that brake lines do not fret against anything. They will eventually rub through, and a hole on a single line break system leads to… no brakes !!!


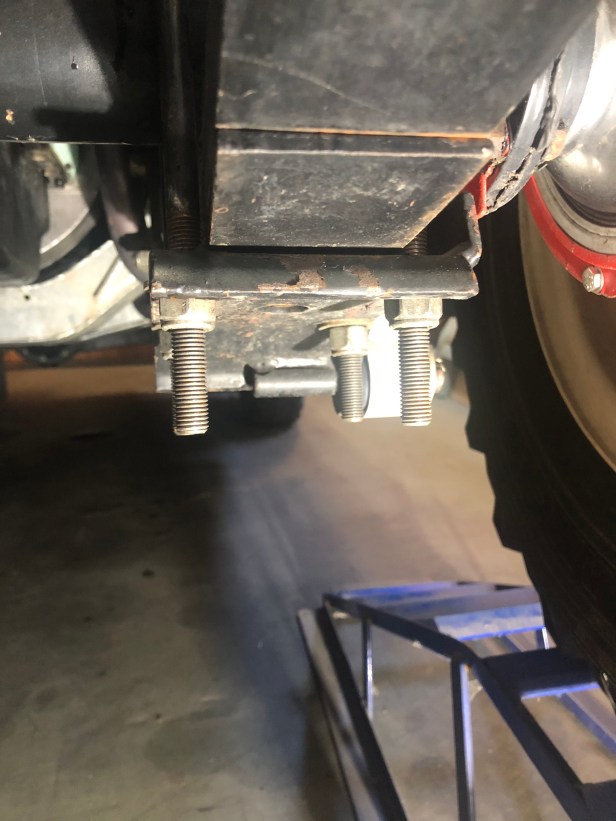
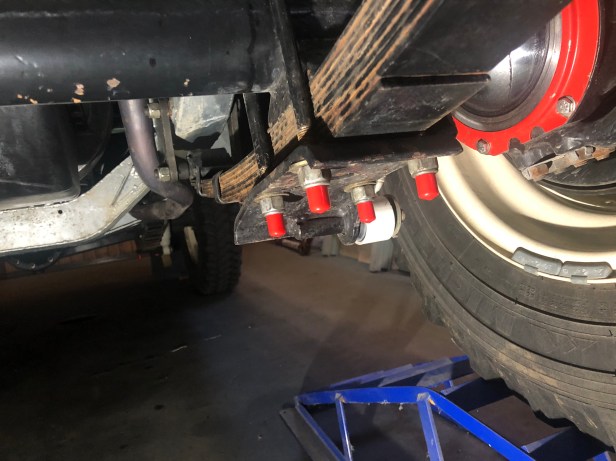
Whilst I was under the front of the vehicle, I took the opportunity to buzz off the redundant lengths of u-bolt thread and tidied the ends up with some smart rubber caps 🙂

d1QgdTflSLS64amx0mV87A
The excessive length of these has been bugging me for a long time. As the front of the vehicle was on the ramps, I quickly  marked them up and cut them off with the angle grinder…


b+eI5IjgQCC5T0jHzBXzNg
…finishing the job with some red thread caps. The process was repeated on the rear axle to match.